

Categories
Categories group your items on the POS and online, for example Manicure, Pedicure and Retail. An item is sold at a location only if its category is sold there.
Find a category
Section titled “Find a category”In the sidebar, under Menu management, open Menu groups and click Categories.
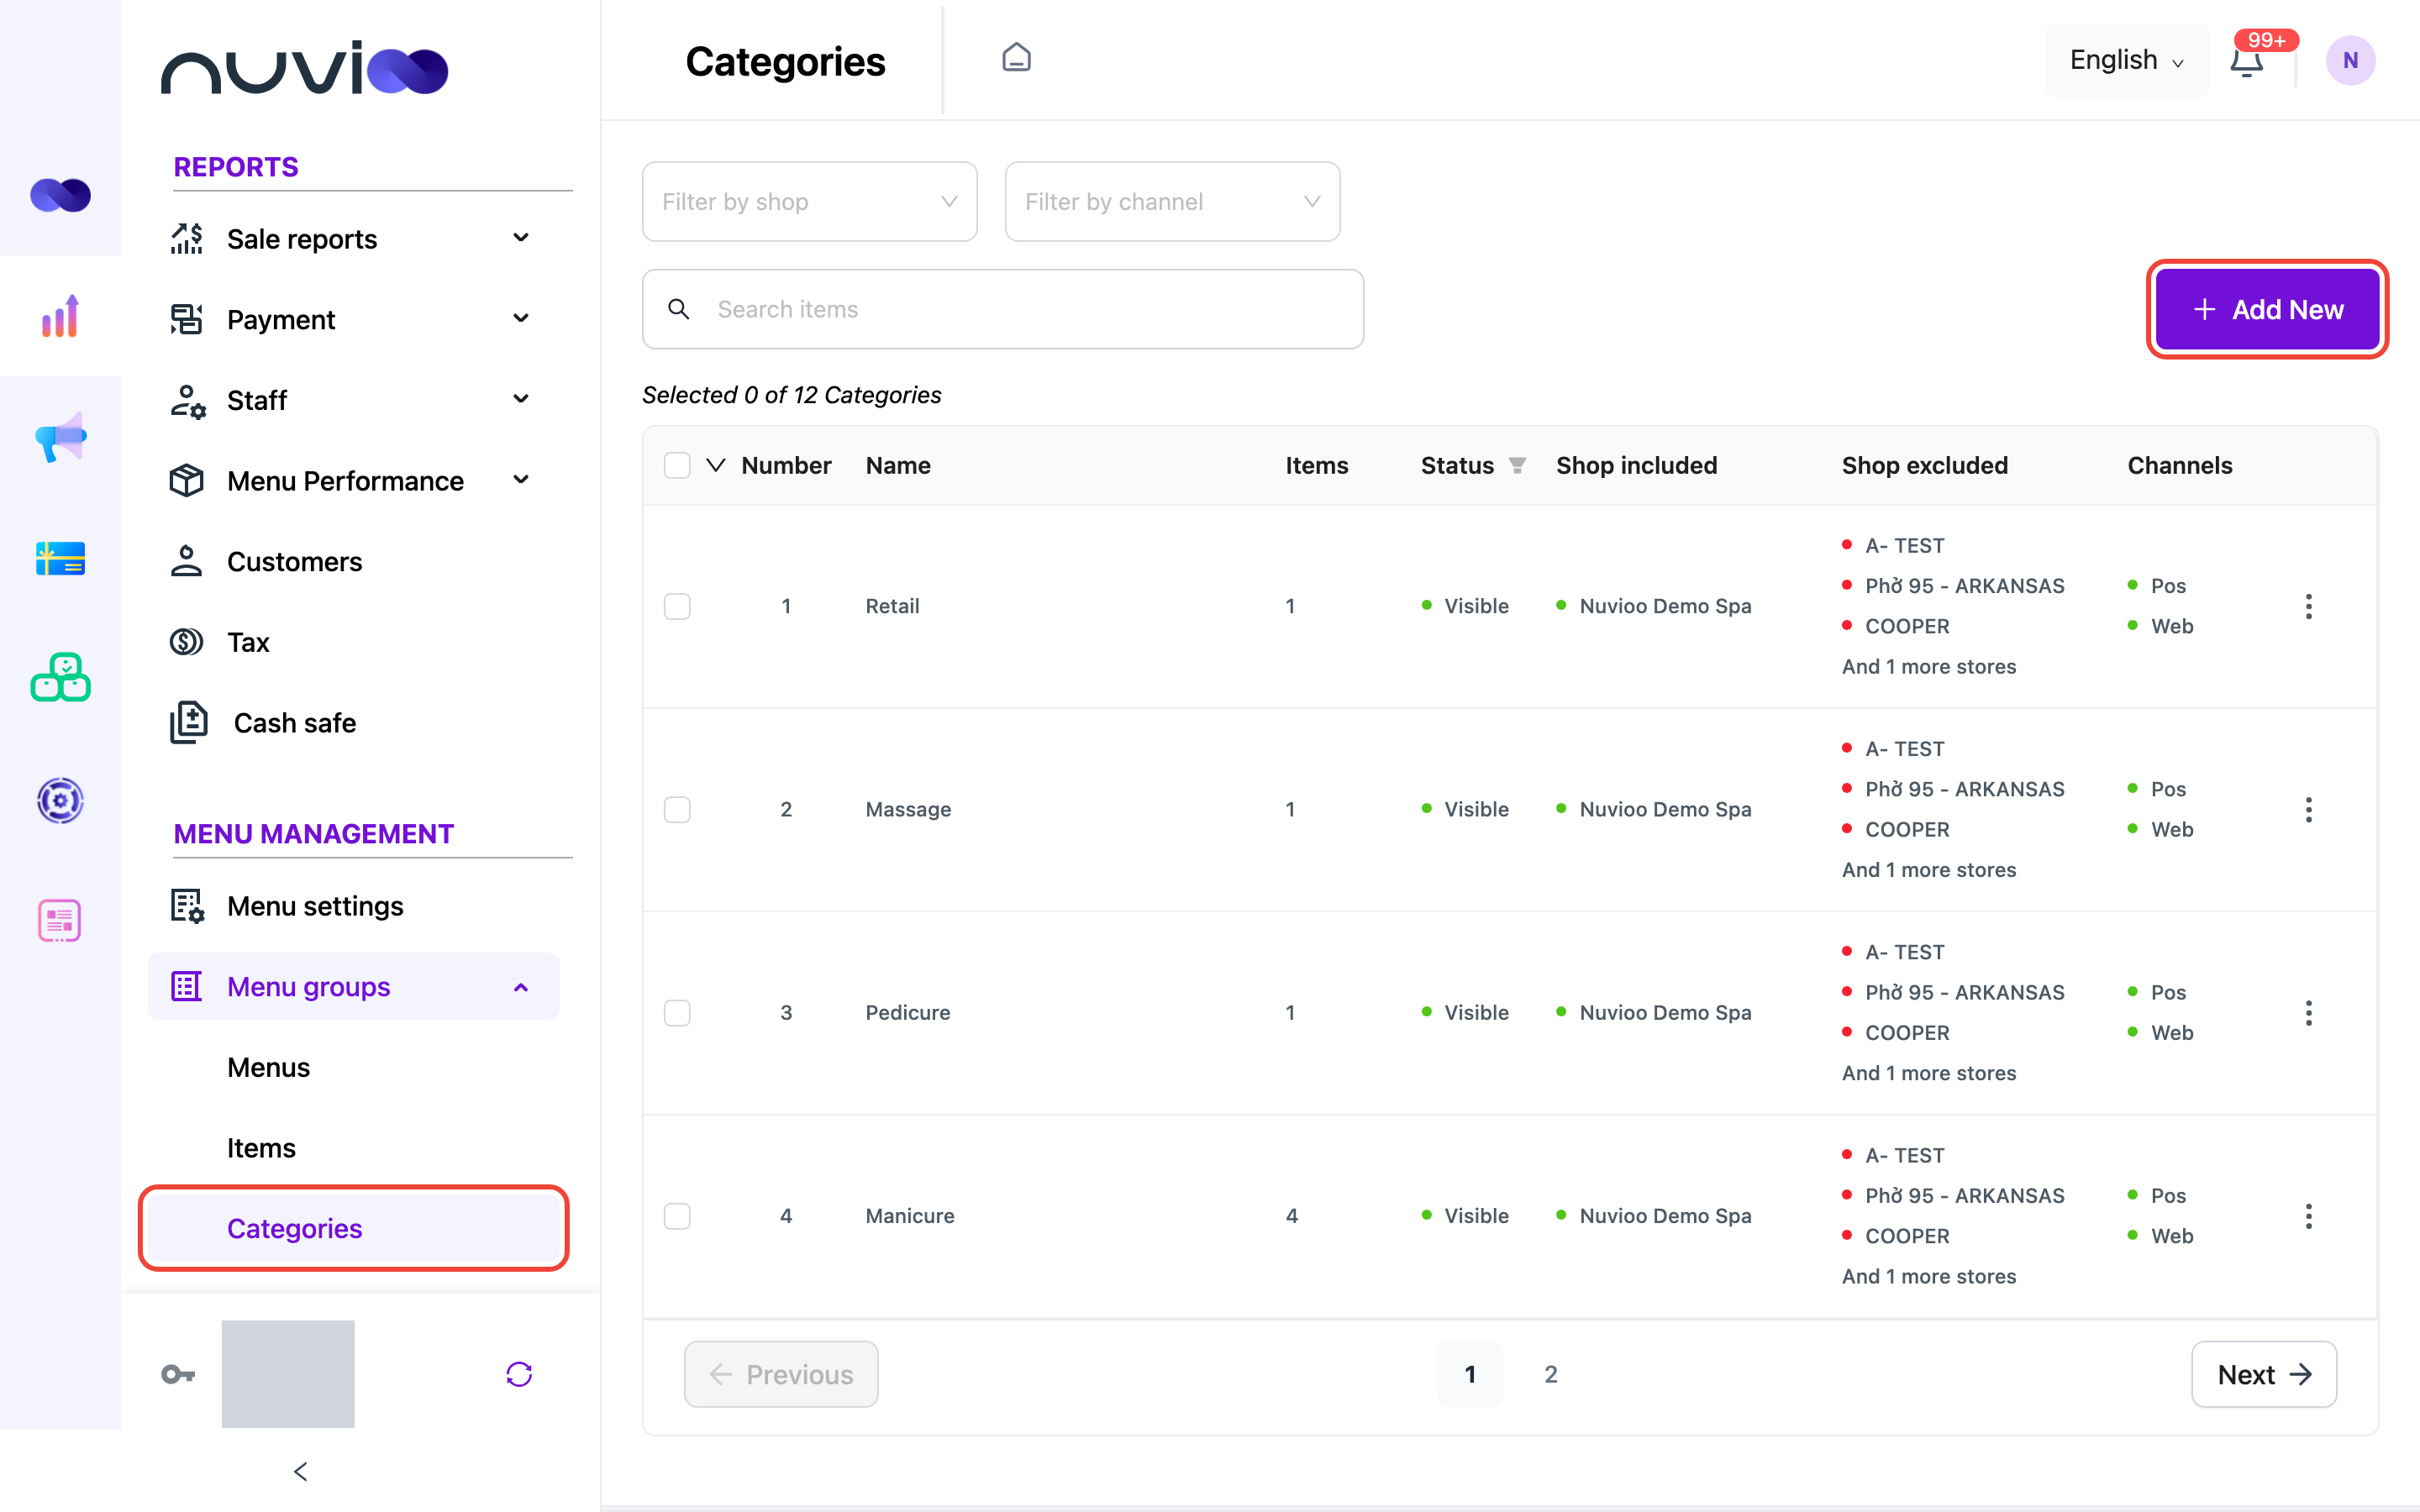
The list shows 10 categories per page, newest first. Above the table, Selected 0 of 12 Categories shows how many rows you ticked and how many categories match.
| Column | What it shows |
|---|---|
| Checkbox | Tick a row to use the bulk menu. Tick the box in the header to select every row on the page. |
| Number | The row number. |
| Name | The category name. |
| Items | How many items are in the category. |
| Status | Visible, Hidden or Unavailable, with a green, red or orange dot. |
| Shop included | The locations that sell the category. The list shows three names, then And N more stores. Hover over it to see them all. |
| Shop excluded | The locations that don’t sell it. |
| Channels | Pos, Web or both. |
To narrow the list:
- Filter by shop: pick a location to see only the categories sold there.
- Filter by channel: pick Pos or Web.
- Search items: type part of a category name.
- Status: open the filter in the Status column header, tick one or more statuses, and confirm.
Clear a filter to see everything again. The list has no sort order you can change.
Add a category
Section titled “Add a category”Open the form
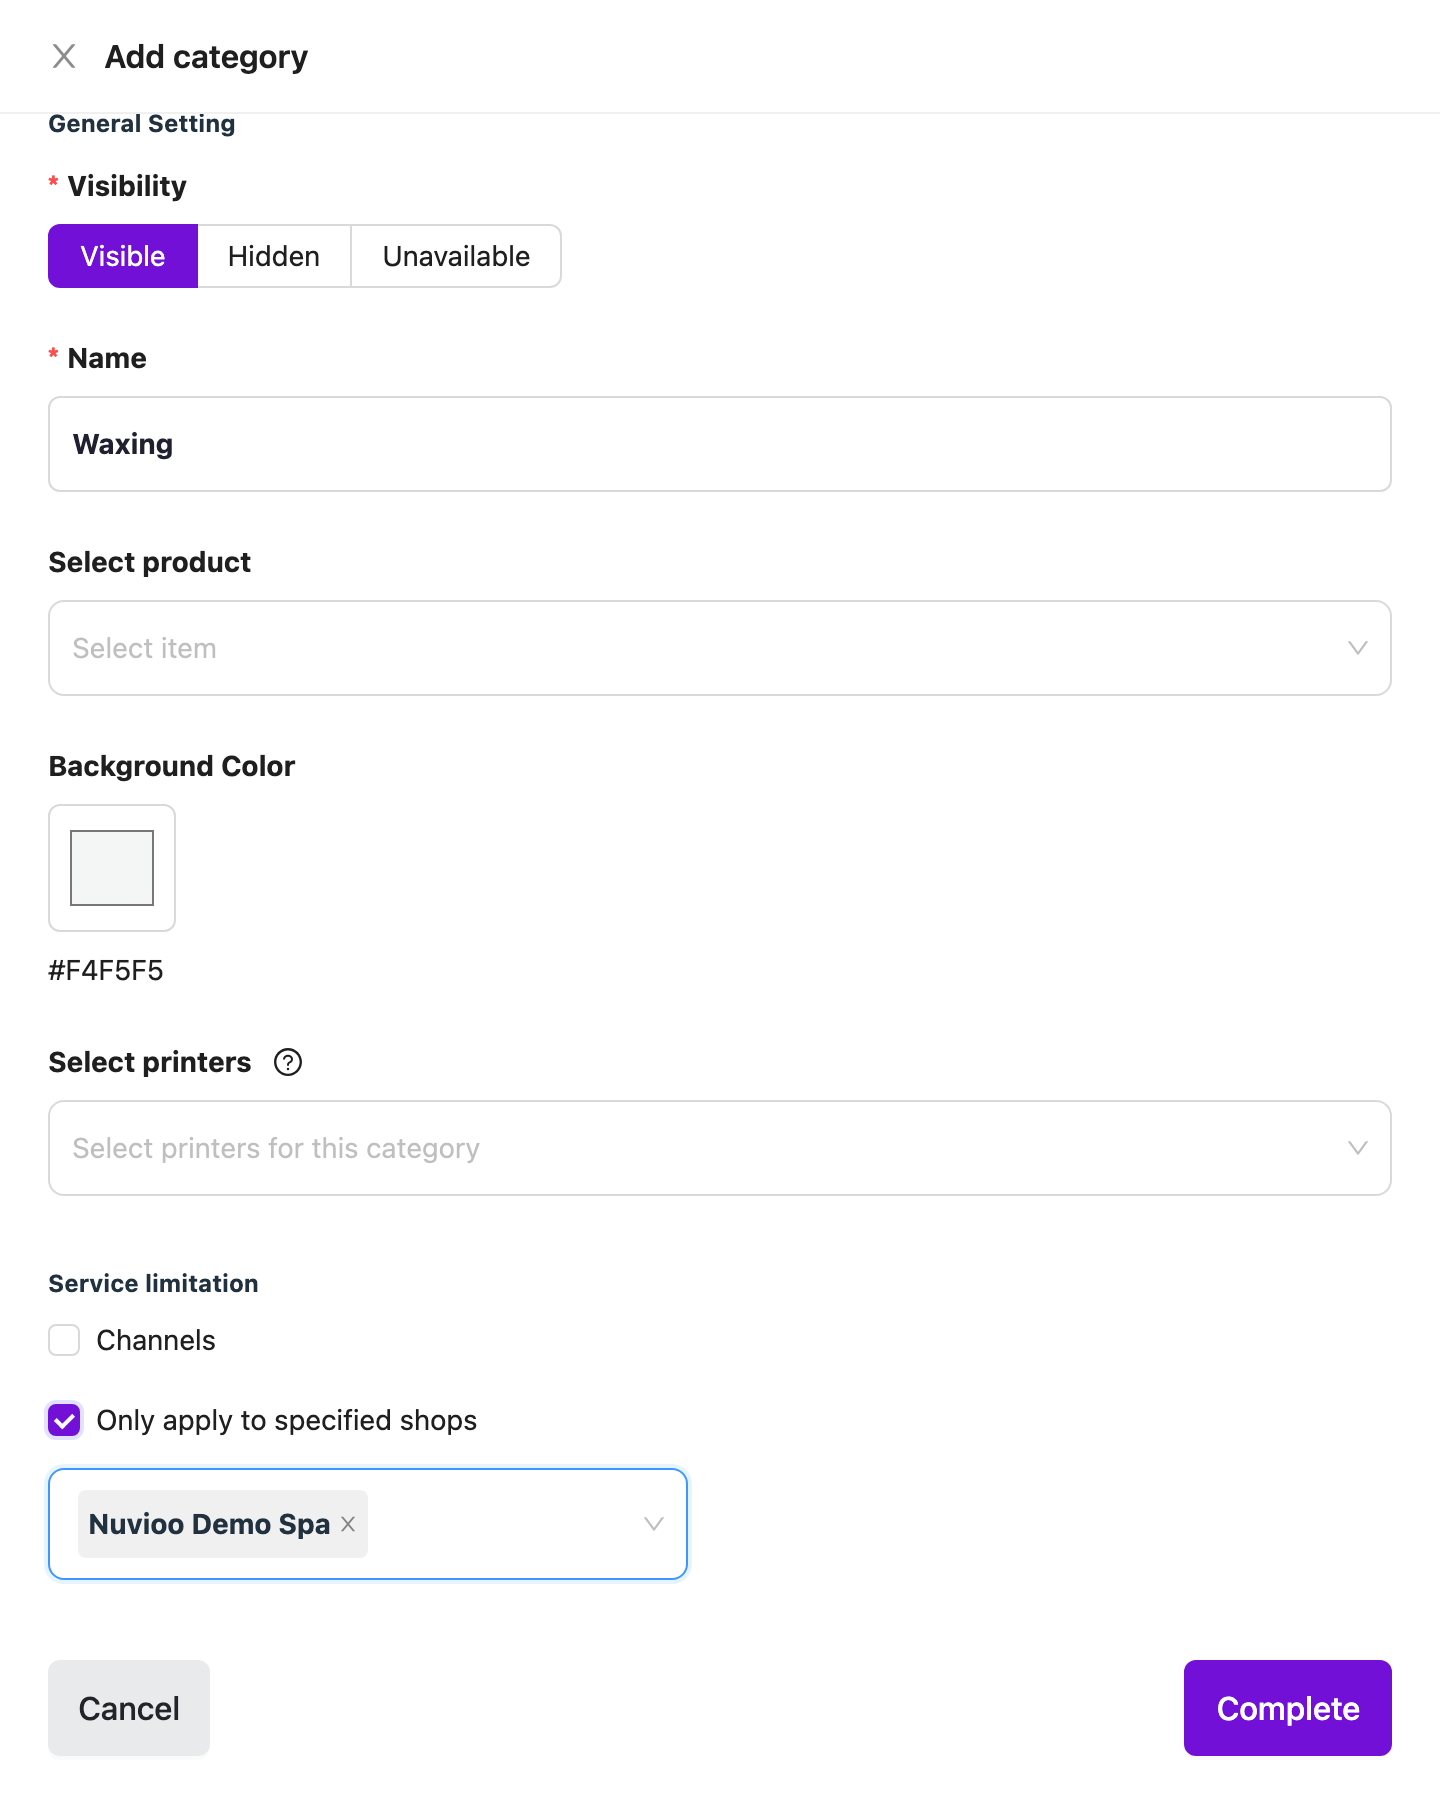
On the Categories page, click Add New. The Add category drawer opens.
Enter the details
Fill in the fields in the table below. Only Name is required.
Choose where it's sold
Under Service limitation:
- Tick Channels to sell only on Pos or only on Web (online ordering). Leave it unticked for both.
- Tick Only apply to specified shops and choose the locations. Leave it unticked to sell at all locations, including ones you add later.
Add category Save
Click Complete. The category appears on the POS straight away.
Fields
Section titled “Fields”| Field | Required | What it does |
|---|---|---|
| Add Image | No | A picture for the category button. JPG or PNG, up to 5 MB, at least 1200 px wide. The standard size is 1200 × 600 px. |
| Visibility | Yes | Visible shows the category. Hidden removes it from the POS and online ordering. Unavailable keeps it on the POS but greyed out, so staff can’t open it. Defaults to Visible. |
| Name | Yes | Up to 200 characters. Two categories can’t have the same name. If you try, you see Duplicate name of category. |
| Select product | No | The items to put in this category. Type to search. Items that aren’t visible start with (Hidden) - or (Unavailable) -. You can also choose the category when you add an item. |
| Background Color | No | The colour of the category button on the POS. It starts as a light grey. |
| Select printers | No | The printers that receive orders for this category. See Printers. |
| Channels | No | Tick it to limit the category to Pos, Web, or both. If you tick it, you must choose at least one channel. |
| Only apply to specified shops | No | Tick it to limit the category to the locations you choose. If you tick it, you must choose at least one location. |
Printers
Section titled “Printers”Select printers lists the printers set up in Devices and printers.
- When Only apply to specified shops is ticked, you can pick printers only after you choose locations. The list shows printers of those locations as Location - Printer.
- Printers set to receive all categories are already selected and shown in grey. You can’t remove them.
- If a saved printer is no longer valid, Nuvioo shows Invalid Printers and the printer names. Choose another printer and save again.
Change a category
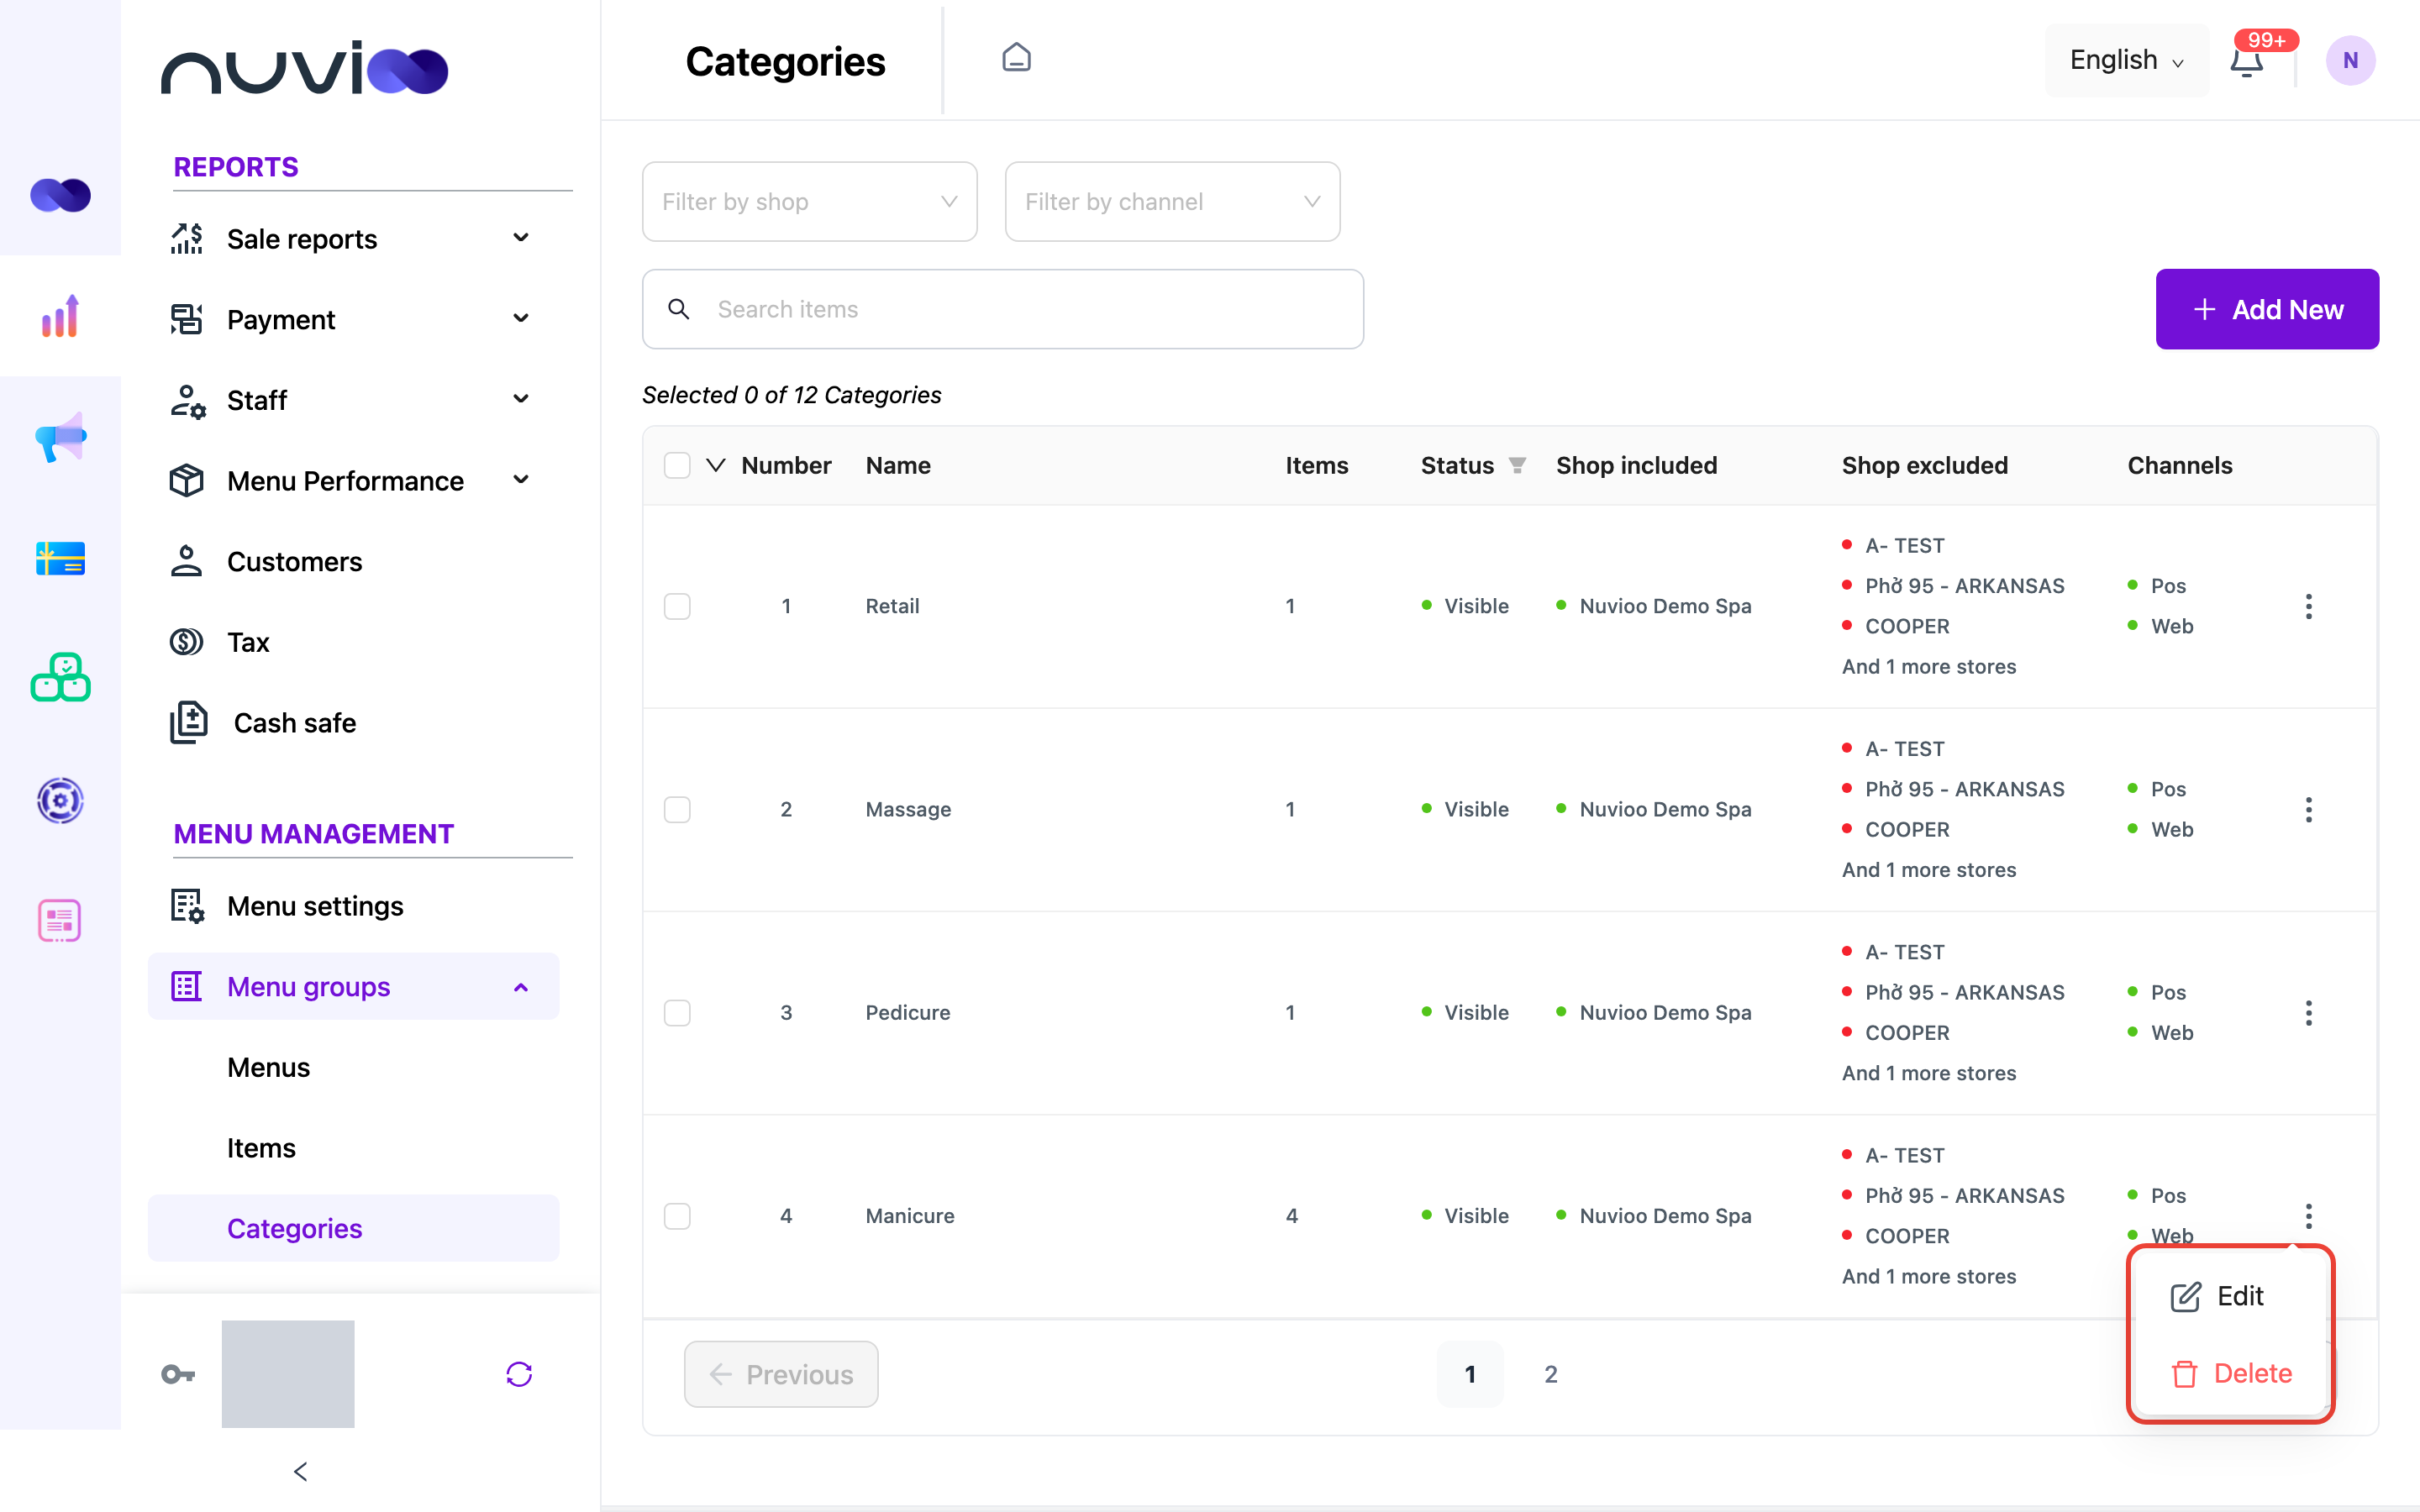
Section titled “Change a category”Click ⋮ on the category’s row, then choose Edit. The Update category drawer has the same fields as the add form. Click Complete to save.
To change the status of several categories at once:
Select the rows
Tick the categories. Tick the box in the header to select the whole page.
Choose a status
Click the arrow next to the header checkbox, open Status, and choose Visible, Hidden or Unavailable.
The Status option stays greyed out until you tick at least one row.
Delete a category
Section titled “Delete a category”Click ⋮ on the row, choose Delete, and confirm with Delete. To delete several, tick them, click the arrow next to the header checkbox, choose Delete, and confirm.
On the POS
Section titled “On the POS”- The POS shows each category as a button with its name. A category with an image shows the image. One without shows its Background Color.
- Hidden categories don’t appear. Unavailable categories appear greyed out and staff can’t tap them.
- Changes reach POS devices straight away.
You need the matching role permission to see Add New, Edit and Delete. See Roles and permissions.