

Manage timesheets
Employees usually clock in and out on the POS app. In the portal you can clock someone in or out for them, add or correct entries, and run a report of hours and wages.
The timesheet tools are on the Timesheet tab of the Employees page. In the sidebar, under Employee management, click Employees, then open the Timesheet tab. It has three tabs of its own: Employee clock-in, Manage timesheet and Timesheet Report.
Before you start
Section titled “Before you start”- Set each employee’s Hourly rate for their role at each location, so wages can be calculated. See Employees.
- To make employees clock in on the POS app, turn on Enable Clock-in/out for the location. See Locations.
How timesheets work
Section titled “How timesheets work”- An employee clocks in under one role at one location. They can clock in under several roles at the same location, one entry per role.
- An employee can be clocked in at only one location at a time.
- When they clock in, the entry copies their current Hourly rate for that role.
- On the POS app, an employee can use Take a break and Resume work. Time on break is taken off the hours when they Clock out. The portal doesn’t show breaks.
- An entry stays open until the employee clocks out. Open entries show Not clock out yet.
Clock an employee in or out
Section titled “Clock an employee in or out”Open Employee clock-in. Choose the employee in Select employee. Type to search.
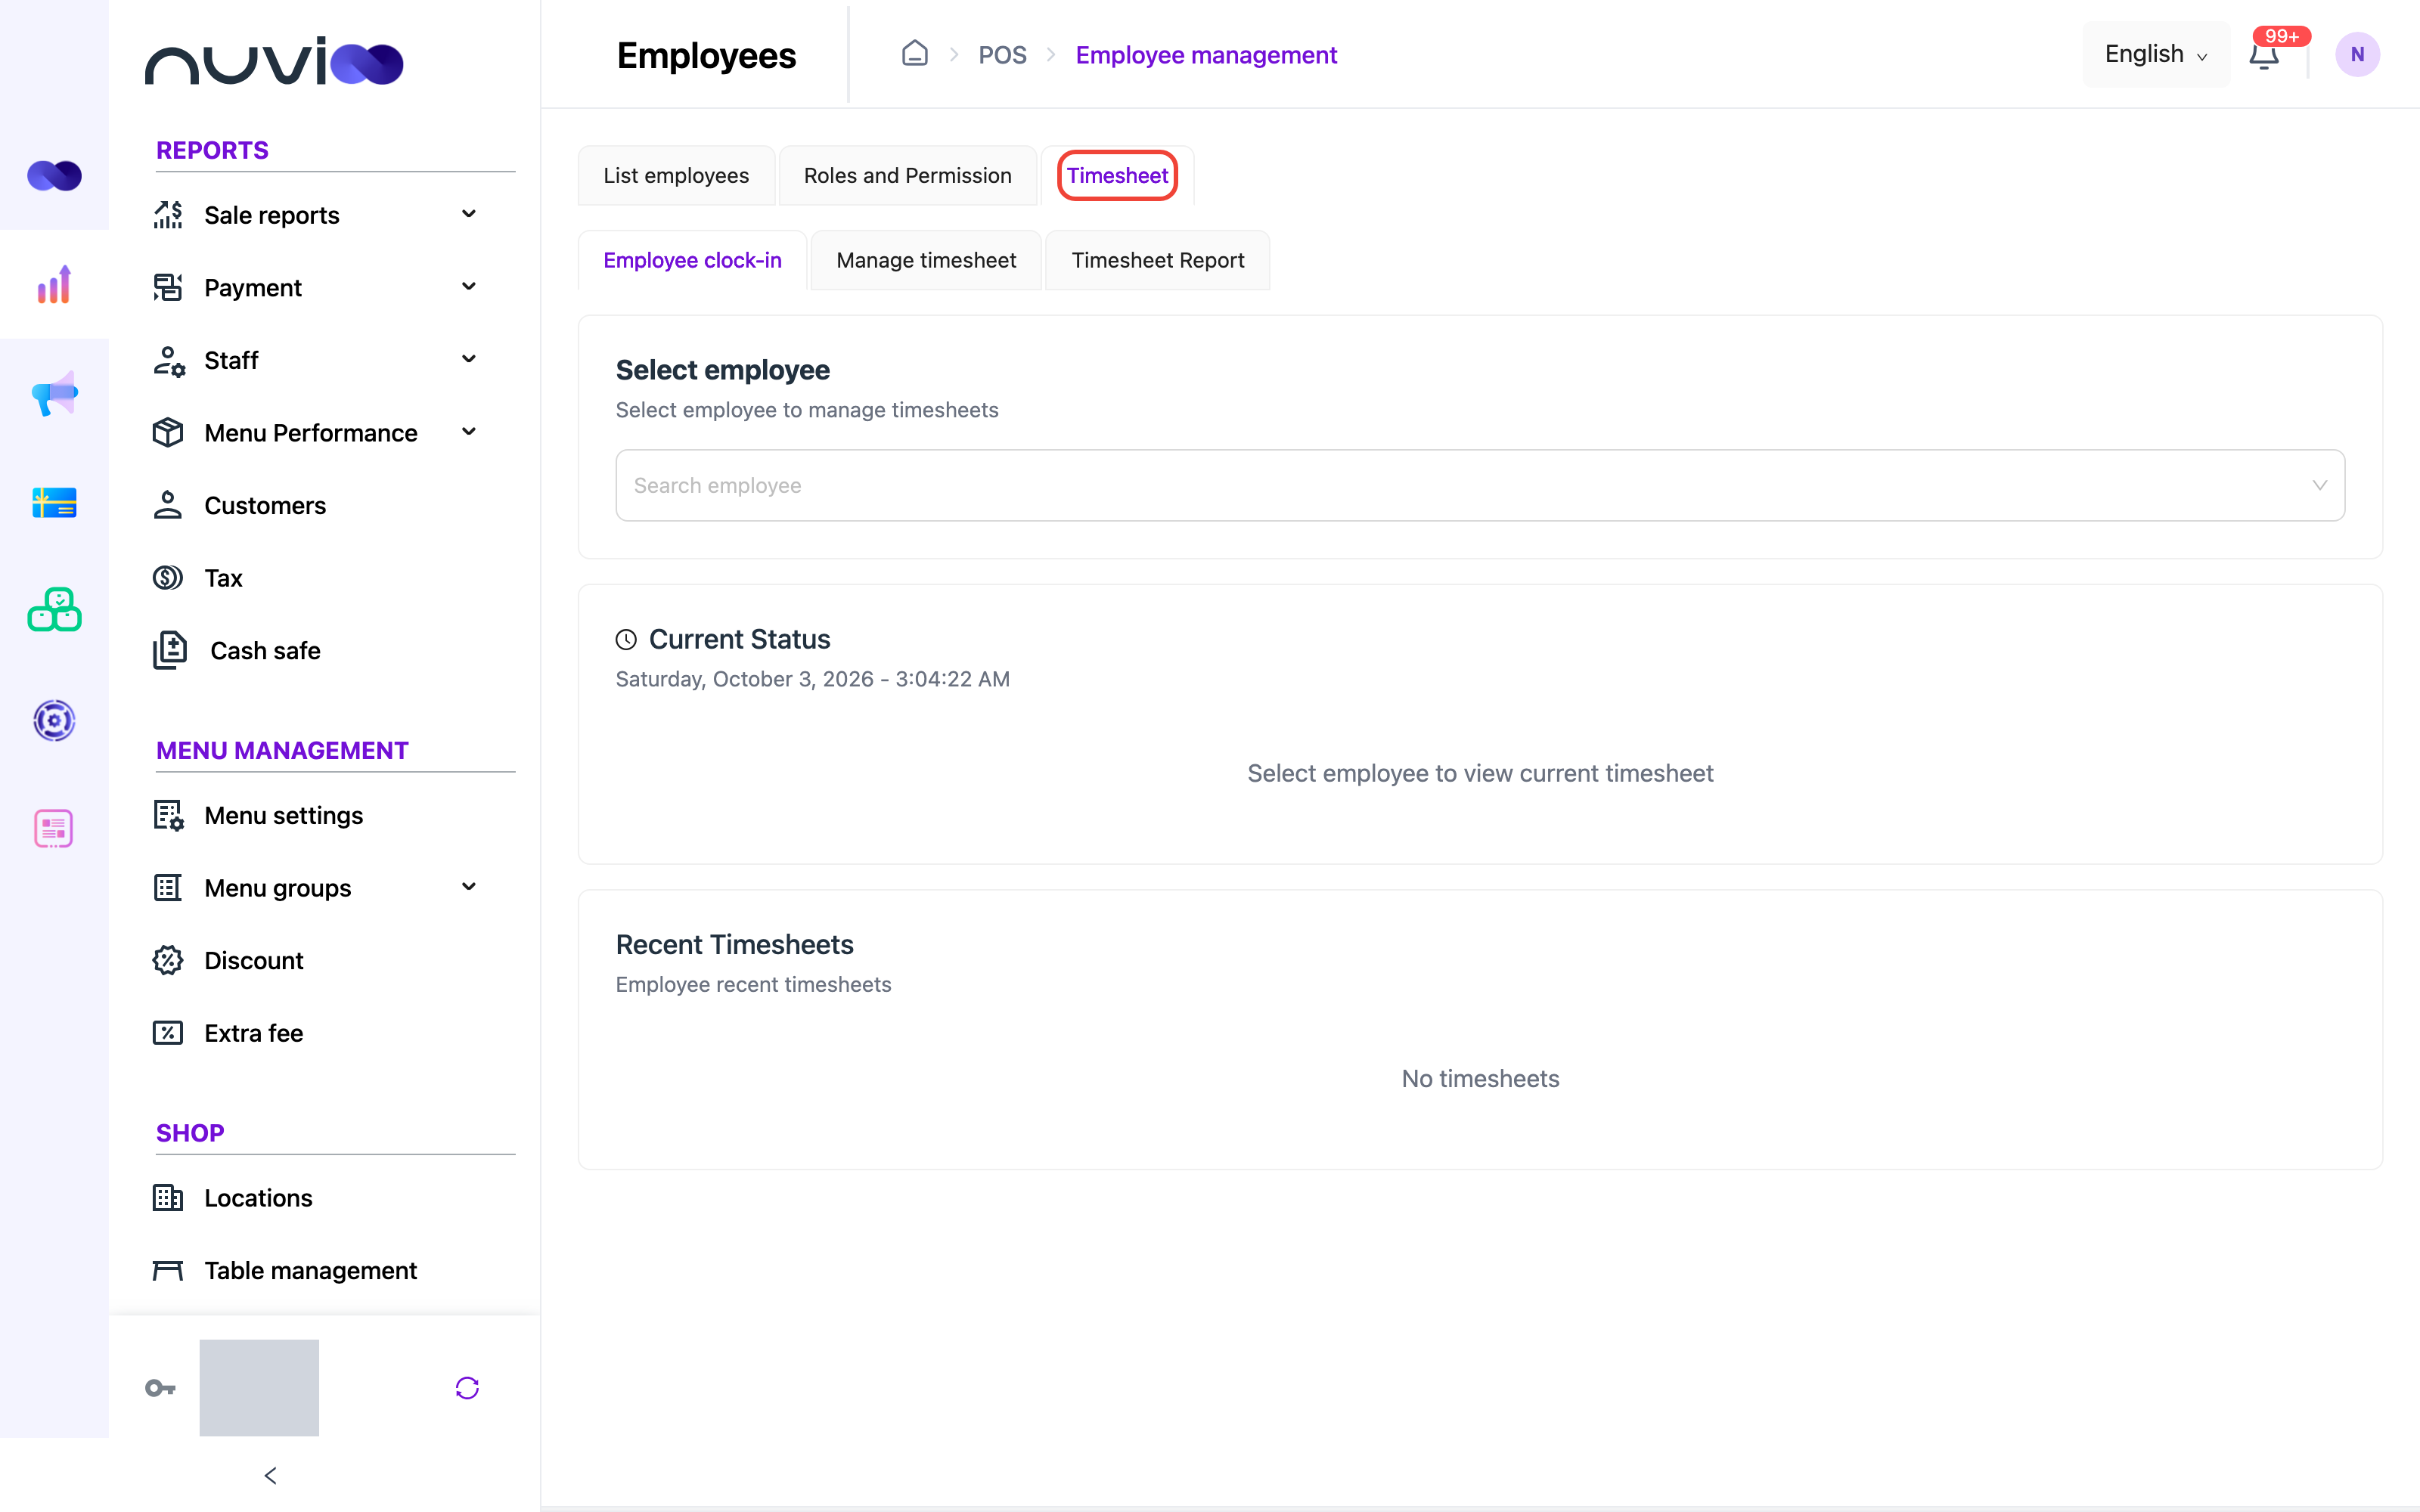
Current Status shows the time now. If the employee is clocked in, it shows Currently clocked in with the location, Clock-in time, Duration, Employee and Role. If not, it shows Employee is not clocked in.
- Clock-in: if the employee has only one role, they are clocked in straight away. Otherwise a Check-in window opens. Choose the Shop and the Role, then click OK. Roles the employee is already clocked in with can’t be chosen.
- Clock-out: click it under the open entry to clock the employee out.
Recent Timesheets lists the employee’s completed entries from the last month, with the times, role, hours and location.
The Clock-in and Clock-out buttons show only if your role can create and edit employees.
Add or fix a timesheet entry
Section titled “Add or fix a timesheet entry”Open Manage timesheet. Use Filters to narrow the list:
- Shop: choose one or more locations. Choose a location first, because Employee lists only employees of the chosen locations.
- Employee: one employee.
- Clock-in time: a date and time range. Quick ranges such as Today and Last 7 days are on the left of the picker.
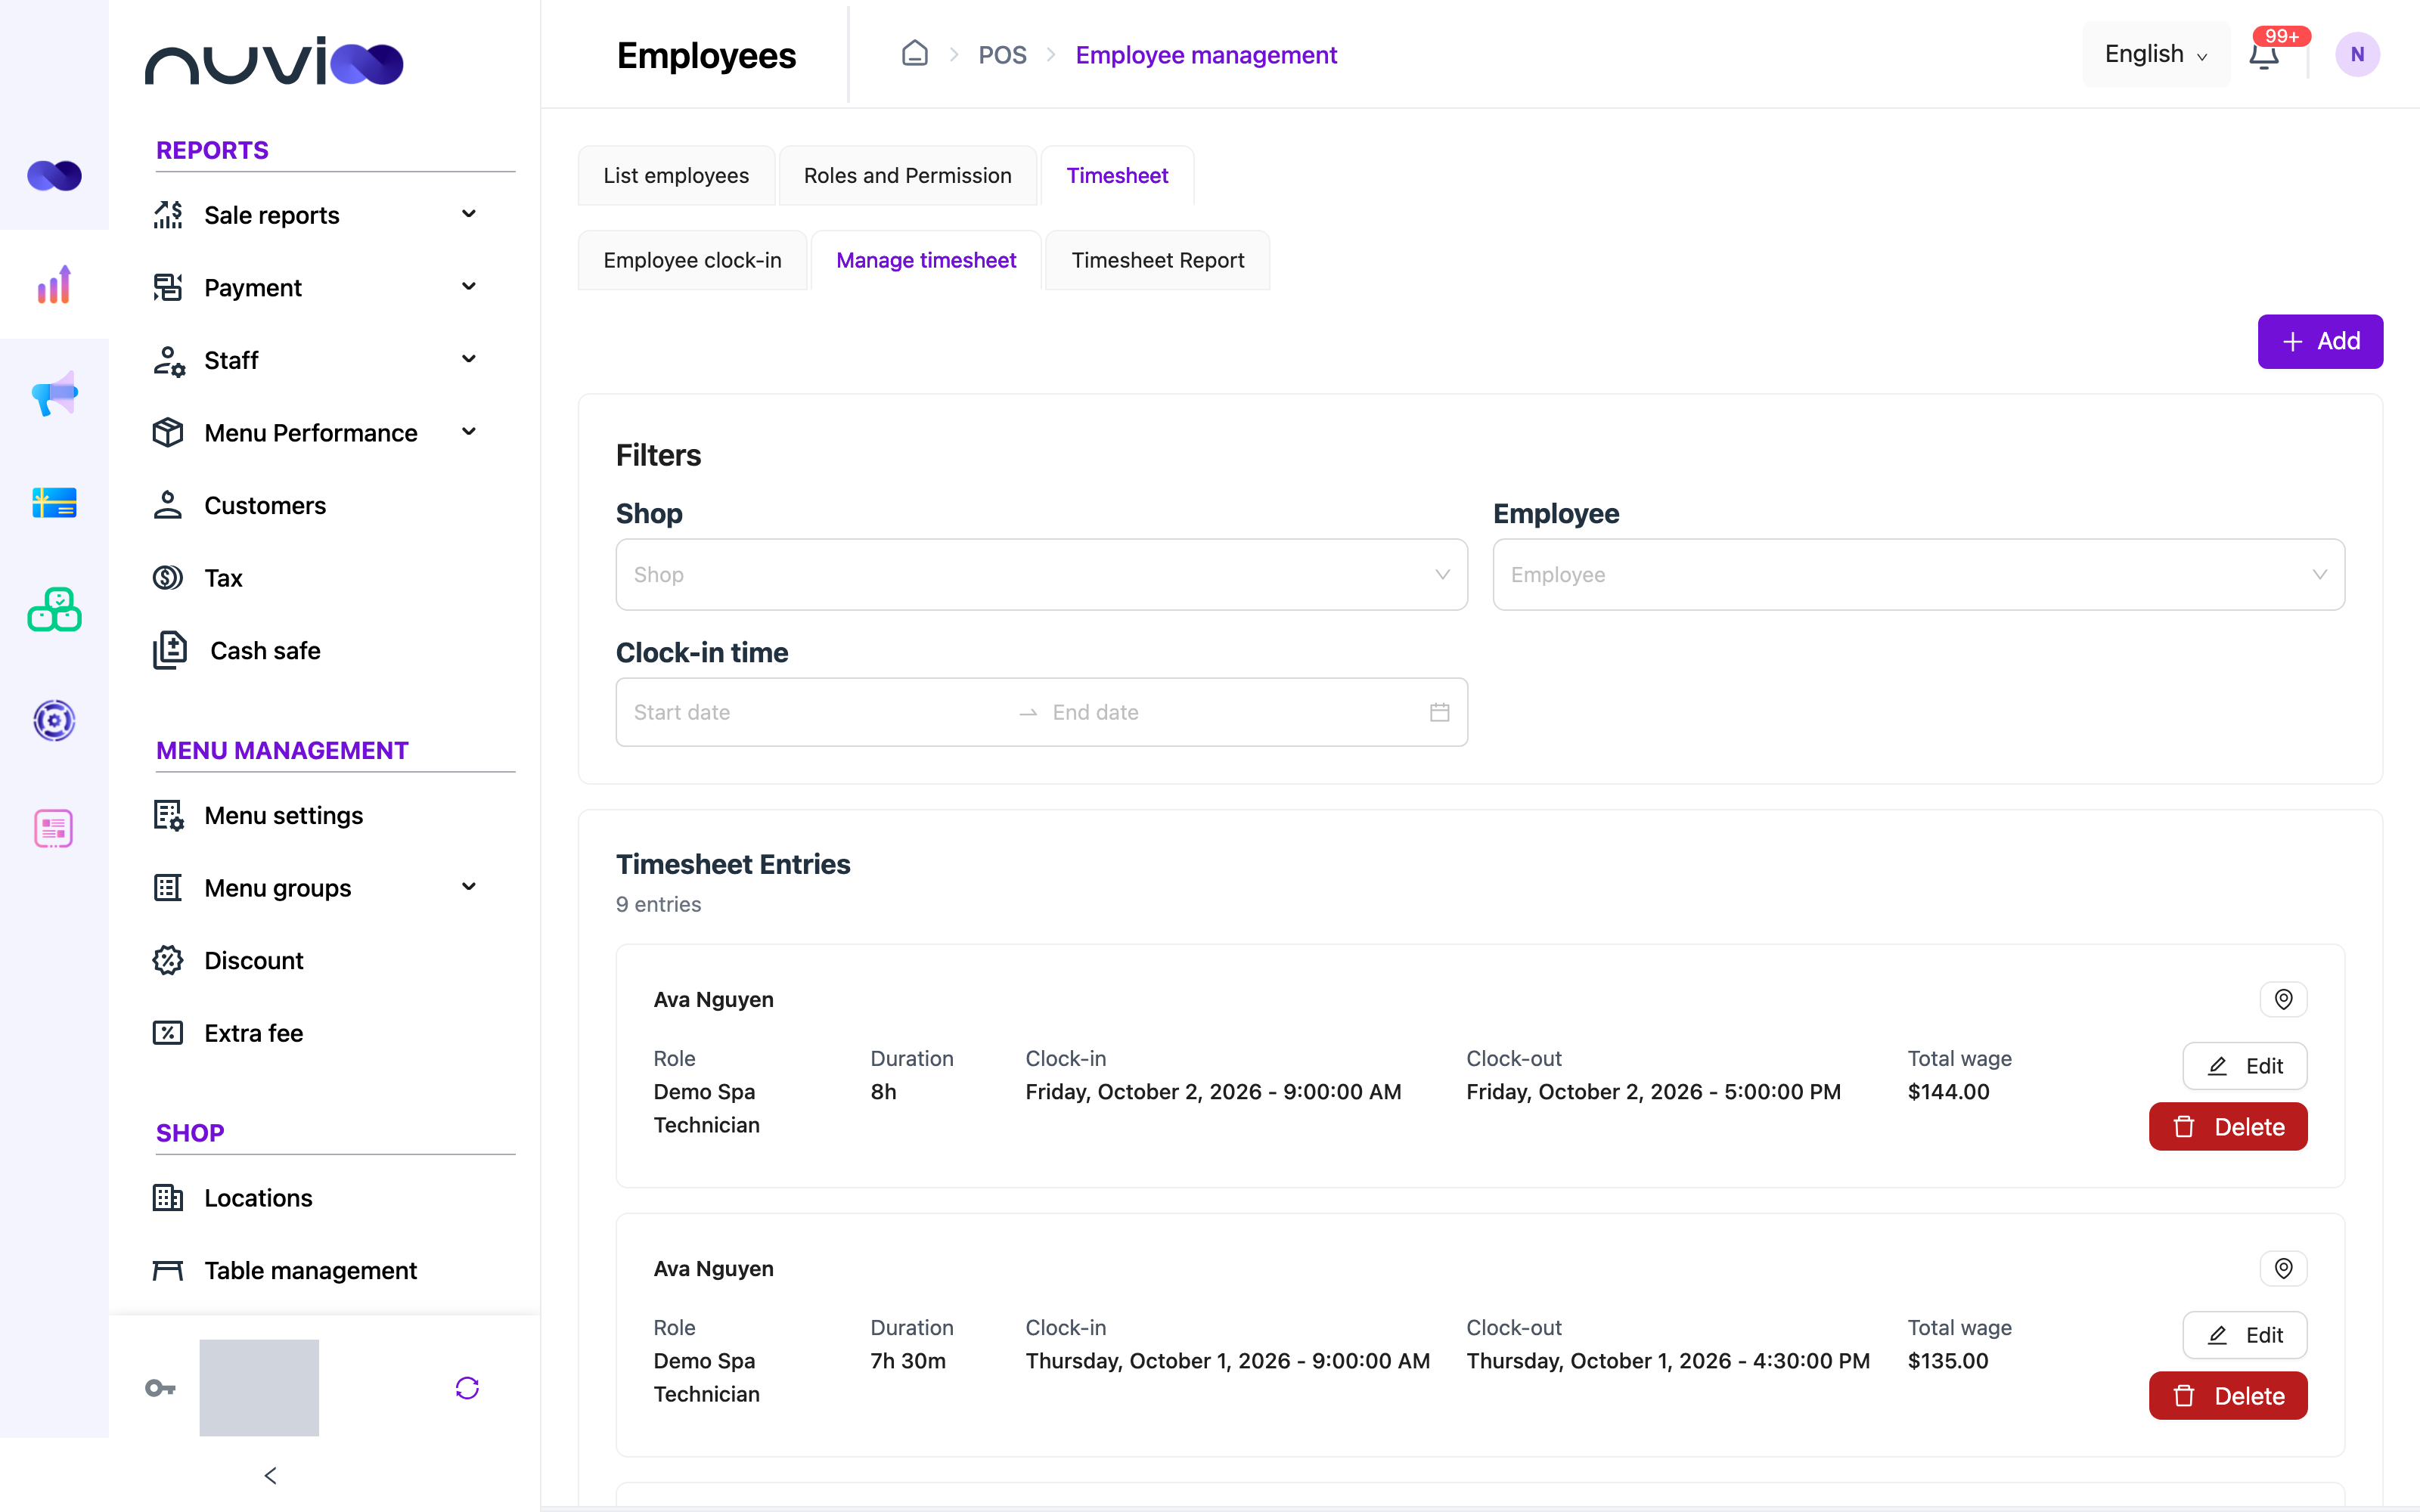
Timesheet Entries shows the number of entries, 10 per page, newest clock-in first. Each entry shows the employee, location, Role, Duration, Clock-in, Clock-out and Total wage. Wage is hours times the entry’s hourly rate. For an open entry, it uses the time so far minus any break time.
Add an entry
Section titled “Add an entry”Use this to record a shift that was missed.
- Click Add.
- In Add Timesheet Entry, fill in the fields in the entry field table below.
- Click Complete.
Edit an entry
Section titled “Edit an entry”Click Edit on the entry. Edit Timesheet Entry opens the same fields with the saved values. Change what you need and click Complete.
Entry fields
Section titled “Entry fields”| Field | Required | What it does |
|---|---|---|
| Employee | Yes | The employee. Type to search. |
| Shop | Yes | One of the locations the employee works at. |
| Role | Yes | One of the employee’s roles at that location. It fills in by itself when there is only one. |
| Clock-in | Yes | The start date and time. It can’t be in the future or after the clock-out. |
| Clock-out | No | The end date and time. It can’t be in the future or before the clock-in. Leave it empty to keep the entry open. |
| Total hours | Calculated | Clock-out minus clock-in, to two decimals. It is read only and stays empty until both times are set. It doesn’t subtract breaks. |
| Hourly rate | No | Dollars per hour, with up to two decimals. If you leave it empty, it saves as 0. It isn’t filled in from the employee’s profile. |
| Total wage | Calculated | Shows hours times rate, for example 8 * 15 = $120.00. |
| Notes | No | Up to 300 characters. |
Delete an entry
Section titled “Delete an entry”Click Delete, then confirm.
The Add, Edit and Delete buttons show only if your role can create, edit and delete employees.
Timesheet report
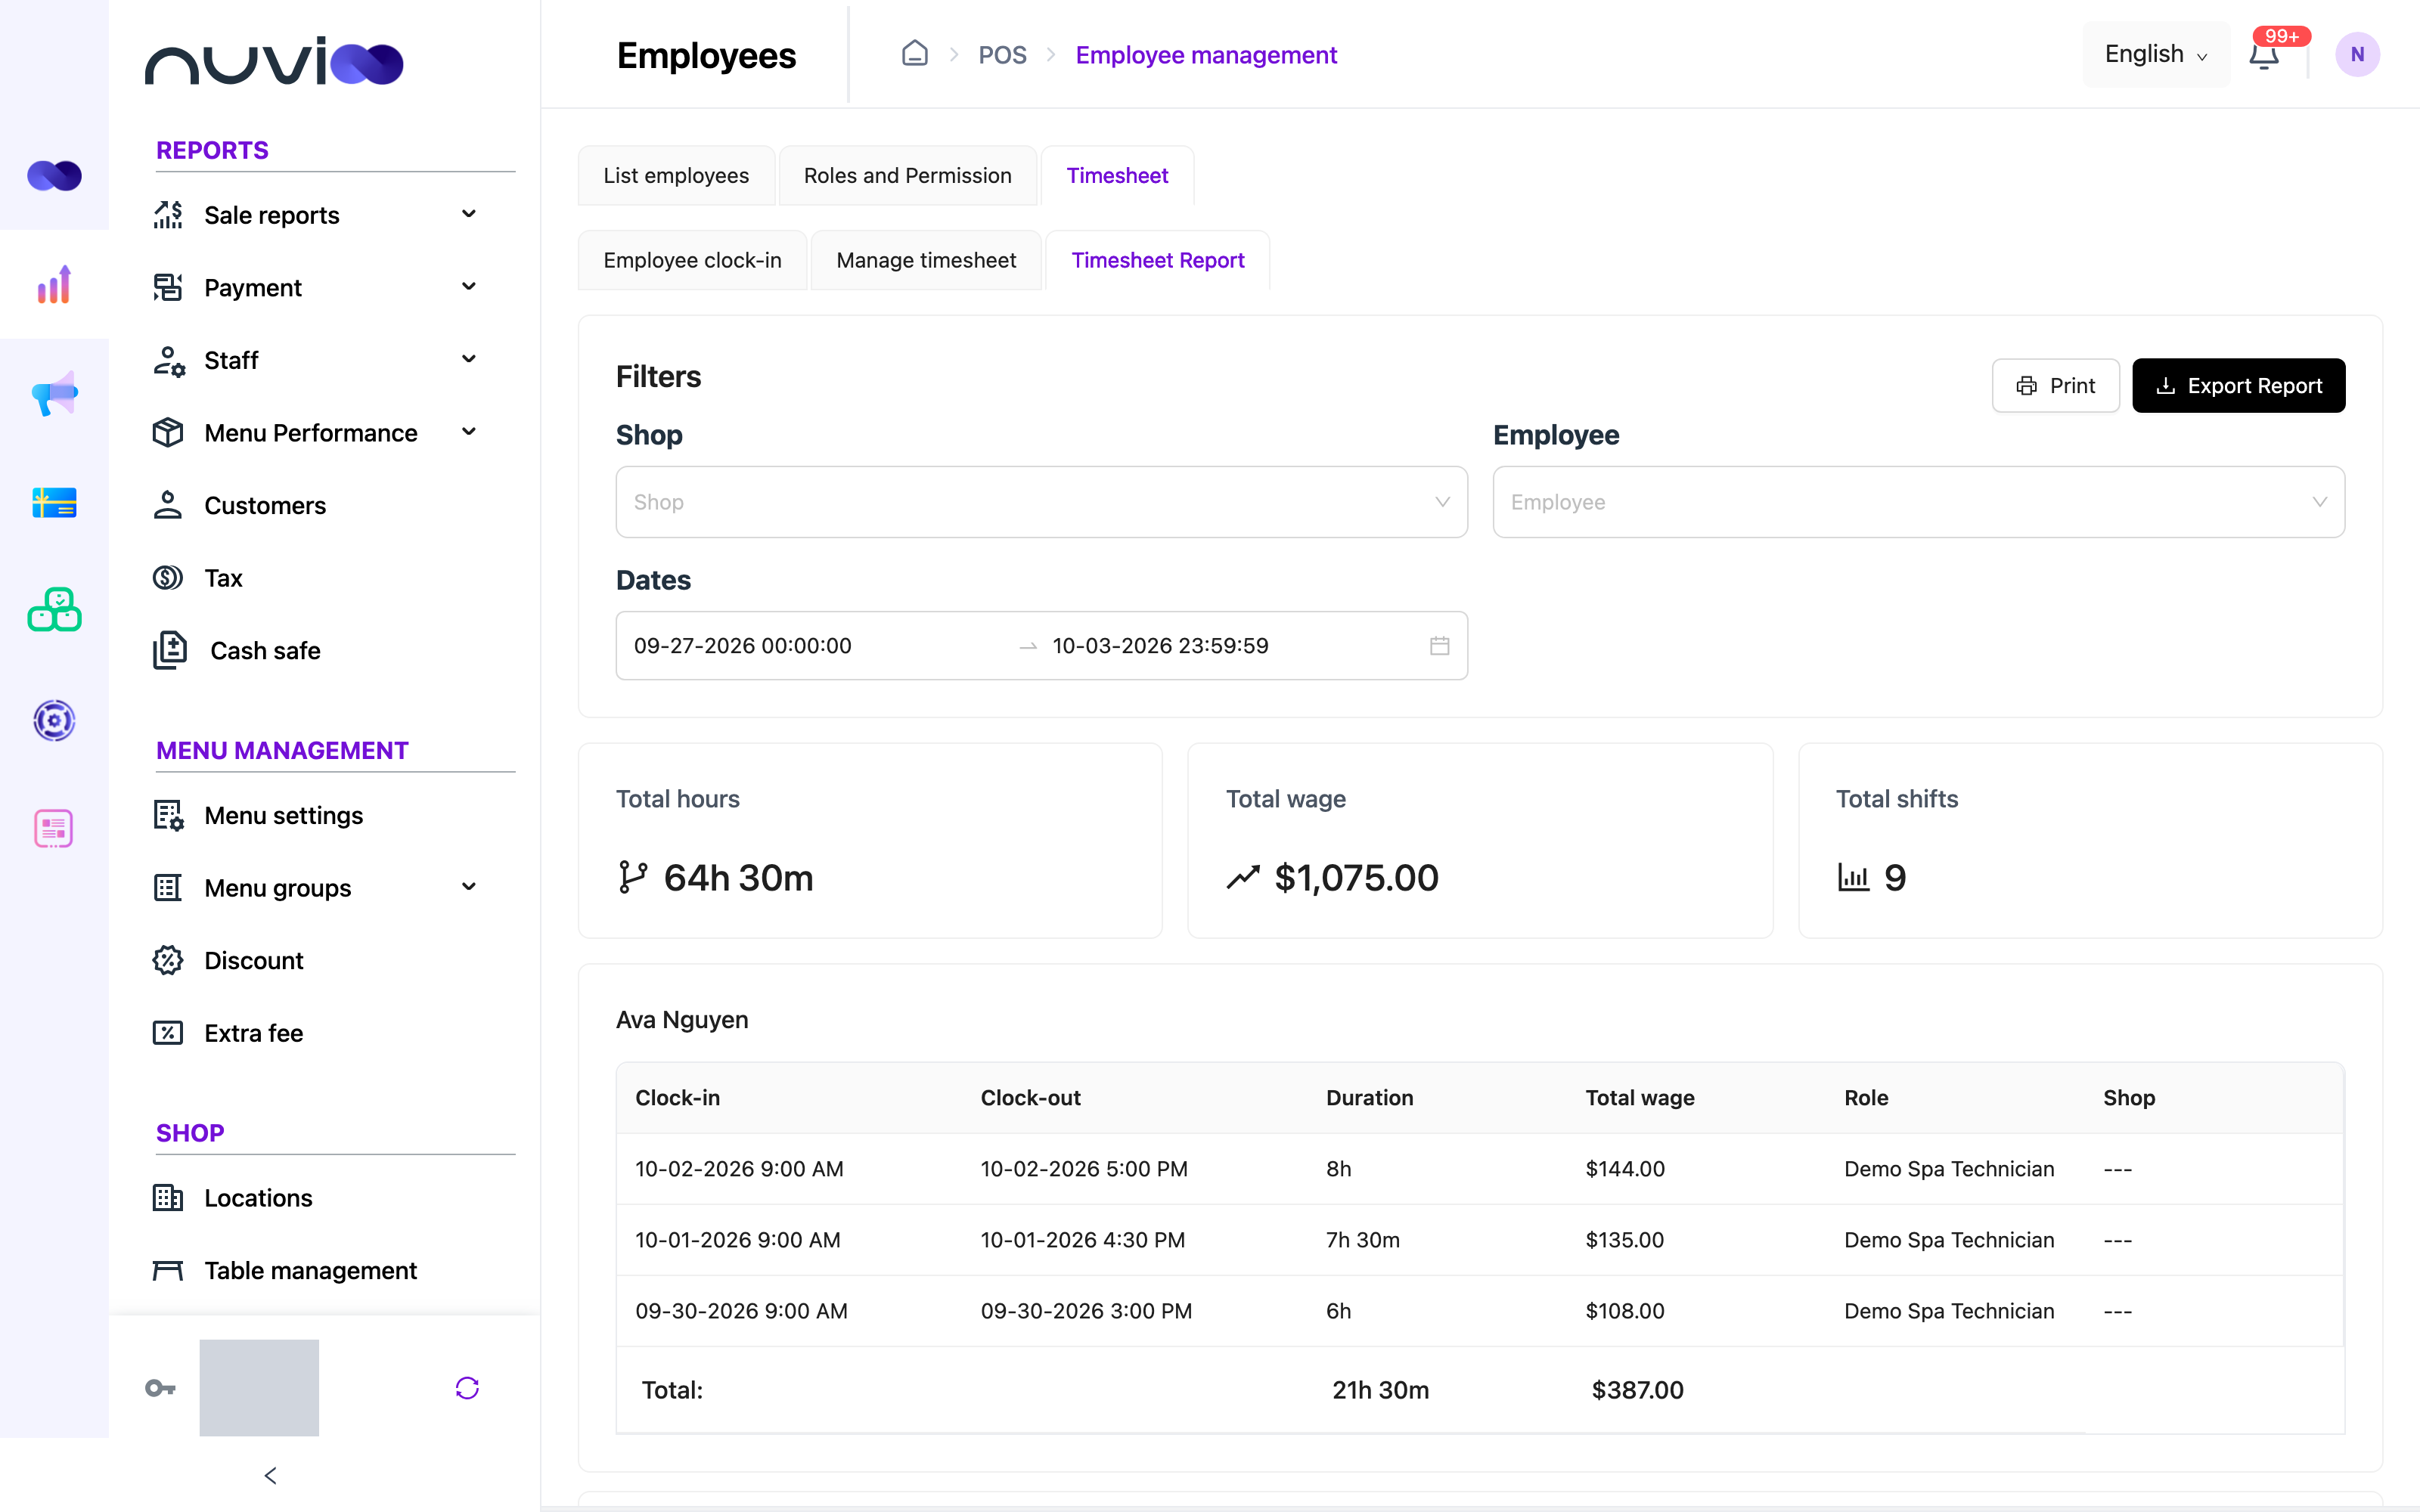
Section titled “Timesheet report”Open Timesheet Report. Under Filters, choose the Shop, Employee and Dates. Choose a location first to pick an employee. Dates starts as the last 7 days and can’t go past today.
The report counts only completed entries, by clock-in time. The cards show Total hours, Total wage and Total shifts. Below them, each employee has a table with Clock-in, Clock-out, Duration, Total wage, Role and Shop for each entry, and a Total: row.
To send the hours to payroll:
- Click Export Report to get an Excel file with the same shops, employee and dates. A message says the download is being processed. The file downloads when it is ready.
- Click Print to print the tables as a PDF. Print shows once the report has loaded.