

Help desk
The help desk tracks customer questions and problems as issues (tickets). Each issue has a subject, a priority, a status, one person it is about, and a message thread.
In the sidebar, under Support, click Help desk.
The issue list
Section titled “The issue list”The page is titled All Issues and shows how many issues there are. The list shows 10 issues per page, with the most recently active issue first.
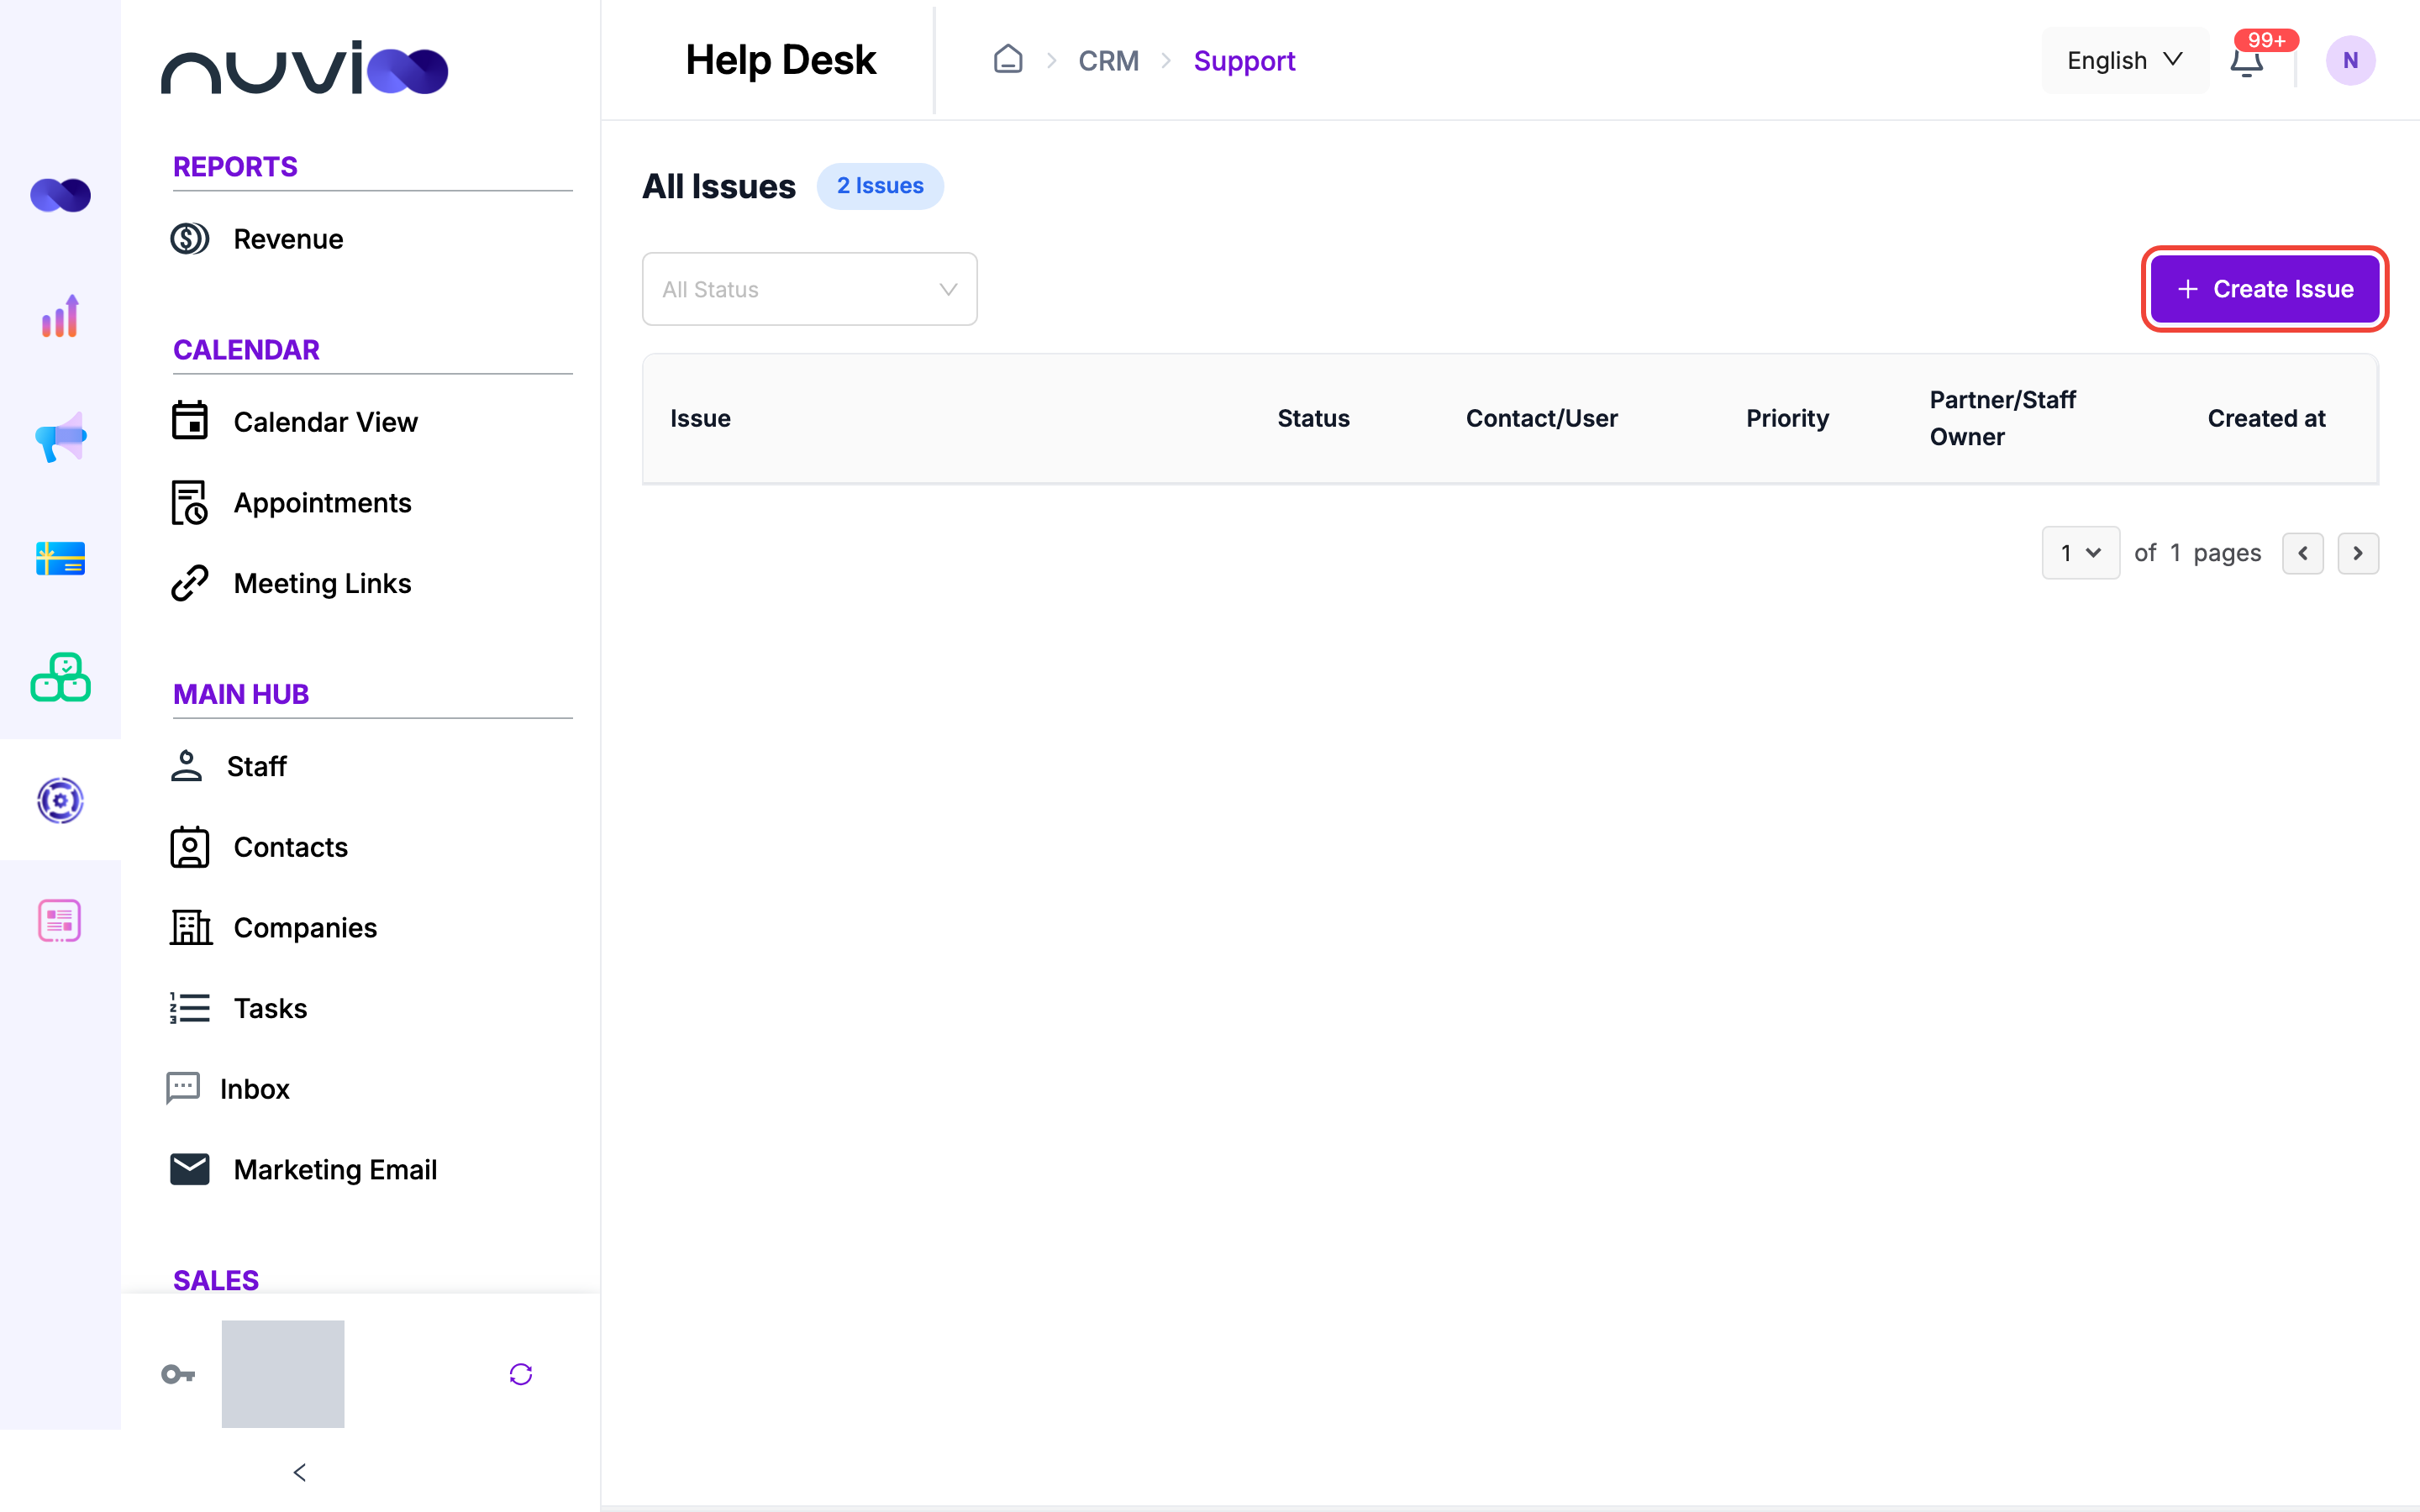
| Column | What it shows |
|---|---|
| Issue | The subject, with a preview of the last message below it. |
| Status | Open or Closed. |
| Contact/User | Who the issue is about: name and email. |
| Priority | Low, Normal, High or Critical. |
| Partner/Staff Owner | The staff owner of the contact, labeled Staff. Shows N/A when there is no owner. |
| Created at | The date the issue was created. |
Use the status list above the table to show only Open or Closed issues. Clear it to show All Status. Click a row to open the issue.
Priorities and statuses
Section titled “Priorities and statuses”Priority is a label. It shows as a colored pill in the issue list: Low (gray), Normal (blue), High (orange) and Critical (red). Normal is the default.
New issues start as Open. When you reply to a Closed issue, it becomes Open again.
Create an issue
Section titled “Create an issue”Start an issue
On the help desk page, click Create Issue. You can also create an issue from a contact’s page with Ticket. See Work with a contact’s timeline.
Enter the details
Fill in the fields in the table below.
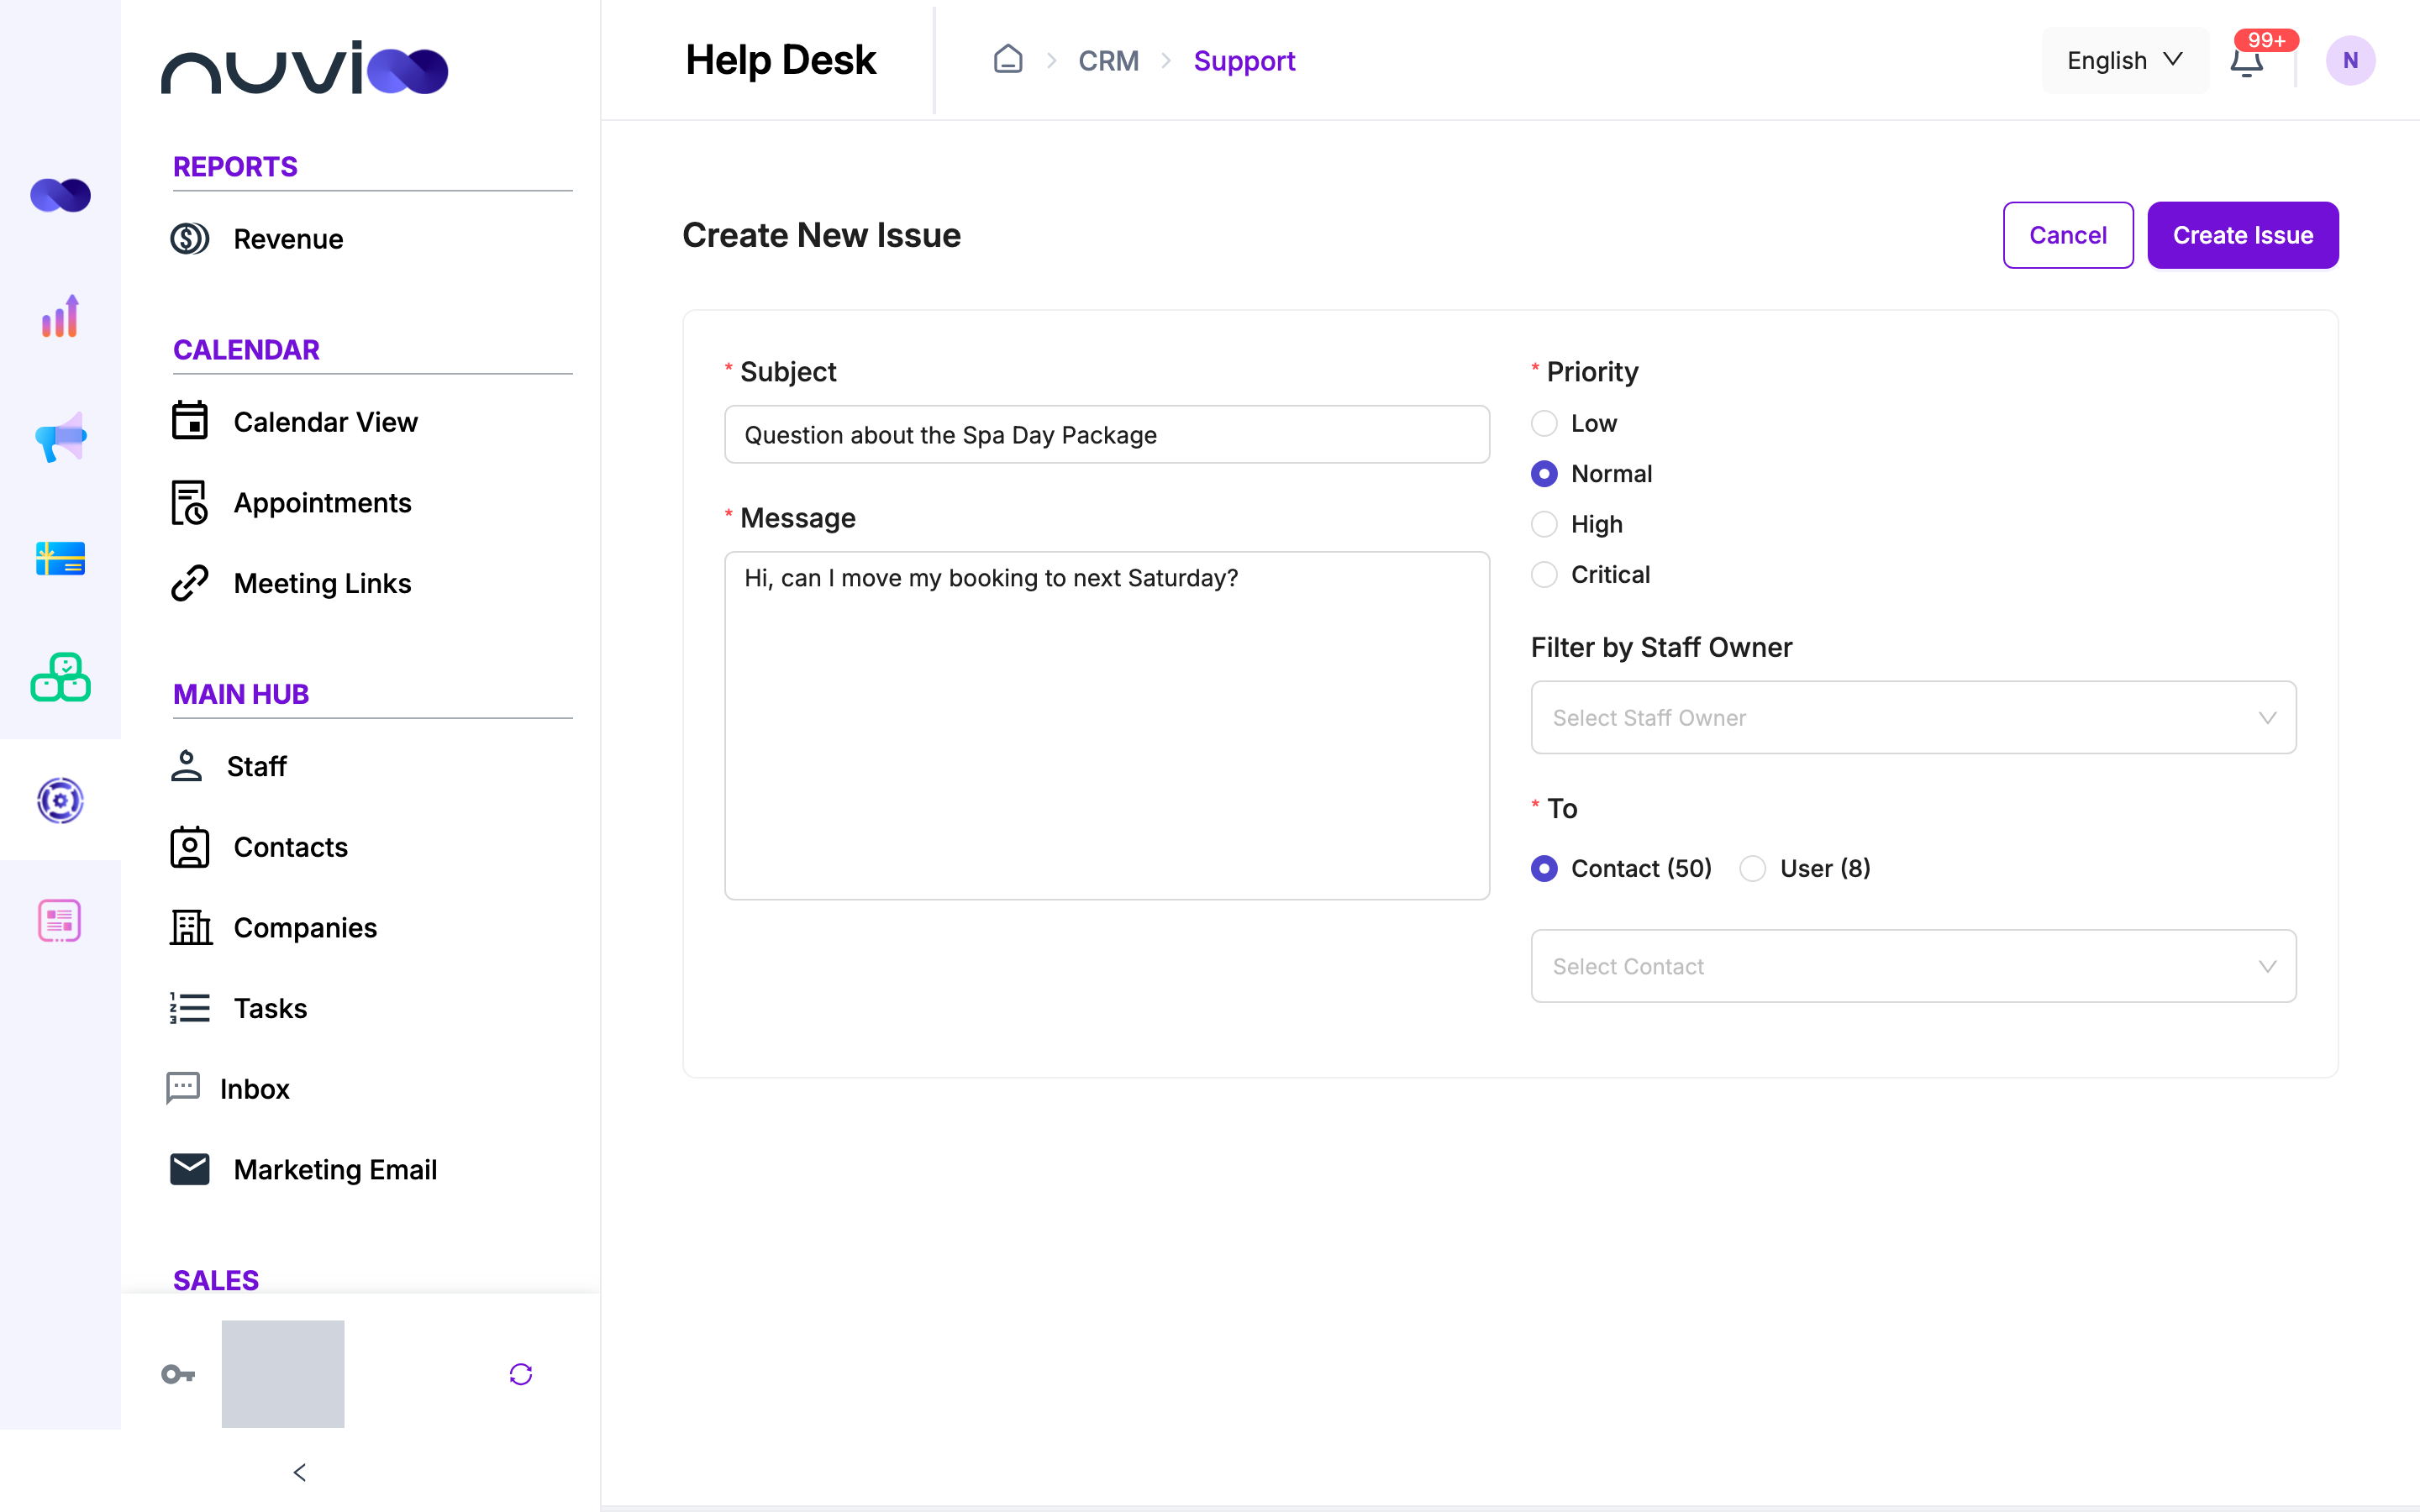
Create New Issue Create
Click Create Issue. The first message of the thread is the Message you entered.
| Field | Required | What it does |
|---|---|---|
| Subject | Yes | A short title. Shown in the list. |
| Message | Yes | The first message in the thread. |
| Priority | Yes | Low, Normal, High or Critical. |
| Filter by Staff Owner | No | Pick a staff member to show only the contacts they own. To switches to Contact, and the User option is hidden. |
| To | Yes | Choose Contact or User. The number next to each option is how many people you can pick from. Click a selected option again to clear it. |
| Contact or user picker | Yes | Search and pick the person. Contacts show their email. |
Automations on your forms can also create issues when someone submits a form.
Open an issue
Section titled “Open an issue”Click an issue in the list to open it.
- Left panel: all issues, newest activity first. Use the status list to filter. Type in Search for label to find issues by subject, name or email. Click an issue to switch to it.
- Header: the contact or user’s name and email, and the subject. Click the close icon to go back to the list.
- Thread: every message with the sender, date and time, and any attachments. Click an attachment to download it.
Reply to an issue
Section titled “Reply to an issue”Write your reply
Type in Message. Press Enter to send. Press Shift and Enter for a new line.
Add files or emoji
Use the image and paperclip buttons to attach files, and the smiley button to add an emoji.
Send
Press Enter or click the send button. The button is off until you type something and any upload finishes.
You can attach up to 10 files per reply. Images can be up to 10 MB. Other files can be up to 50 MB. Accepted types are images, PDF, Word, Excel, text, ZIP and RAR files. Remove an attached file with its bin icon before you send.
Replies in the thread are visible to everyone who can open the issue. There are no private notes.