

Integrations
In the sidebar, under Settings, click Integration. Your Apps lists every app you can connect. An app you haven’t connected shows a description and Connect. A connected app shows its account details and Manage.
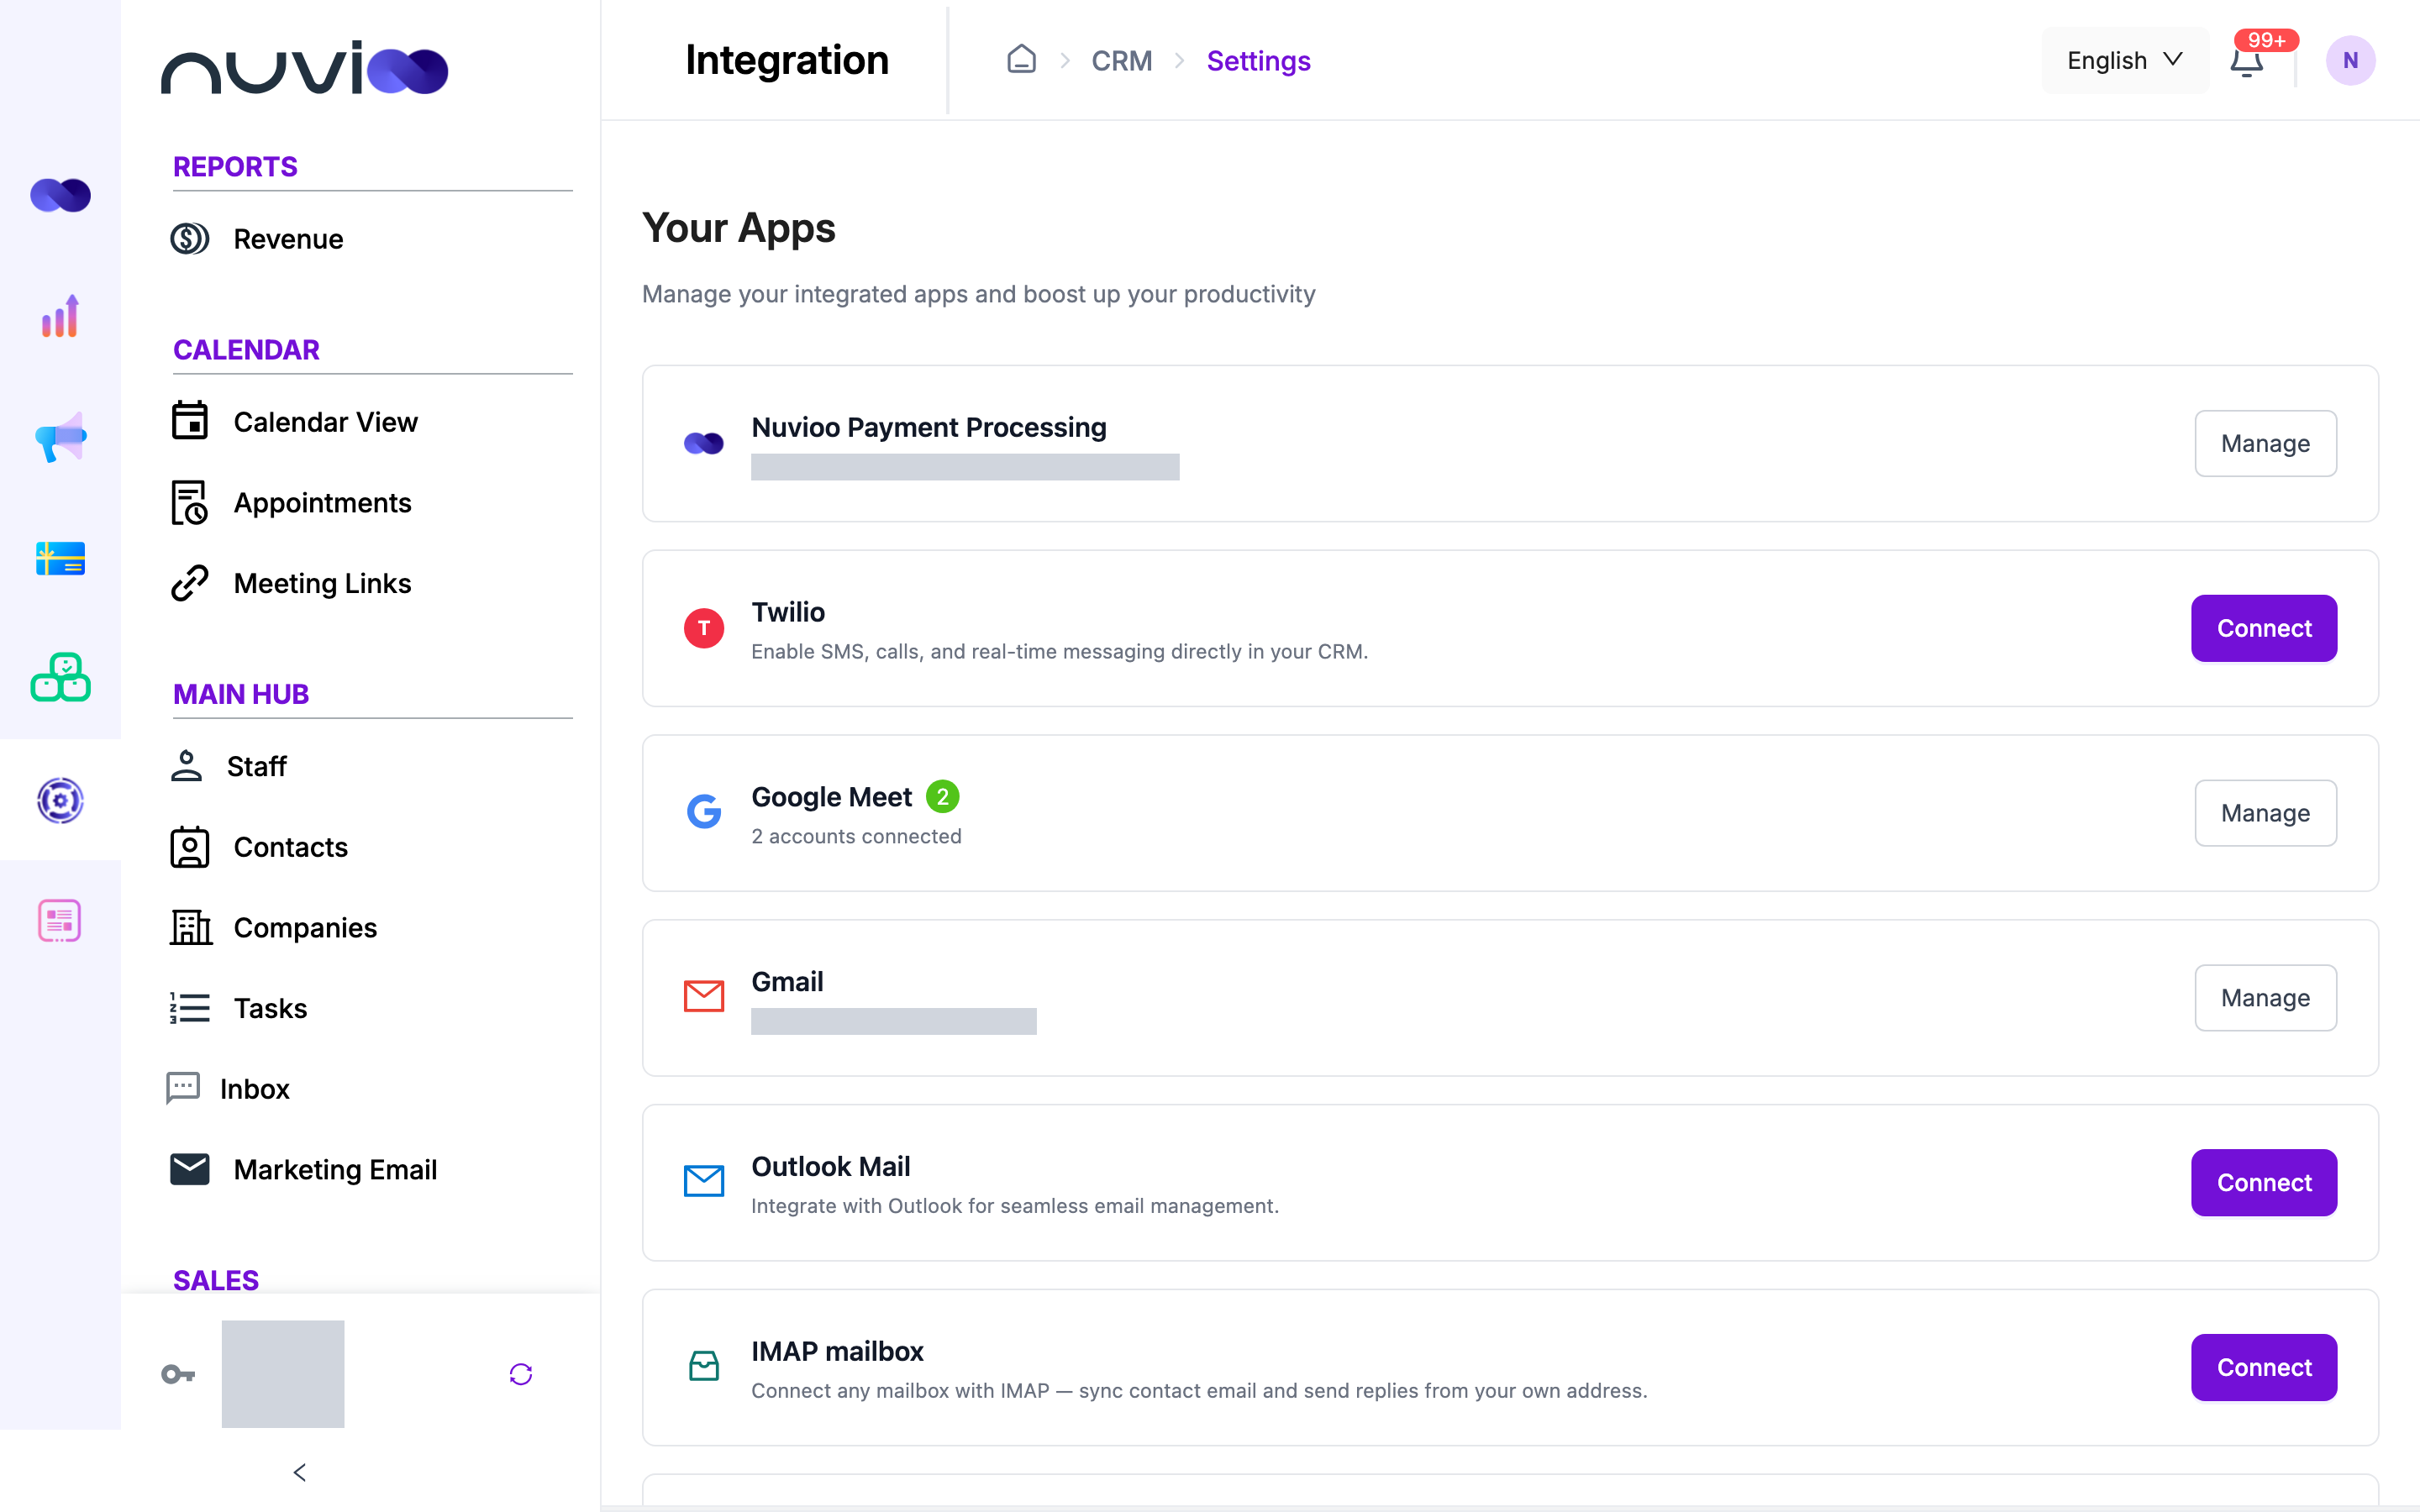
Your role decides who can connect. Without create access to Integration, Connect and Manage are turned off. See Manage users and roles.
What each app is for
Section titled “What each app is for”| App | Connect it to | Used in CRM for |
|---|---|---|
| Nuvioo Payment Processing | Take card and bank payments. | Paying invoices, quotes and subscriptions, and paid meeting links. Fees are set in Payments and tax. |
| Twilio | Text and call from your own phone number. | Phone and Text on a contact. See Work with a contact’s timeline. |
| Google Meet | Your Google account. | Virtual location on appointments. |
| Zoom | Your Zoom account. | Virtual location on appointments. Choosing Zoom creates a real Zoom meeting. |
| Gmail | Your Google mailbox, with sign-in. | Sending email to contacts from your address. See Contacts. |
| Outlook Mail | Your Microsoft mailbox, with sign-in. | The same as Gmail. |
| IMAP mailbox | Any mailbox, with its server details. | The same as Gmail. Works with providers that don’t offer sign-in connection. |
| Email forwarding | A Nuvioo address you forward mail to. | Logging email on contacts’ timelines. It can’t send. |
| Webhook | A form on another website. | Sending form submissions to CRM as contacts. |
Connect Google Meet, Zoom, Gmail or Outlook Mail
Section titled “Connect Google Meet, Zoom, Gmail or Outlook Mail”Click Connect
Click Connect on the app’s card. You go to the provider’s sign-in page.
Approve access
Sign in and approve the permissions it asks for. You return to Integration.
If it fails, a message tells you why:
| Message | What to do |
|---|---|
| The email address is already connected as a personal email or team email channel. | Disconnect it where it is connected, then try again. |
| Your Microsoft administrator must approve Nuvioo. | Ask your IT admin to grant access, then try again. |
| Access was not granted. | Try again and approve all the permissions. |
| The provider did not complete the sign-in. | Try connecting again. |
| We could not finish connecting this account. | Try again. |
Manage a connected app
Section titled “Manage a connected app”Click Manage. The page shows the connected account and its Last used date.
- Gmail and Outlook Mail can have several accounts. Click Add account to connect another. Click Remove next to an account, then Delete to confirm.
- Google Meet and Zoom show one account. Click Disconnect, then Delete to confirm.
- Google Meet and Zoom also have Preferences. Tick an option and click Save:
| App | Option | What it does |
|---|---|---|
| Google Meet | Meeting Recordings & Transcripts | Syncs recordings and transcripts of past, current and future meetings to your CRM. |
| Zoom | Sync newly scheduled webinars by default | Syncs each new webinar from your Zoom account. |
| Zoom | Sync all past webinars and transcripts | Syncs your earlier webinars and transcripts. |
| Zoom | Meeting Recordings & Transcripts | Syncs recordings and transcripts of past, current and future meetings to your CRM. |
Connect Nuvioo Payment Processing
Section titled “Connect Nuvioo Payment Processing”Click Connect. The Manage integration - Nuvioo page opens.
Join
Click Join payment and complete the onboarding form. If you already started, the button says Continue. If you already have a merchant ID, click Input configuration and enter it instead.
Review the settings
After you join, set Payment terminal, Payment method (Nuvioo) and Merchant ID. Turn on Auto close batch time to close the day’s card batch automatically. Then choose a Time zone and Time. Both are required when it is on.
Save
Click Save.
The page also has a Terminal list for card readers. Click Add payment terminal, enter a Name and Serial number, and choose the Model: PAX A800, PAX A920PRO, SUNMI P2 or SUNMI P3 MIX. Each terminal shows a Device status and has Edit, Check connection and delete actions.
Connect Twilio
Section titled “Connect Twilio”Twilio needs your own Twilio account. Nuvioo stores the credentials encrypted.
Enter your credentials
Click Connect. In Configure Twilio Account, enter these from your Twilio Console, then click Next.
Field Where to find it Account SID Twilio Console home page. Starts with AC. Auth Token Twilio Console home page. Click Show to reveal it. API Key (SID) Twilio Console, API Keys. Starts with SK. Create a main key. API Secret Shown once when you create the key. Copy it right away. Choose a phone number
In Select Phone Number, pick a number already in your Twilio account and click Use This Number. To buy one, click Browse New Numbers, choose a number and click Purchase.
Local numbers need an A2P 10DLC Messaging Service with a verified campaign. Enter its Messaging Service SID (starts with MG) when asked. A toll-free number must be verified, and then needs a Messaging Service to turn on SMS.
After you connect, click Manage. The page shows a billing overview and your connected numbers with their SMS status. Click Settings for:
- Add Phone Number: add another number to an account.
- Edit API Credentials: update the keys. This can also update the Account SID and Auth Token. Keep the same Twilio account, or your existing numbers stop working.
- Add new account: connect another Twilio account.
To remove a number, click Remove Phone Number and choose a strategy:
| Strategy | What happens |
|---|---|
| Soft Disconnect (Keep Number) | Nuvioo clears the webhooks and stops using the number. The number stays in your Twilio account, and Twilio still bills you for it. |
| Release Number (Stop Billing) | The number goes back to Twilio and billing stops now. You can restore it within 10 days, and billing restarts. |
Connect an IMAP mailbox
Section titled “Connect an IMAP mailbox”Use this for a mailbox that doesn’t offer sign-in, such as Yahoo, iCloud or Zoho, or for Gmail with an app password.
Open the form
Click Connect. Connect a mailbox with IMAP opens.
Enter the mailbox
Enter the Mailbox address and, optionally, a From name. Under Quick fill, click Gmail, Yahoo, iCloud or Zoho to fill in the servers. Otherwise enter IMAP host, IMAP port (usually 993), SMTP host, SMTP port (587 or 465), Username and Password. Use an app password if your provider requires one. Leave Use SSL/TLS (recommended) ticked.
Test and connect
Click Test connection. When it says Connection looks good, click Connect.
Email with one of your existing contacts is added to that contact’s timeline. Mail from people who aren’t contacts is ignored. It isn’t logged later if you add them as a contact.
Click Manage to see your mailboxes. Click Connect another mailbox to add one, or Disconnect to remove one. Edit the From name in a mailbox’s row. A mailbox marked Receive only can log mail but can’t send.
Set up email forwarding
Section titled “Set up email forwarding”Forwarding needs no password. Click Connect to open your forwarding page. Nuvioo issues one address for you.
Copy your address
Under Forward to, copy your Nuvioo address.
Add a forwarding rule
In your mail provider, create a rule that forwards mail to that address. The page shows setup steps for common providers.
Wait for the first message
The row shows Waiting for first forwarded email until a message arrives.
Forwarding is receive-only. To change the address, click Rotate address and confirm. The old address stops working. There is no Disconnect. To stop logging, delete the forwarding rule in your mail provider.
Connect a webhook
Section titled “Connect a webhook”Use a webhook to send submissions from a form on another website, such as one built in Duda or Wix, to CRM.
Create the webhook form
Click Connect, enter a Form name and a Source (for example, duda or wix), then save.
Paste the URL
Click Copy link next to URL for the webhook and paste it into your form builder.
Each submission is saved. When it has First name, Last name, Email and Phone fields, CRM also finds or creates the contact by email and adds the submission to their timeline.
Click Manage to see your webhook forms with their Source, Status and number of Submissions. Click the pencil on a row to open the form with its URL and each submission. There, the pencil lets you rename the form or turn Active off. The bin on a row deletes the form. To add another, click Connect form.