

Inbox settings
Open the inbox and click Inbox Settings at the bottom of the views, or go to Inbox → settings. Use ← Back to inbox to return.
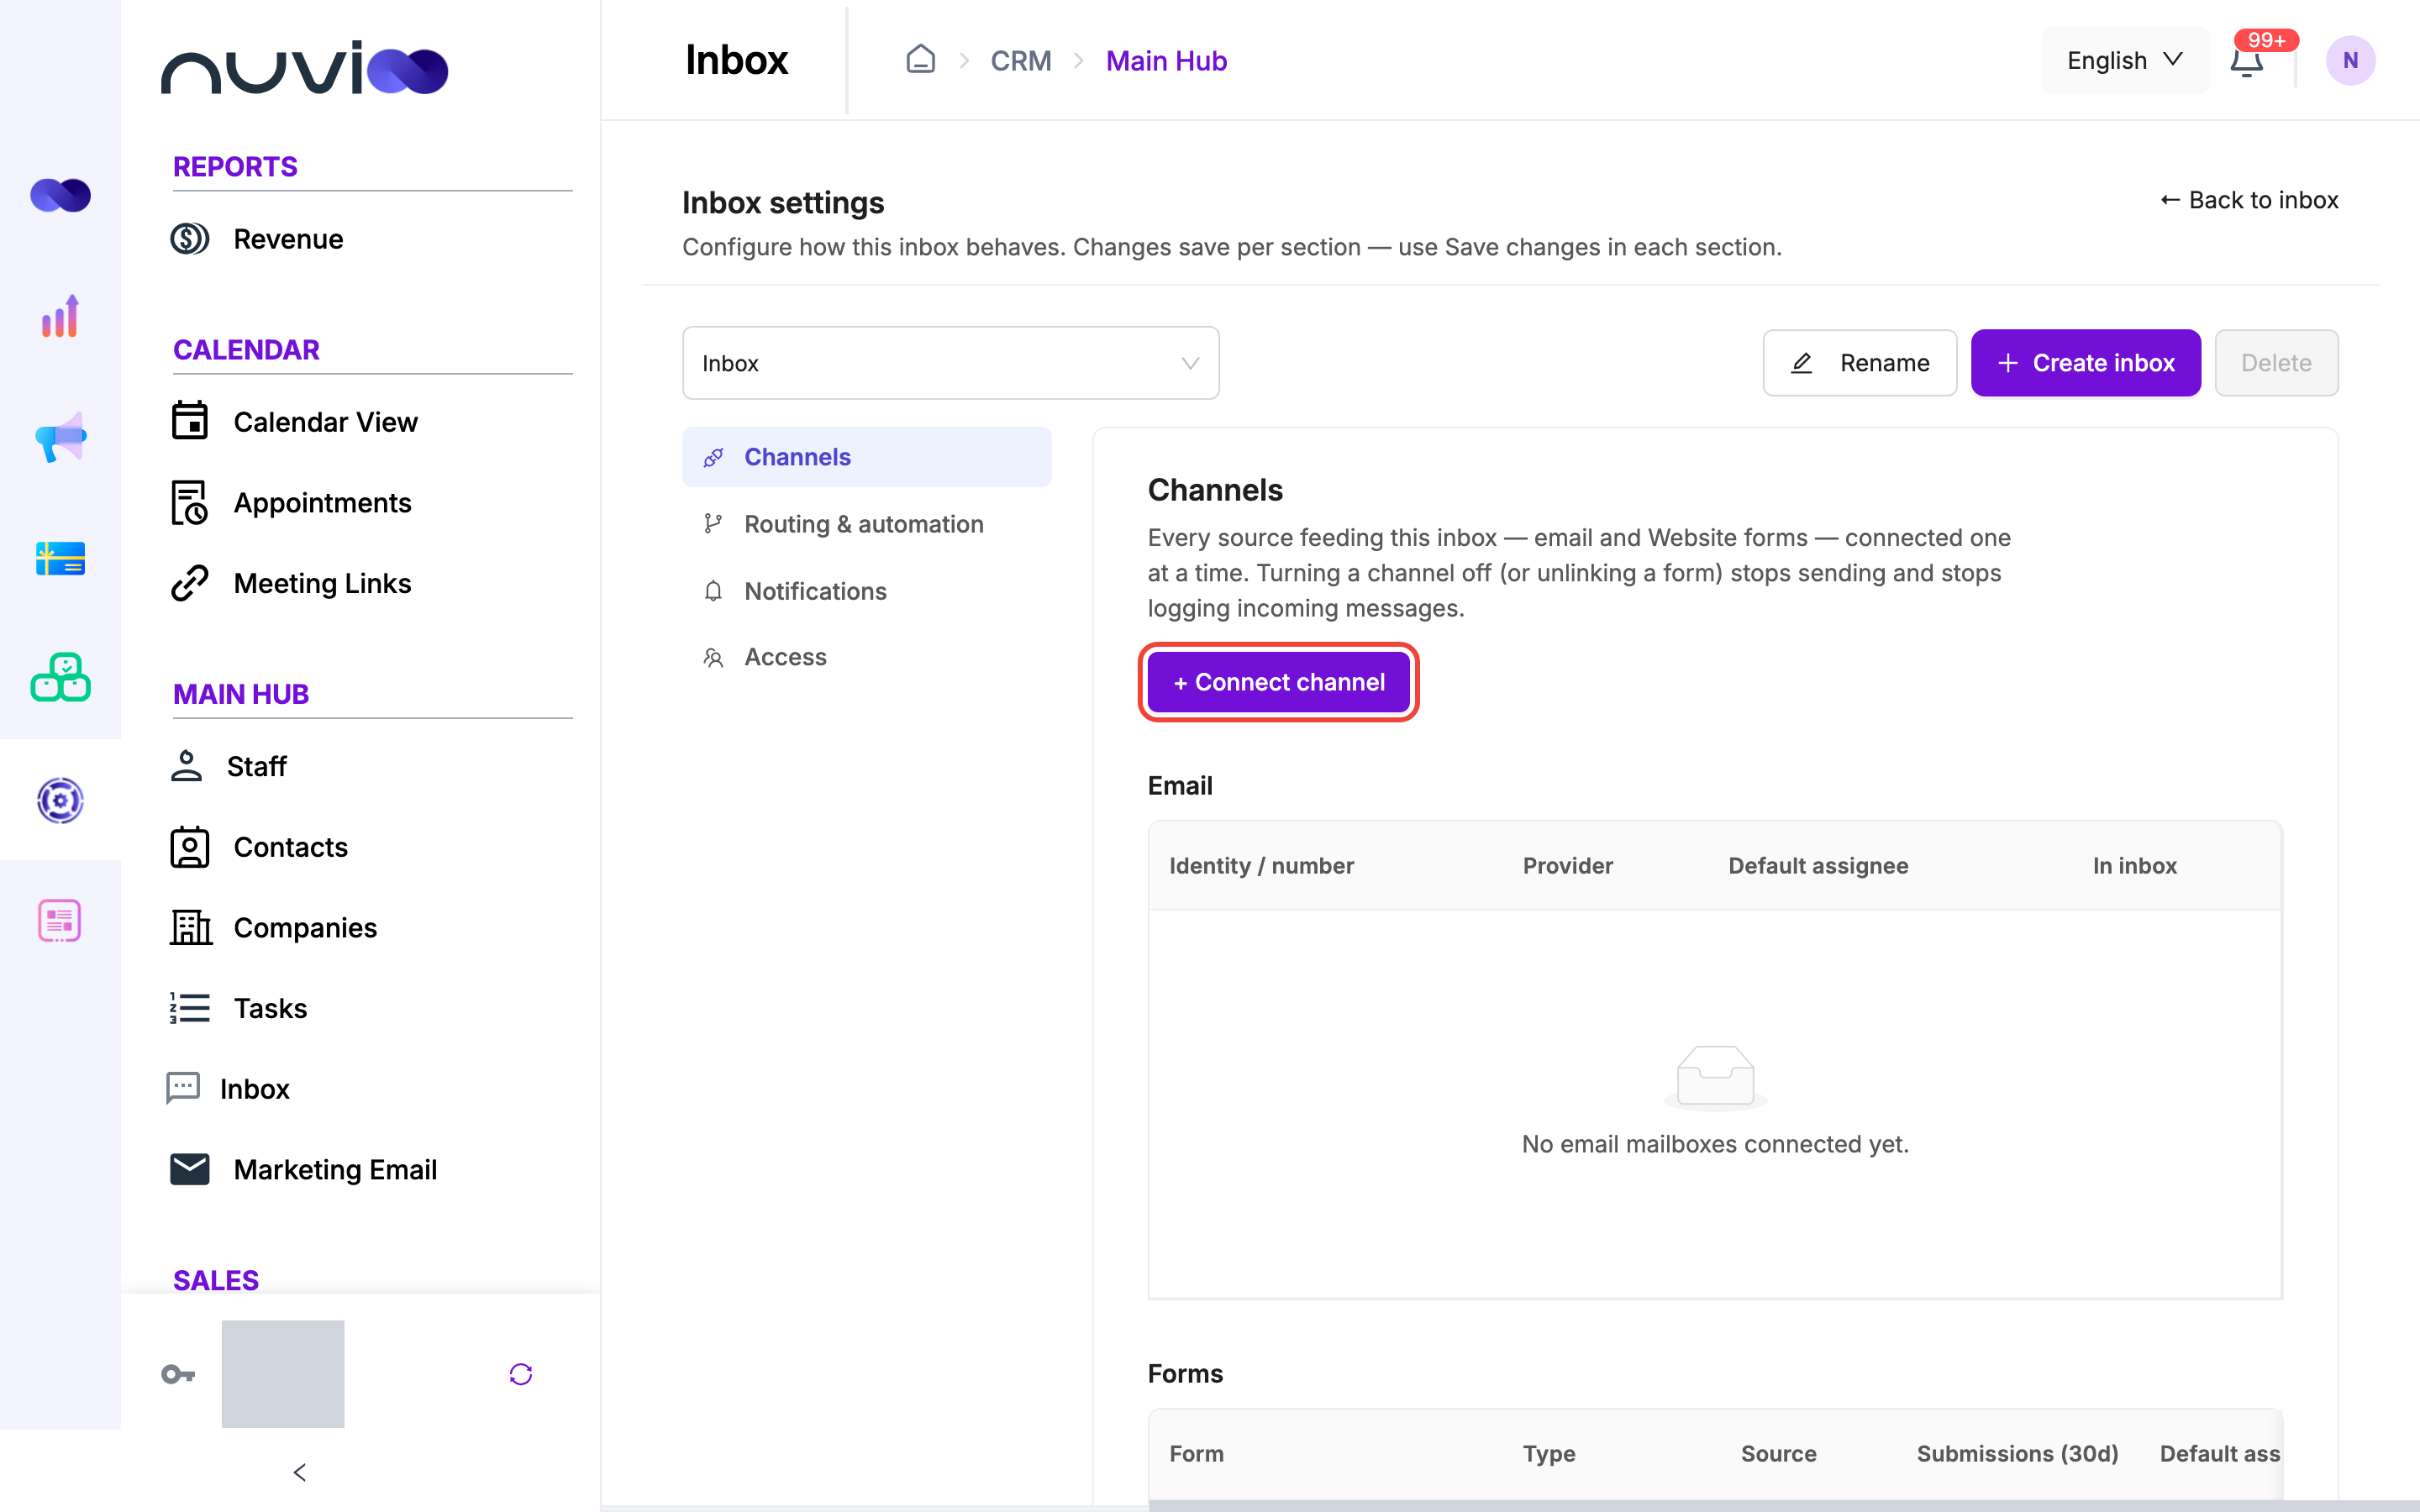
Every setting applies to one inbox. The picker at the top of the page chooses which inbox you are editing. The four sections on the left each save on their own, so click Save changes in the section you edited.
Create, rename and choose an inbox
Section titled “Create, rename and choose an inbox”| Control | What it does |
|---|---|
| Inbox picker | Chooses the inbox to configure. You can search by name. |
| Rename | Changes the inbox name (up to 255 characters). |
| Create inbox | Adds an inbox with a name and an access setting. |
| Delete | Is turned off. Deleting inboxes isn’t supported yet. |
Start
Click Create inbox.
Name it and set access
Enter an Inbox name, for example Sales or Support. Under Who can access this inbox?, choose Everyone on the team or Specific users. For Specific users, pick the Members. You are added automatically.
Create
Click Create inbox. The new inbox becomes the current one. It has no channels yet, so connect one next.
Channels
Section titled “Channels”Channels lists every source that feeds this inbox. Nothing is added automatically. Each row exists because someone connected it.
Turning a channel off, or unlinking a form, stops sending and stops logging new messages from it.
Connect a channel
Section titled “Connect a channel”Start
Under Channels, click + Connect channel.
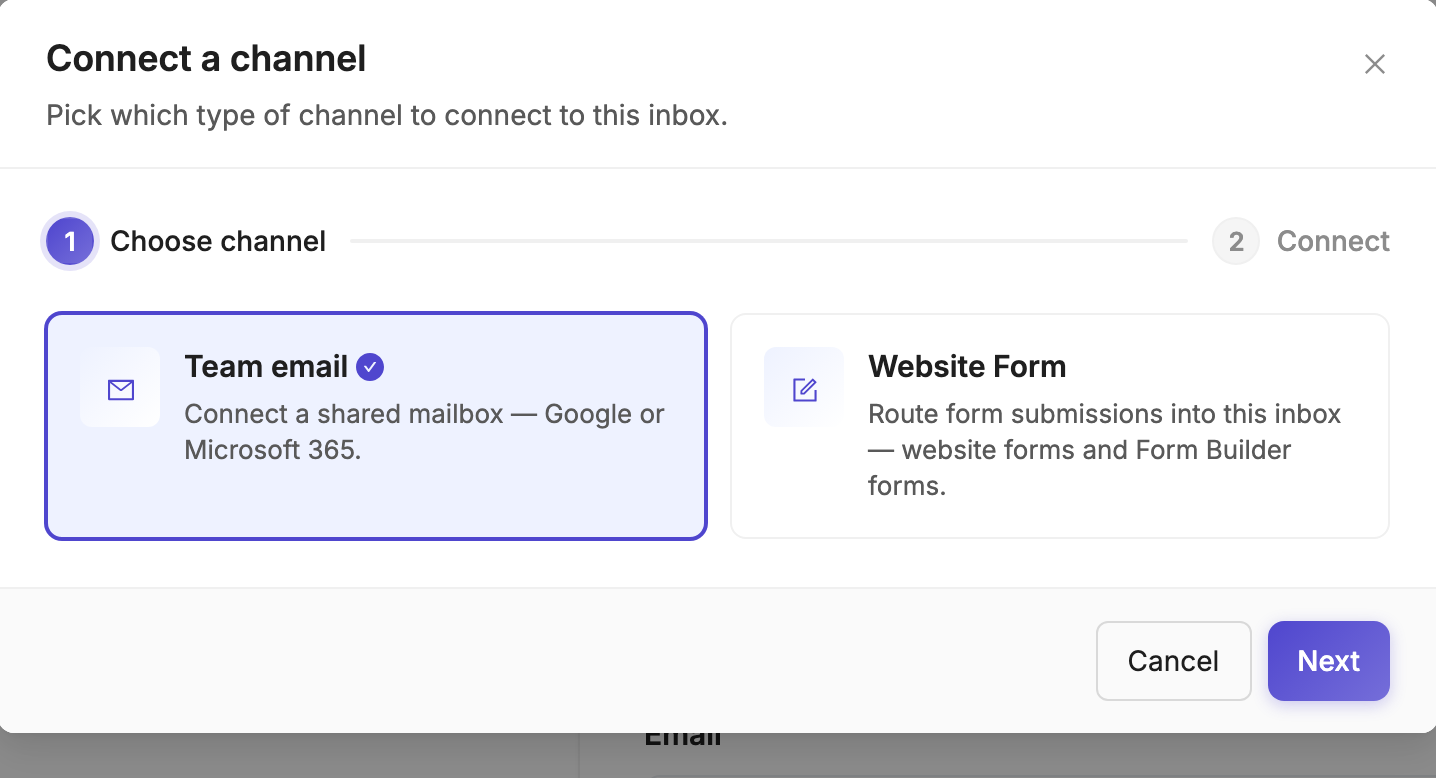
Choose the channel
- Team email: connect a shared mailbox.
- Website Form: route website form and Form Builder submissions into this inbox.
Click Next and follow the steps for that channel.
Connect team email
Section titled “Connect team email”Under Connect via, choose how to connect the mailbox.
| Option | What you need |
|---|---|
| Google Workspace (OAuth) | Sign in to Google and allow access. |
| Microsoft 365 (OAuth) | Sign in to Microsoft and allow access. |
| IMAP / SMTP (Gmail, Yahoo, iCloud, any) | The mailbox address and its IMAP and SMTP details. |
| Email forwarding (no password needed) | Access to your mail provider’s forwarding settings. |
The From name is what recipients see when your team replies. It is optional. It is hidden for forwarding unless forwarding can send replies.
Click Connect. You go to your provider to sign in and grant send access. When you return, the mailbox appears under Channels and you see Mailbox connected to this inbox.
If it fails, a red message explains why and offers Try again. Common causes:
- That email is already connected: the address is a personal email or a channel elsewhere. Disconnect it there first.
- Mailbox in use by another inbox: unlink it from the other inbox first.
- Your Microsoft admin must approve Nuvioo: your organization requires an administrator to approve access. Ask your IT admin, then try again.
- Access was not granted: accept the permissions and try again.
- Enter the Mailbox address.
- Use Quick fill to set the host and port for Gmail, Yahoo, iCloud or Zoho, or enter them yourself.
- Fill in IMAP host, IMAP port (usually 993), SMTP host, SMTP port (587 or 465), Username and Password. Use an app password if your provider requires one.
- Click Test connection. It checks Incoming (IMAP) and Outgoing (SMTP) and shows Connection looks good or which check failed.
- Click Connect.
- Enter the Mailbox address. This is your existing mailbox, the one you forward from.
- Pick Your email provider to see the exact menu path for it: Gmail (personal), Google Workspace / Google Groups, Outlook / Microsoft 365, Yahoo Mail or Other provider.
- Click Connect. Nuvioo creates a unique forwarding address for this inbox.
- In your mailbox, add that address as a forwarding address and turn on forwarding.
- Gmail, Google Workspace and Outlook email a confirmation code to the forwarding address. It shows on the channel row within a few seconds.
Messages are attributed to the original sender, not the forwarding mailbox. Attachments over 25 MB or beyond 20 files per message are dropped.
A forwarding channel is Receive-only unless your workspace can send from it. Then the row shows Sends & receives, and replies go out from a Nuvioo sending domain instead of your own. Reply from another connected team email if replies must come from your address.
How each email connection works
Section titled “How each email connection works”The four ways to connect a mailbox behave differently. Pick the one that fits how your customers write to you.
| Google Workspace | Microsoft 365 | IMAP / SMTP | Email forwarding | |
|---|---|---|---|---|
| Which emails come in | Replies in an email thread (messages that answer an earlier email) | Replies in an email thread | Emails with the mailbox in To | Every email you forward |
| How fast | Within seconds | Within seconds | Checked every 3 to 5 minutes | Within seconds |
| Your own replies sent from Gmail or Outlook | Logged in the conversation | Logged in the conversation | Not logged | Not logged |
| Replies from Nuvioo are sent from | Your mailbox | Your mailbox | Your mailbox, through your SMTP server | A Nuvioo sending address, or not at all (Receive-only) |
| What you need | Google sign-in | Microsoft sign-in (your admin may need to approve) | Server details and a password or app password | Access to forwarding settings |
With IMAP / SMTP, an email where the mailbox is only in Cc or Bcc is skipped.
What happens to each email
Section titled “What happens to each email”- One conversation per thread: replies stay in the same conversation, and a reply brings a conversation back from Trash.
- Contacts are created for you: everyone who emails a team mailbox becomes a contact, along with the other people on the email. Your own team addresses are skipped.
- Duplicates are dropped: the same email arriving twice in one conversation is only kept once.
- Blocked senders: new emails from a blocked sender don’t create a conversation.
Team mailboxes and personal mailboxes
Section titled “Team mailboxes and personal mailboxes”Only team mailboxes connected here feed the inbox. A mailbox someone connects for themselves under Integrations is personal: its emails are logged on the contact’s timeline, but they never appear in the inbox. One address can’t be both. To use an address as a team mailbox, disconnect it as a personal one first.
Connect a form
Section titled “Connect a form”Two kinds of form can feed an inbox:
| Type | What it is | Contact |
|---|---|---|
| Website form | A form on a website you built with Nuvioo Sites. | Nuvioo finds the contact by the mapped email, or creates one. |
| Form builder | A form made in Forms. | Created or updated by the form itself when Always create a contact for new email addresses is on. See Style & Settings. |
Each submission becomes its own conversation. When you link a form, its earlier submissions are added to the inbox too, oldest first. Linking it again later doesn’t add them twice.
Select the form
Choose Website Form, click Next, and search for a form. The list shows forms not yet linked, with their Type (Website form or Form builder), Source and Submissions (30d).
Map fields (website forms only)
Match your form’s submitted properties to contact fields: Email (required), First name, Last name, Phone and Job title. Email is used to find an existing contact or create one. You can’t connect a website form without it.
Form Builder forms skip this step because their fields already map to contact properties.
Set a default assignee and connect
Optionally choose a Default assignee for this form, then click Connect.
Manage connected channels
Section titled “Manage connected channels”Email channels show a table with these columns.
| Column | What it does |
|---|---|
| Identity / number | The mailbox address. Forwarding channels also show the address to forward to. |
| Provider | How the mailbox is connected. |
| Default assignee | Who new conversations from this mailbox go to. Leave it empty to leave them unassigned. |
| In inbox | Turns the channel on or off for this inbox. |
| From name | The sender name for replies. Saves when you leave the field or press Enter. |
| Rotate address | Forwarding only. Issues a new forwarding address. |
| Unlink | Removes the mailbox from this inbox. Linking it again means signing in again. |
The Forms table shows the same Default assignee and Submissions (30d) columns, plus these.
| Column | What it does |
|---|---|
| Type | Website form or Form builder. |
| Mapping | Edit mapping or Configure mapping for website forms. Form Builder forms show Not required. |
| Unlink | Stops creating inbox items from the form. The form keeps collecting submissions. |
A default assignee on a channel or form takes effect before automatic assignment. Conversations that arrive with an assignee are not reassigned.
Routing and automation
Section titled “Routing and automation”This section decides who gets new conversations.
| Setting | What it does |
|---|---|
| Automatically assign conversations | When off, new conversations stay unassigned for your team to pick up. When on, the rules below apply. |
| Assign to | The rule: Specific default assignee, Contact owner (falls back to default assignee) or Round-robin between inbox users. |
| Assignee or Default assignee | For Specific default assignee, every new conversation goes to this person, and you must choose one. For Contact owner, it is the fallback when the contact has no owner. Not used for round-robin. |
| Assign to available users only | Skips people who are away, offline or outside their working hours. If nobody is available, the conversation stays unassigned. |
| Hide spam-flagged form submissions from inbox | Marks Form Builder submissions that were flagged as spam as spam, so they go to Spam. It has no effect on website forms. |
Availability uses each person’s away status from the inbox, their working hours in Calendar settings, and whether they have the inbox open. Round-robin never picks someone who is away, even when Assign to available users only is off.
Notifications
Section titled “Notifications”| Setting | What it does |
|---|---|
| In-app notifications | Alerts a teammate in the app when a conversation is assigned to them. |
| Email notification for assigned items | Notifies the assignee when a conversation is routed to them. |
Both settings send the same assignment notification. It goes out when either one is on.
Access
Section titled “Access”Access decides who can see and work in this inbox.
- Everyone on the team: all active users.
- Specific users: only the members you add. Use Add members to search and add people, and the delete button to remove them. No members yet. shows when the list is empty.
Admins and owners can always see and manage every inbox. Other users can change access only if they can already use the inbox. Without permission, the controls are off and a tooltip says so. Click Save changes to apply.
If you save a Specific users inbox with no members, you are added as a member.
Back to the inbox: see Inbox.