

Booking an appointment (customer view)
When a customer opens your meeting link, they see your booking page. They don’t need to sign in. The page has two steps, shown as Step 1/2 and Step 2/2.
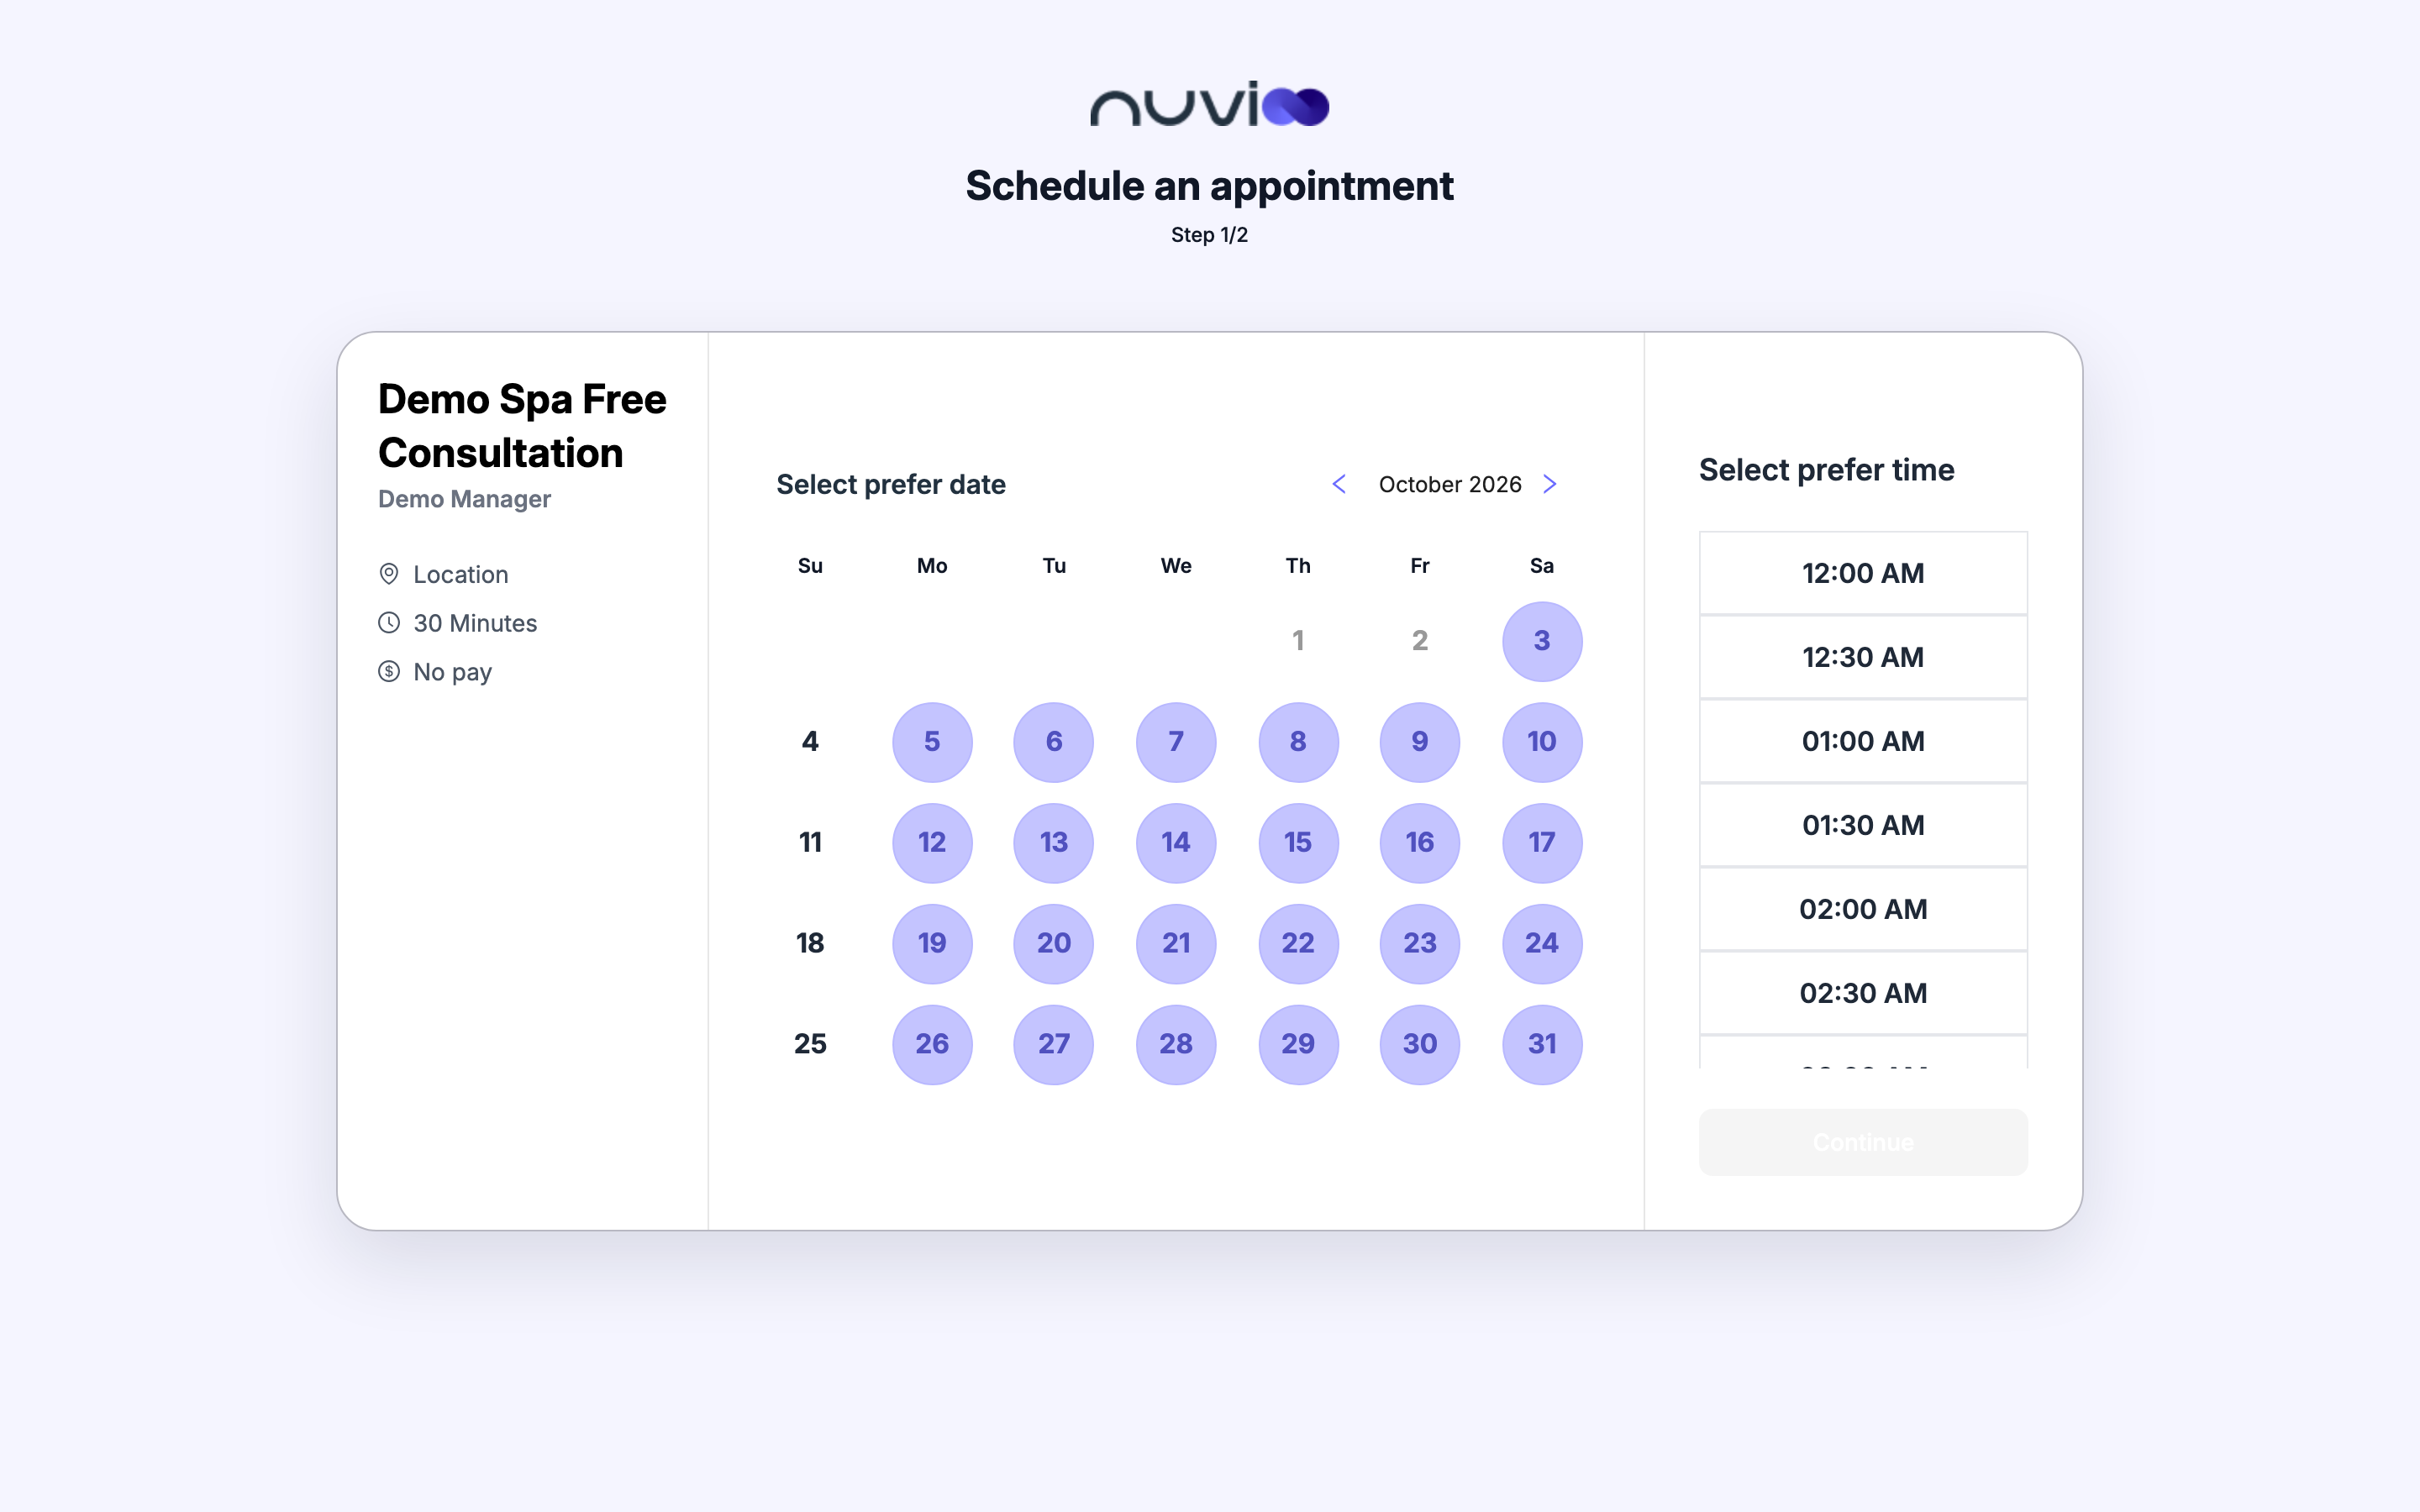
Step 1: choose a date and time
Section titled “Step 1: choose a date and time”The left side describes the booking:
- The title, the host names and the products.
- The location type: In person, Virtual, Phone call or Custom.
- The length, for example “30 Minutes”.
- The price and payment option: Pay full, Pay deposit (with the deposit amount), Pay later or No pay.
On the right, the customer picks a date, then a time.
Pick a date
Under Select prefer date, days with free times are highlighted. Past days, and days beyond your Limit future bookings setting, can’t be picked. The arrows move between months. The first day of the week follows your Business settings.
Pick a time
Under Select prefer time, the list shows only free start times. A time is missing if a host is outside their hours or already has an event. Today’s times start at least one hour from now. The times use the time format in your business settings.
Continue
Click Continue. It stays off until a date and time are chosen. If you preselected a date and time on the link, they are already picked.
Step 2: enter details and confirm
Section titled “Step 2: enter details and confirm”The customer sees Appointment details with the title, time, price and location. Under Enter your details, they fill in:
| Field | Required | Notes |
|---|---|---|
| First name | Yes | |
| Last name | Yes | |
| Yes | The confirmation goes here. | |
| Phone number | Yes | Format (000)-000-0000. |
| Company | No | |
| Description | No | Anything to share before the appointment. |
| Add guests | No | Shown only if you allowed guests. The customer adds guest emails, up to your limit, and sees “Invite up to N guests to this appointment.” |
If the booking is paid upfront, a Summary lists the products, Subtotal, Tax and Total. For a deposit it also shows the Deposit and the Outstanding balance.
The customer clicks Schedule appointment.
- For No pay and Pay later, the booking is made straight away.
- For Pay full and Pay deposit, a payment window opens. The booking is confirmed after the customer pays.
- If the time was taken in the meantime, or the host isn’t available, the page shows an error and the customer picks another time.
The customer then sees You have successfully booked your appointment! with a summary of the title, time, price and location. For a phone call, it shows the phone number and who calls whom. The page says A calendar invite and invoice has been emailed to you.
What happens in Nuvioo
Section titled “What happens in Nuvioo”- The customer, any guests and the host get a confirmation email with a calendar invite. For paid bookings it comes after payment.
- The appointment appears in your Appointments and on the calendar.
- Nuvioo creates a contact for the customer. If a contact with the same email exists, Nuvioo updates its name and phone number, and sets its company to the one the customer entered.
Reschedule or cancel
Section titled “Reschedule or cancel”If you ticked Allow attendees to cancel or reschedule this appointment? on the meeting link, the confirmation email has a reschedule link and a cancel link.
Open the link
A reschedule link opens the booking page with the Former time shown on the left. A cancel link opens Cancel appointment.
Choose a new time (reschedule only)
The customer picks a date, clicks a start time and then an end time, and clicks Continue.
Confirm
The customer enters their Email, which must match the one on the appointment, and a Reason for change (or Reason for cancellation). Both are required. A reschedule also has an optional Description. They click Reschedule appointment or Cancel appointment.
The customer sees You have successfully rescheduled your appointment! or You have successfully cancelled your appointment!. If the customer already paid, they’re asked to confirm first. If the new time clashes with the host’s hours or calendar, they’re asked to confirm or pick another time.
Pay for an appointment you scheduled
Section titled “Pay for an appointment you scheduled”For an appointment you scheduled yourself with a payment due, the confirmation email has a payment link. It opens the same details page, already filled in and locked. The customer can add guests if you allowed them, then clicks Schedule appointment and pays.