

Calendar settings
In the sidebar, under Settings, click Calendar settings. Each tab has its own settings. Change a tab, then click Save at the bottom. Reset clears the form on that tab. It doesn’t undo a save you already made. Save and Reset are hidden if your role can’t edit calendar settings.
Most settings belong to you. Your teammates set their own working hours and connect their own calendars.
General availability
Section titled “General availability”Set your Time zone and the Working hours for each day.
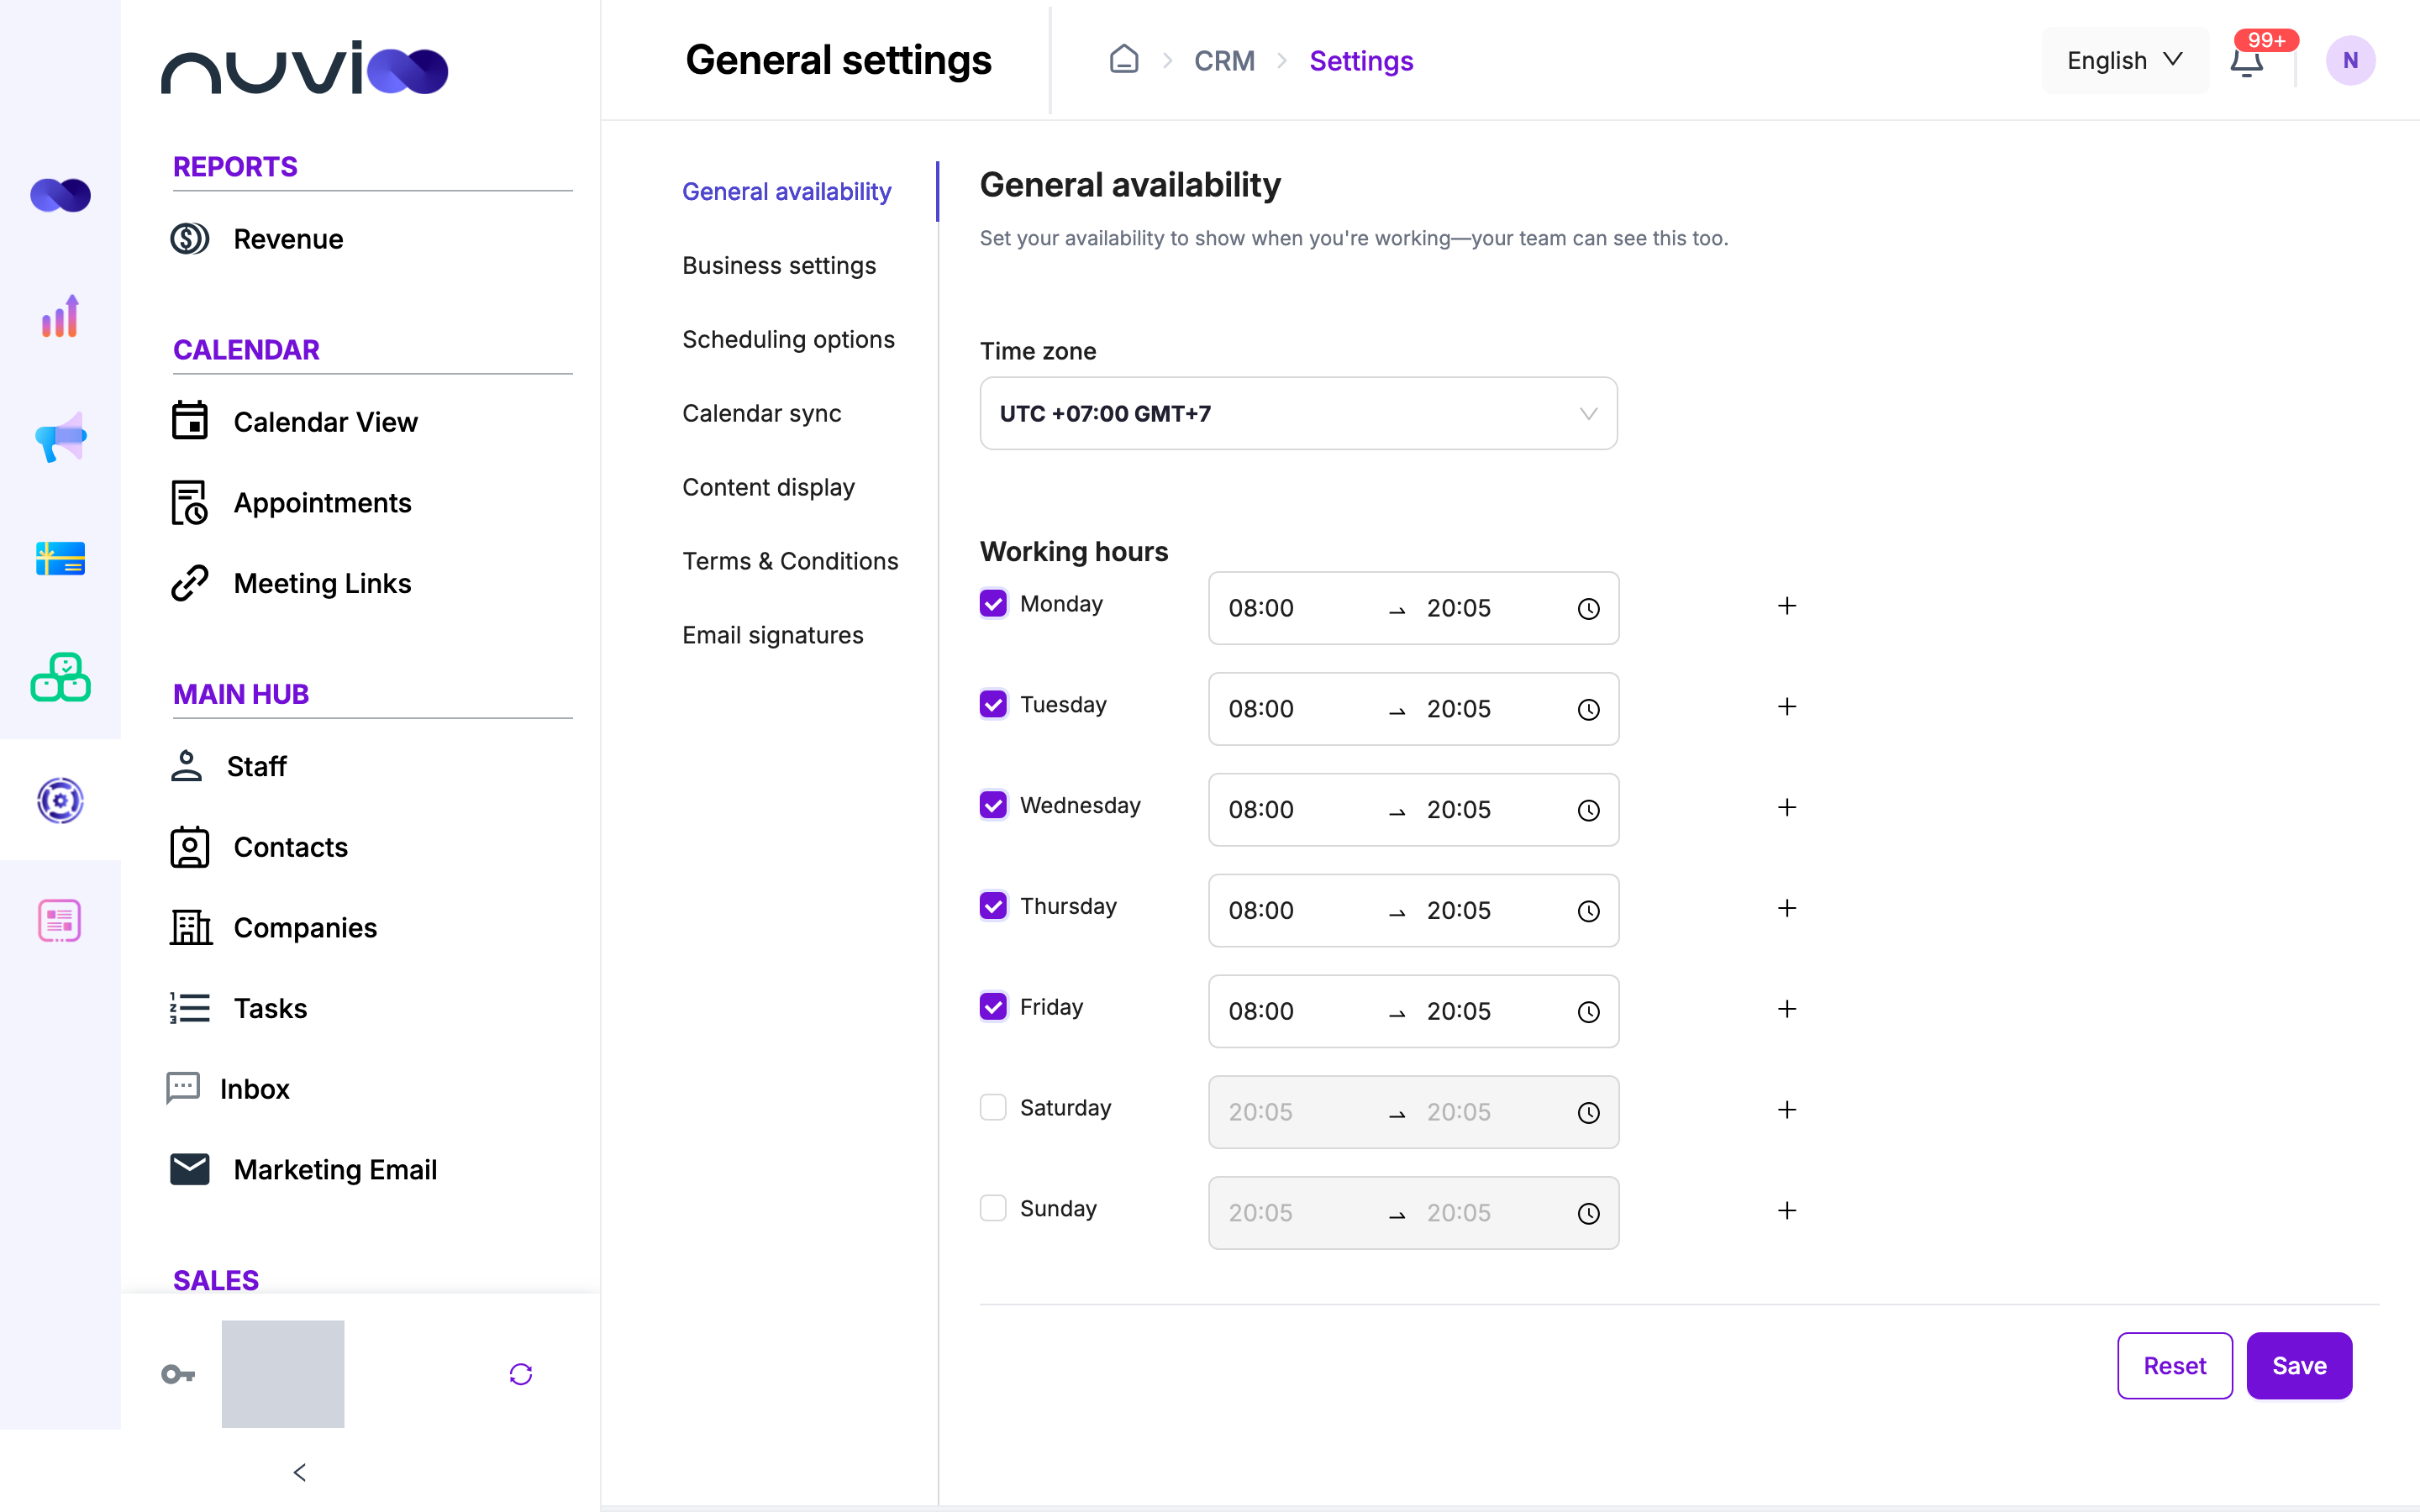
Choose your time zone
Pick it from Time zone. Type to search the list. It’s required.
Set your hours
Tick each day you work, then set the start and end time. Click + to add a second range on the same day, for example a split shift. Click x to remove a range. A range can’t overlap the one before it.
Save
Click Save. You see Update success.
Working hours decide when you can be booked:
- The calendar greys out time outside them.
- Scheduling an appointment outside them shows a staff conflict warning.
- A new meeting link starts with the hours of the staff you pick, and customers only see times inside them.
If an existing appointment falls outside your new hours, a dialog says One appointment fall outside the new working hours. The appointment stays. Click Proceed to save the new hours anyway.
Business settings
Section titled “Business settings”These settings shape the whole team’s calendar and your customers’ booking pages.
| Setting | What it does |
|---|---|
| Time format | 12 hours (AM/PM) or 24 hours. Applies to time pickers, the calendar and booking pages. |
| Week starts on | Saturday, Sunday or Monday. Sets the first day of week and month views and booking calendars. |
| Time zone | The business time zone. |
| Meeting channel | The business’s meeting addresses. Click Add new meeting channel. |
| Add your business phone number | Business phone numbers for phone call appointments. |
Time format, week start and time zone are all required.
Scheduling options
Section titled “Scheduling options”These are your own meeting channels. Staff pick them as the Address or Phone number on an appointment. See Location and video.
- Tick Use the company default meeting channel and contact information to use the business settings above.
- Under Meeting channel, click Add address. Enter an Address name, Street address, Apt, suite, etc, Country, State/Province, City and Zip/Postal code, then click Save location.
- Under Add your business phone number, click Add phone number. Enter a Phone number label and a Phone number, then click Save phone number.
Calendar sync
Section titled “Calendar sync”Connect Google or Outlook calendars so Nuvioo can avoid double-booking you and add your appointments to your own calendar.
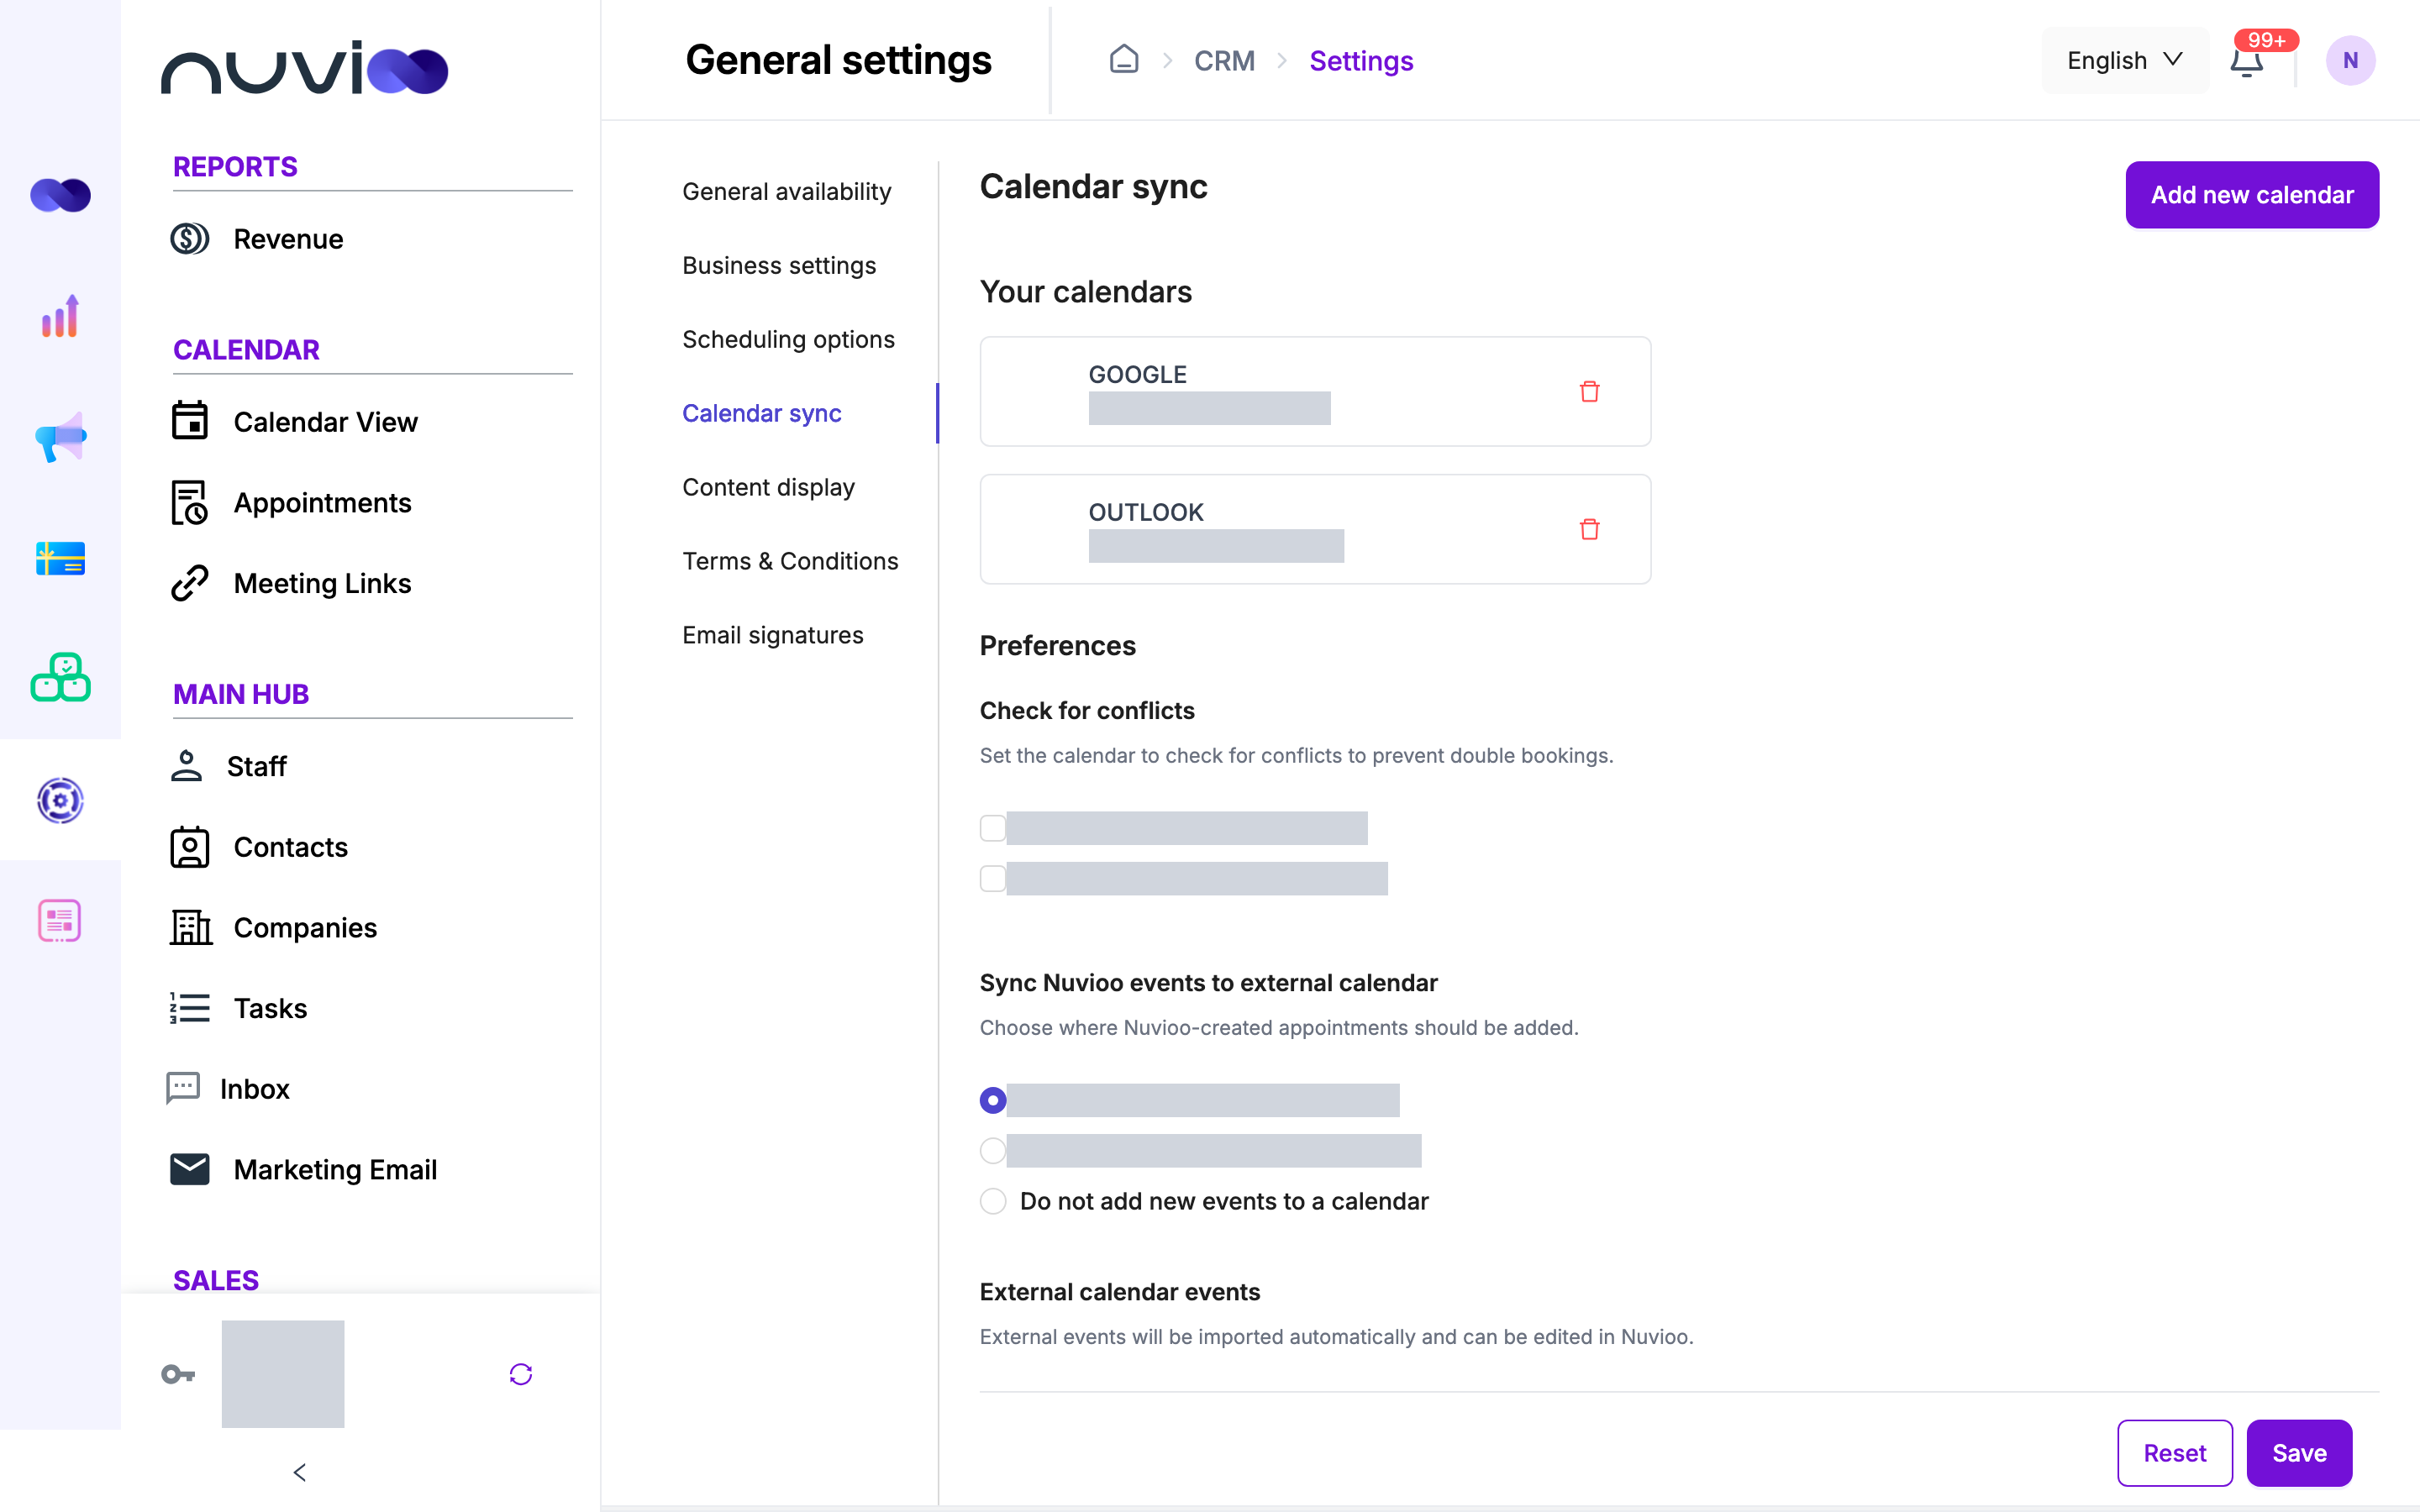
Connect a calendar
Section titled “Connect a calendar”Add a calendar
On the Calendar sync tab, click Add new calendar. The button shows only if your role can edit calendar settings.
Choose Google or Outlook
Click Connect next to Google Calendar (Gmail, G Suite) or Outlook Calendar (Office 365, Outlook.com, live.com or hotmail).
Sign in and allow access
You go to Google or Microsoft in the same browser tab. Sign in and allow access. You return to Nuvioo, and the calendar appears under Your calendars.
You do this yourself. Nuvioo can’t connect a calendar for you. To disconnect one, click the delete icon next to it and confirm with Delete.
If Google access expires or is revoked, the calendar shows Reconnect required. It is left out of the preferences below until you reconnect it with Reconnect Google Calendar on the calendar.
Choose what sync does
Section titled “Choose what sync does”Once a calendar is connected, Preferences appear:
- Check for conflicts: tick the calendars Nuvioo should check so you aren’t double-booked. A time that overlaps an event there triggers a conflict warning.
- Sync Nuvioo events to external calendar: choose the one calendar where new appointments are added, or Do not add new events to a calendar.
Click Save. Events from your connected calendars are imported automatically and show on your Nuvioo calendar. You can edit them there.
Content display
Section titled “Content display”Choose Time slot increments for the calendar: 5 minutes, 10 minutes, 15 minutes, 30 minutes or 1 hour. It’s required.
Other tabs
Section titled “Other tabs”- Terms & Conditions sets the default notes, terms and contact text copied into every new invoice, quote and subscription invoice. Existing documents don’t change.
- Email signatures lets you create reusable signatures. Save and Reset stay available on this tab even if your role can’t edit calendar settings.