

Inbox
The inbox brings customer messages from your connected channels into one place: team email, website forms and Form Builder forms. Your team can reply, assign, comment internally and close conversations.
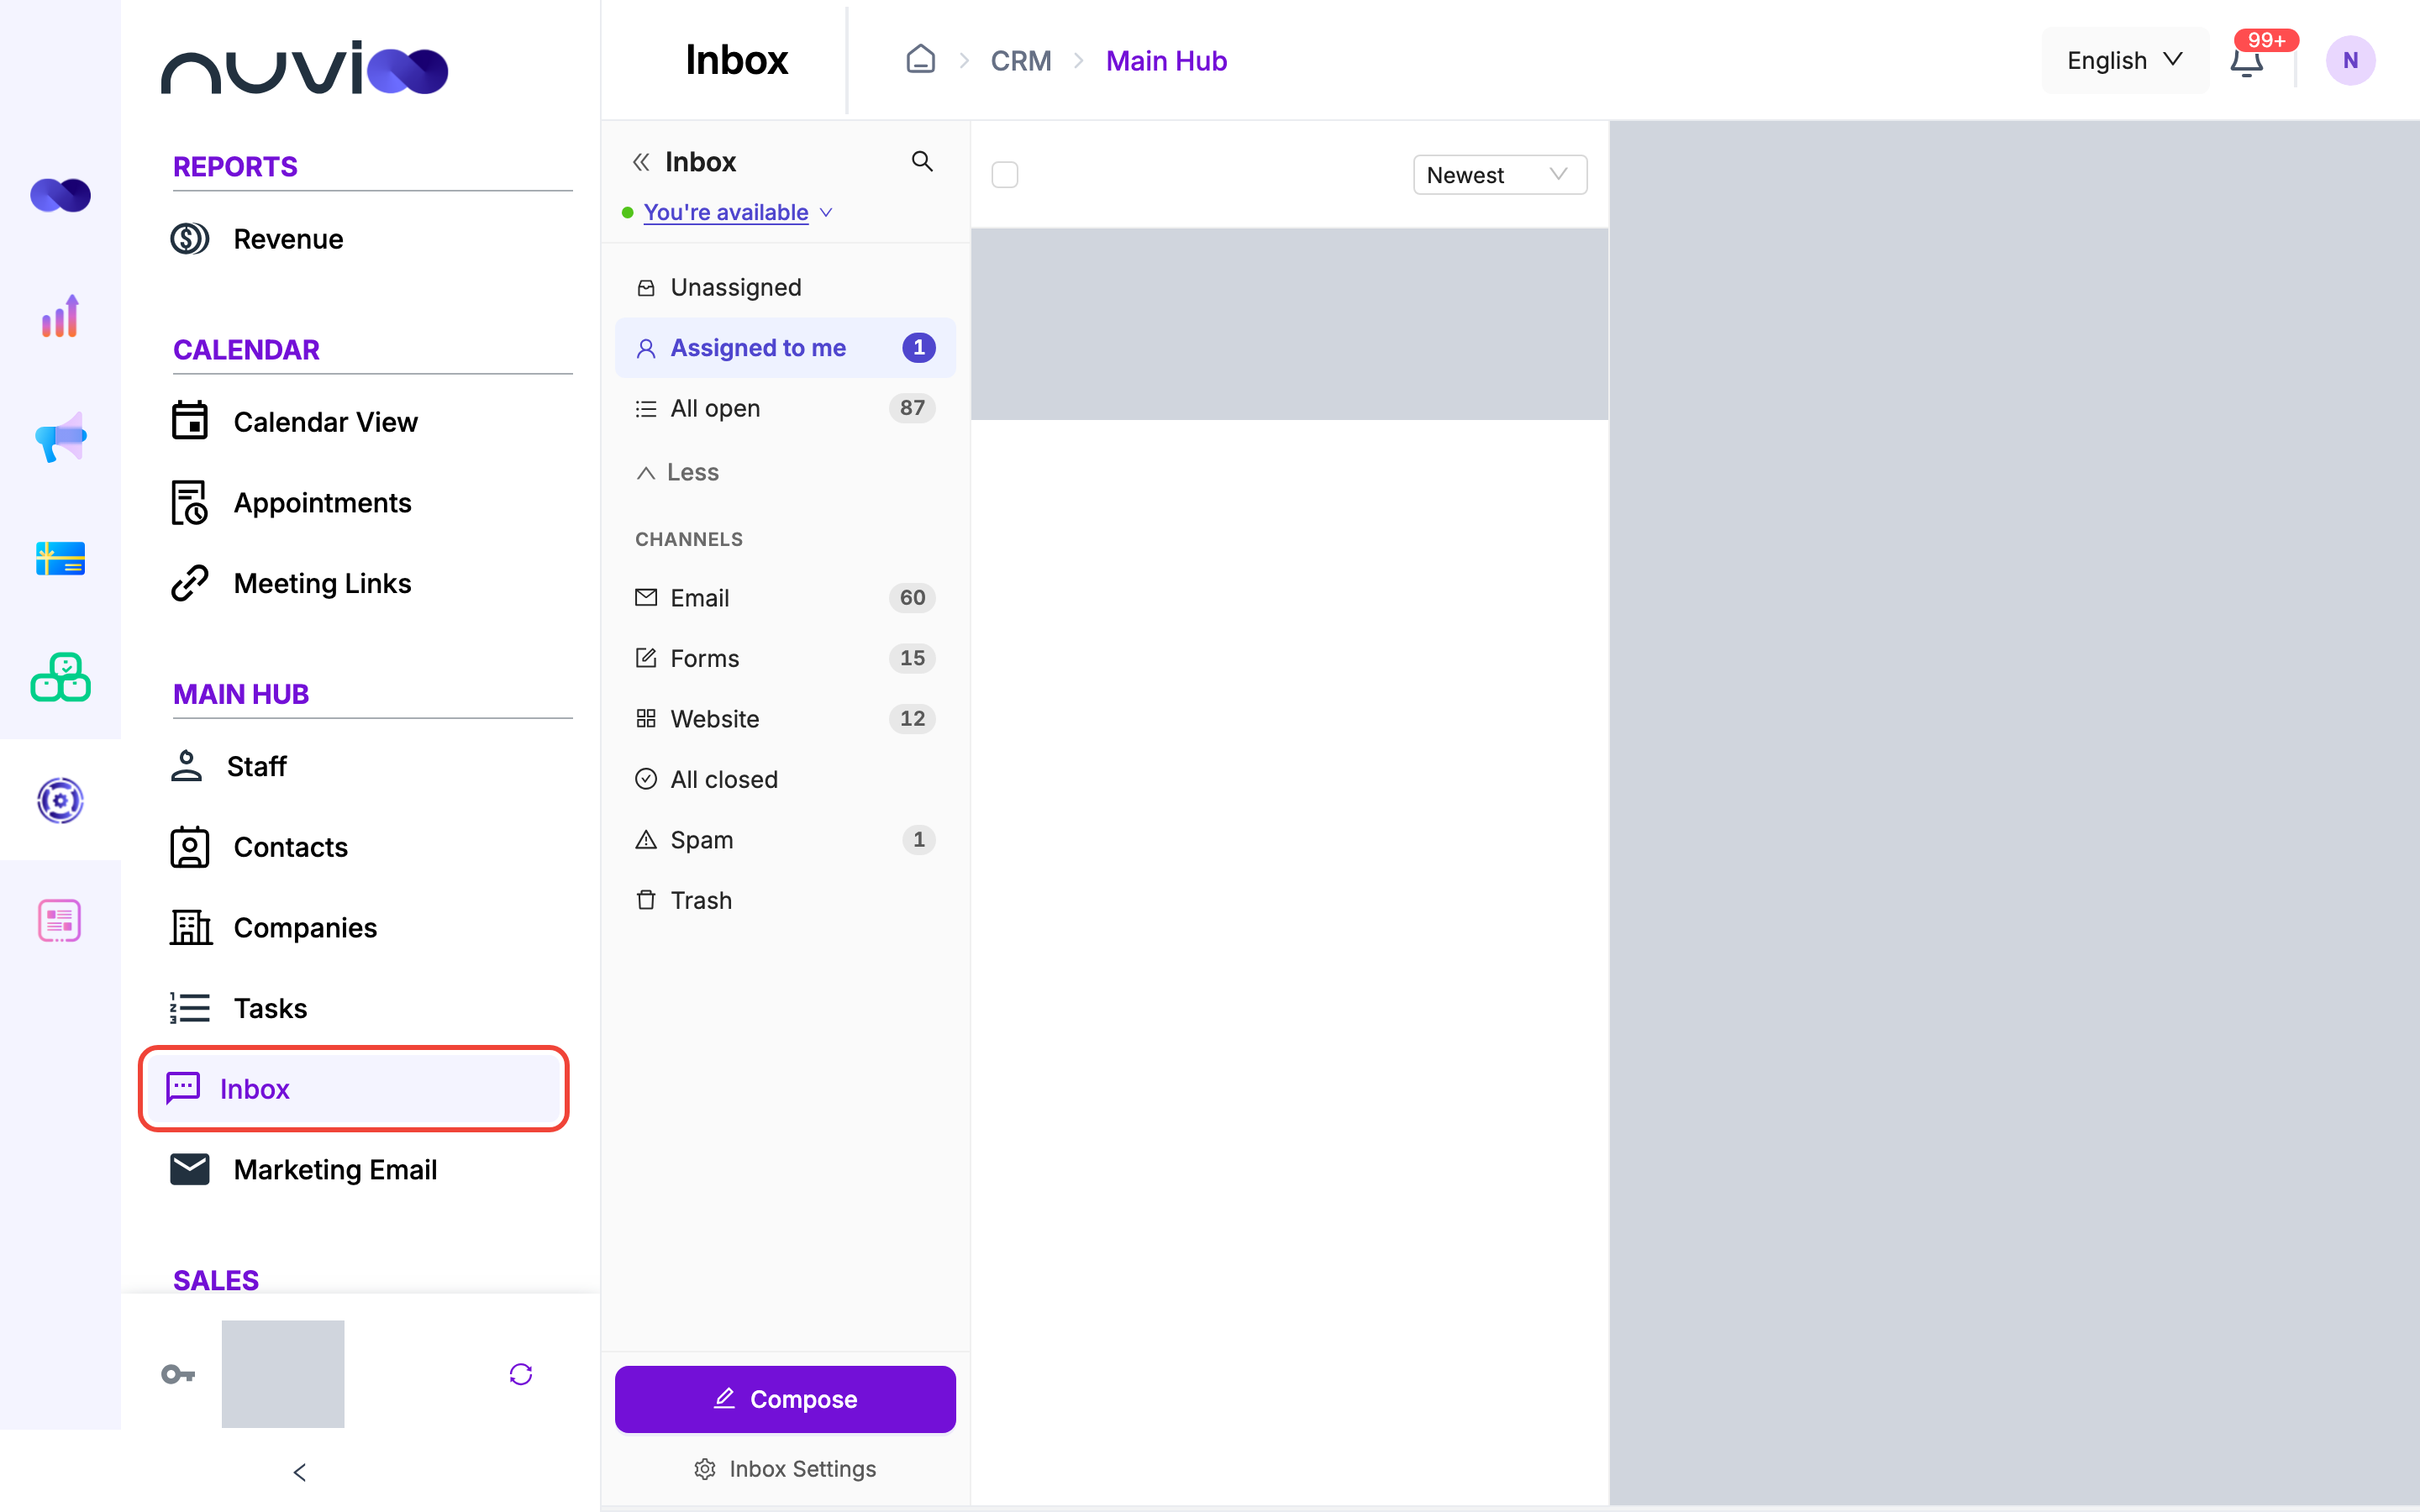
The screen has up to four panes, from left to right:
- Views: the list of views, the inbox name and your availability.
- Conversation list: the conversations in the selected view.
- Conversation: the messages, the owner and the reply box.
- Contact details: the person behind the conversation. It is hidden until you open it.
Messages only appear here after you connect a channel. See Inbox settings.
Where conversations come from
Section titled “Where conversations come from”| Channel | What starts a conversation | Contact |
|---|---|---|
| Team email (Google Workspace, Microsoft 365, IMAP or forwarding) | An email to a connected team mailbox. Replies join the same conversation. With Google Workspace and Microsoft 365, only replies to earlier emails come in. See How each email connection works. | Created automatically for the sender and the other people on the email. |
| Website form | A submission on a form from your Nuvioo website. | Found by email or phone number, or created from the mapped fields. |
| Form builder | A submission on a form made in Forms. | Linked when the form creates contacts. |
Emails in a personal mailbox connected under Integrations don’t appear here. They show on the contact’s timeline instead.
Switch inbox
Section titled “Switch inbox”The inbox name sits at the top of the Views pane. If your account has more than one inbox, click the name to switch. Choose Create inbox at the bottom of the list to add one.
You only see inboxes you can access. An admin controls this under Access in Inbox settings.
Find conversations
Section titled “Find conversations”| View | Shows |
|---|---|
| Unassigned | Open conversations with no owner. |
| Assigned to me | Open conversations you own. |
| All open | Every open conversation. |
| Open conversations from a connected team mailbox. | |
| Forms | Open Form Builder submissions. |
| Website | Open website form submissions. |
| All closed | Closed conversations. |
| Spam | Conversations marked as spam. |
| Trash | Conversations you moved to trash. |
Each open view shows a count of conversations. Click Less to hide the channel views and More to show them again. Use the arrows at the top of the pane to collapse it to icons.
Read the list
Section titled “Read the list”Each row shows the contact, the subject, a preview, the time of the last message, and the owner (or Unassigned). A dot marks a conversation you haven’t read. A conversation turns read when you open it. Small labels mark Closed, Spam and Blocked conversations. The icon on the left shows the channel.
Use the menu at the top of the list to sort by Newest or Oldest.
Search and filter
Section titled “Search and filter”Start a search
Click the search icon next to the inbox name. The Views pane changes to a filter panel.
Search by text
Type in the search box above the list. It starts with Search and the inbox name. It searches the conversation text and the contact’s name, email and phone number.
Add filters
Under Filter by:, set any of these. Searches stay inside the view you came from.
Filter Options Status Open, Closed or All. Channel Account A connected mailbox or form. Contact One contact. Assignee Anyone, Me, Unassigned or a teammate. Date A From and To date. Leave search
Click Clear all to reset the filters, or Exit search to go back to the views.
Work on a conversation
Section titled “Work on a conversation”Click a conversation to open it. The header shows the subject, the contact and when the conversation was created. Click the contact’s name to open their record.
Read the messages
Section titled “Read the messages”Messages are grouped by day, oldest at the top, and the thread starts with Conversation started. Each message shows the sender, how long ago it arrived and a channel label such as Email.
- Message details: hover over the arrow next to the time to see From, To, Subject and Date. Click the copy button next to a value to copy it.
- Status: a tag shows the message’s status, for example sent, received, queued or failed.
- Delivery problems: when a reply could not be delivered, There was an issue sending this email. shows under it. Check the address and send again.
- Attachments: files on a message are listed under it. Click one to open or download it.
Assign an owner
Section titled “Assign an owner”Under the header, the Owner control shows who handles the conversation. Click it to search for a teammate and pick them. Your own name is listed first. Click Unassign to remove the owner.
The new owner gets a notification if notifications are turned on. See Inbox settings.
You can also assign conversations automatically. See Routing and automation.
Close, reopen and delete
Section titled “Close, reopen and delete”| Button | What it does |
|---|---|
| Close conversation | Moves the conversation to All closed. |
| Reopen conversation | Moves a closed conversation back to the open views. |
| Move to trash | Moves it to Trash. |
| Restore | In Trash, puts the conversation back. |
| Delete forever | In Trash, removes the conversation for good, after you confirm. You can’t undo it. |
A conversation in Trash comes back to its normal views when a new message arrives in it.
Spam and blocked senders
Section titled “Spam and blocked senders”Open the … menu in the header.
- Mark as spam closes the conversation and moves it to Spam. Unmark spam removes the flag. The conversation stays closed until you click Reopen conversation.
- Block sender stops that email address or phone number from starting new conversations in this inbox. Their new messages are dropped, not sent to Spam. Replies in a conversation that already exists still arrive. The block applies to this inbox only, and the conversation shows a Blocked label. Unblock sender lifts it.
Click the i button next to the … menu to show or hide the contact details pane.
Act on several conversations
Section titled “Act on several conversations”Tick the checkbox on a row (it replaces the channel icon when you hover), or tick the box above the list to select every loaded conversation. A bar replaces the conversation header with Close conversation (or Reopen conversation in All closed), Move to trash (or Delete forever in Trash) and Mark as spam in the … menu. Clear the box above the list to leave selection mode.
Reply by email
Section titled “Reply by email”The box under the conversation has two tabs: Email and Comment. The Email tab appears only when this inbox has a team mailbox that can send, and the conversation has an email address to reply to. Otherwise a message explains why, and only Comment is available.
Check the recipients
To is filled in with the latest sender or the contact’s email. Replace it, or add more people. Click Cc or Bcc to add those fields. Enter a name or an email address, or pick a contact.
Choose the sender or subject (optional)
Click the ⋮ button next to To to show From and Subject. From lists only the team mailboxes of this inbox, not personal mailboxes. If you don’t pick one, the inbox’s default team mailbox sends the email. A mailbox connected by forwarding sends from a Nuvioo sending address, so pick another team mailbox if the reply must come from your own address.
Write the message
Use the rich-text editor. Your email signature is added automatically when you have one. Create or change it in Calendar settings under Email signatures. Click … under the editor to show or hide the quoted earlier message. The quote is always sent with your reply.
Attach files
Click the paperclip. You can attach up to 5 files of up to 10 MB each.
Send
Click Send. The button stays off until there is a message and at least one recipient in To.
If an email fails to deliver, the message shows There was an issue sending this email.
Resize the box by dragging its top edge. Use the minus button to collapse it and the expand button to make it fullscreen.
Reply to or forward one message
Section titled “Reply to or forward one message”Hover over a message and click its … button.
| Action | What it does |
|---|---|
| Reply | Opens Email with that message quoted. |
| Forward | Opens Email with the message in the body, clears To and sets the subject to Fwd: followed by the original subject. |
| Copy link | Copies a link to that message. |
Forward and reply are only available when the Email tab is available.
Add an internal comment
Section titled “Add an internal comment”Use the Comment tab to leave a note for your team. The note is never sent to the contact.
- Click Comment.
- Type your note. Type @ and a teammate’s name to mention them. Mentioned teammates get a notification.
- Click Add comment.
Comments appear in the conversation thread. Hover over a comment and click … for Copy text, Pin (or Unpin) and Delete. Deleting asks you to confirm and can’t be undone.
Start a new conversation
Section titled “Start a new conversation”Open Compose
Click Compose at the bottom of the Views pane.
Fill in the email
In New conversation, enter To (required). Click Cc or Bcc to add those fields. From groups your senders as team and personal mailboxes. Enter a Subject (it can be empty) and write the Message, which is required. You can attach files.
Send
Click Send. You see Conversation started and the new conversation opens.
Form submissions
Section titled “Form submissions”A form conversation starts with the submitted answers, shown as a card in the thread, with any uploaded files. You can reply by email when the submission includes an email address. If it doesn’t, you see No email in this submission — replies unavailable. Add an internal comment instead.
Contact details
Section titled “Contact details”Open the contact details pane with the i button in the conversation header. It shows:
- Contact: the name, a CRM linked or Not in CRM label, and Open contact.
- The contact’s properties, such as email, phone number and owner, and their companies.
- Their deals, quotes and invoices, when they have any.
- Form: the form and the submission time, for form conversations.
- Past conversations: earlier conversations with the same contact. Click one to open it.
For a form conversation with a contact who isn’t in the CRM yet, you can add them:
- Create contact from submitted data creates the contact when the submission has an email address.
- Map fields & create contact appears when no email could be read. Match the submitted fields to contact properties, then create the contact.
New messages arrive without a refresh. When a form submission or email matches an existing contact by email or phone number, the conversation links to that contact automatically.
Show or hide yourself as available
Section titled “Show or hide yourself as available”The status under the inbox name (for example You’re available) controls whether new conversations can be routed to you. Click it to switch between You’re available and You’re away.
The status is only used when automatic assignment is on. See Routing and automation.
To connect mailboxes and forms, see Inbox settings. To link the people you talk to, see Contacts.