

Create a form
Forms collect information from your website visitors, such as contact requests or newsletter sign-ups. Each submission can create or update a contact in CRM.
Create the form
Section titled “Create the form”Name it and pick a template
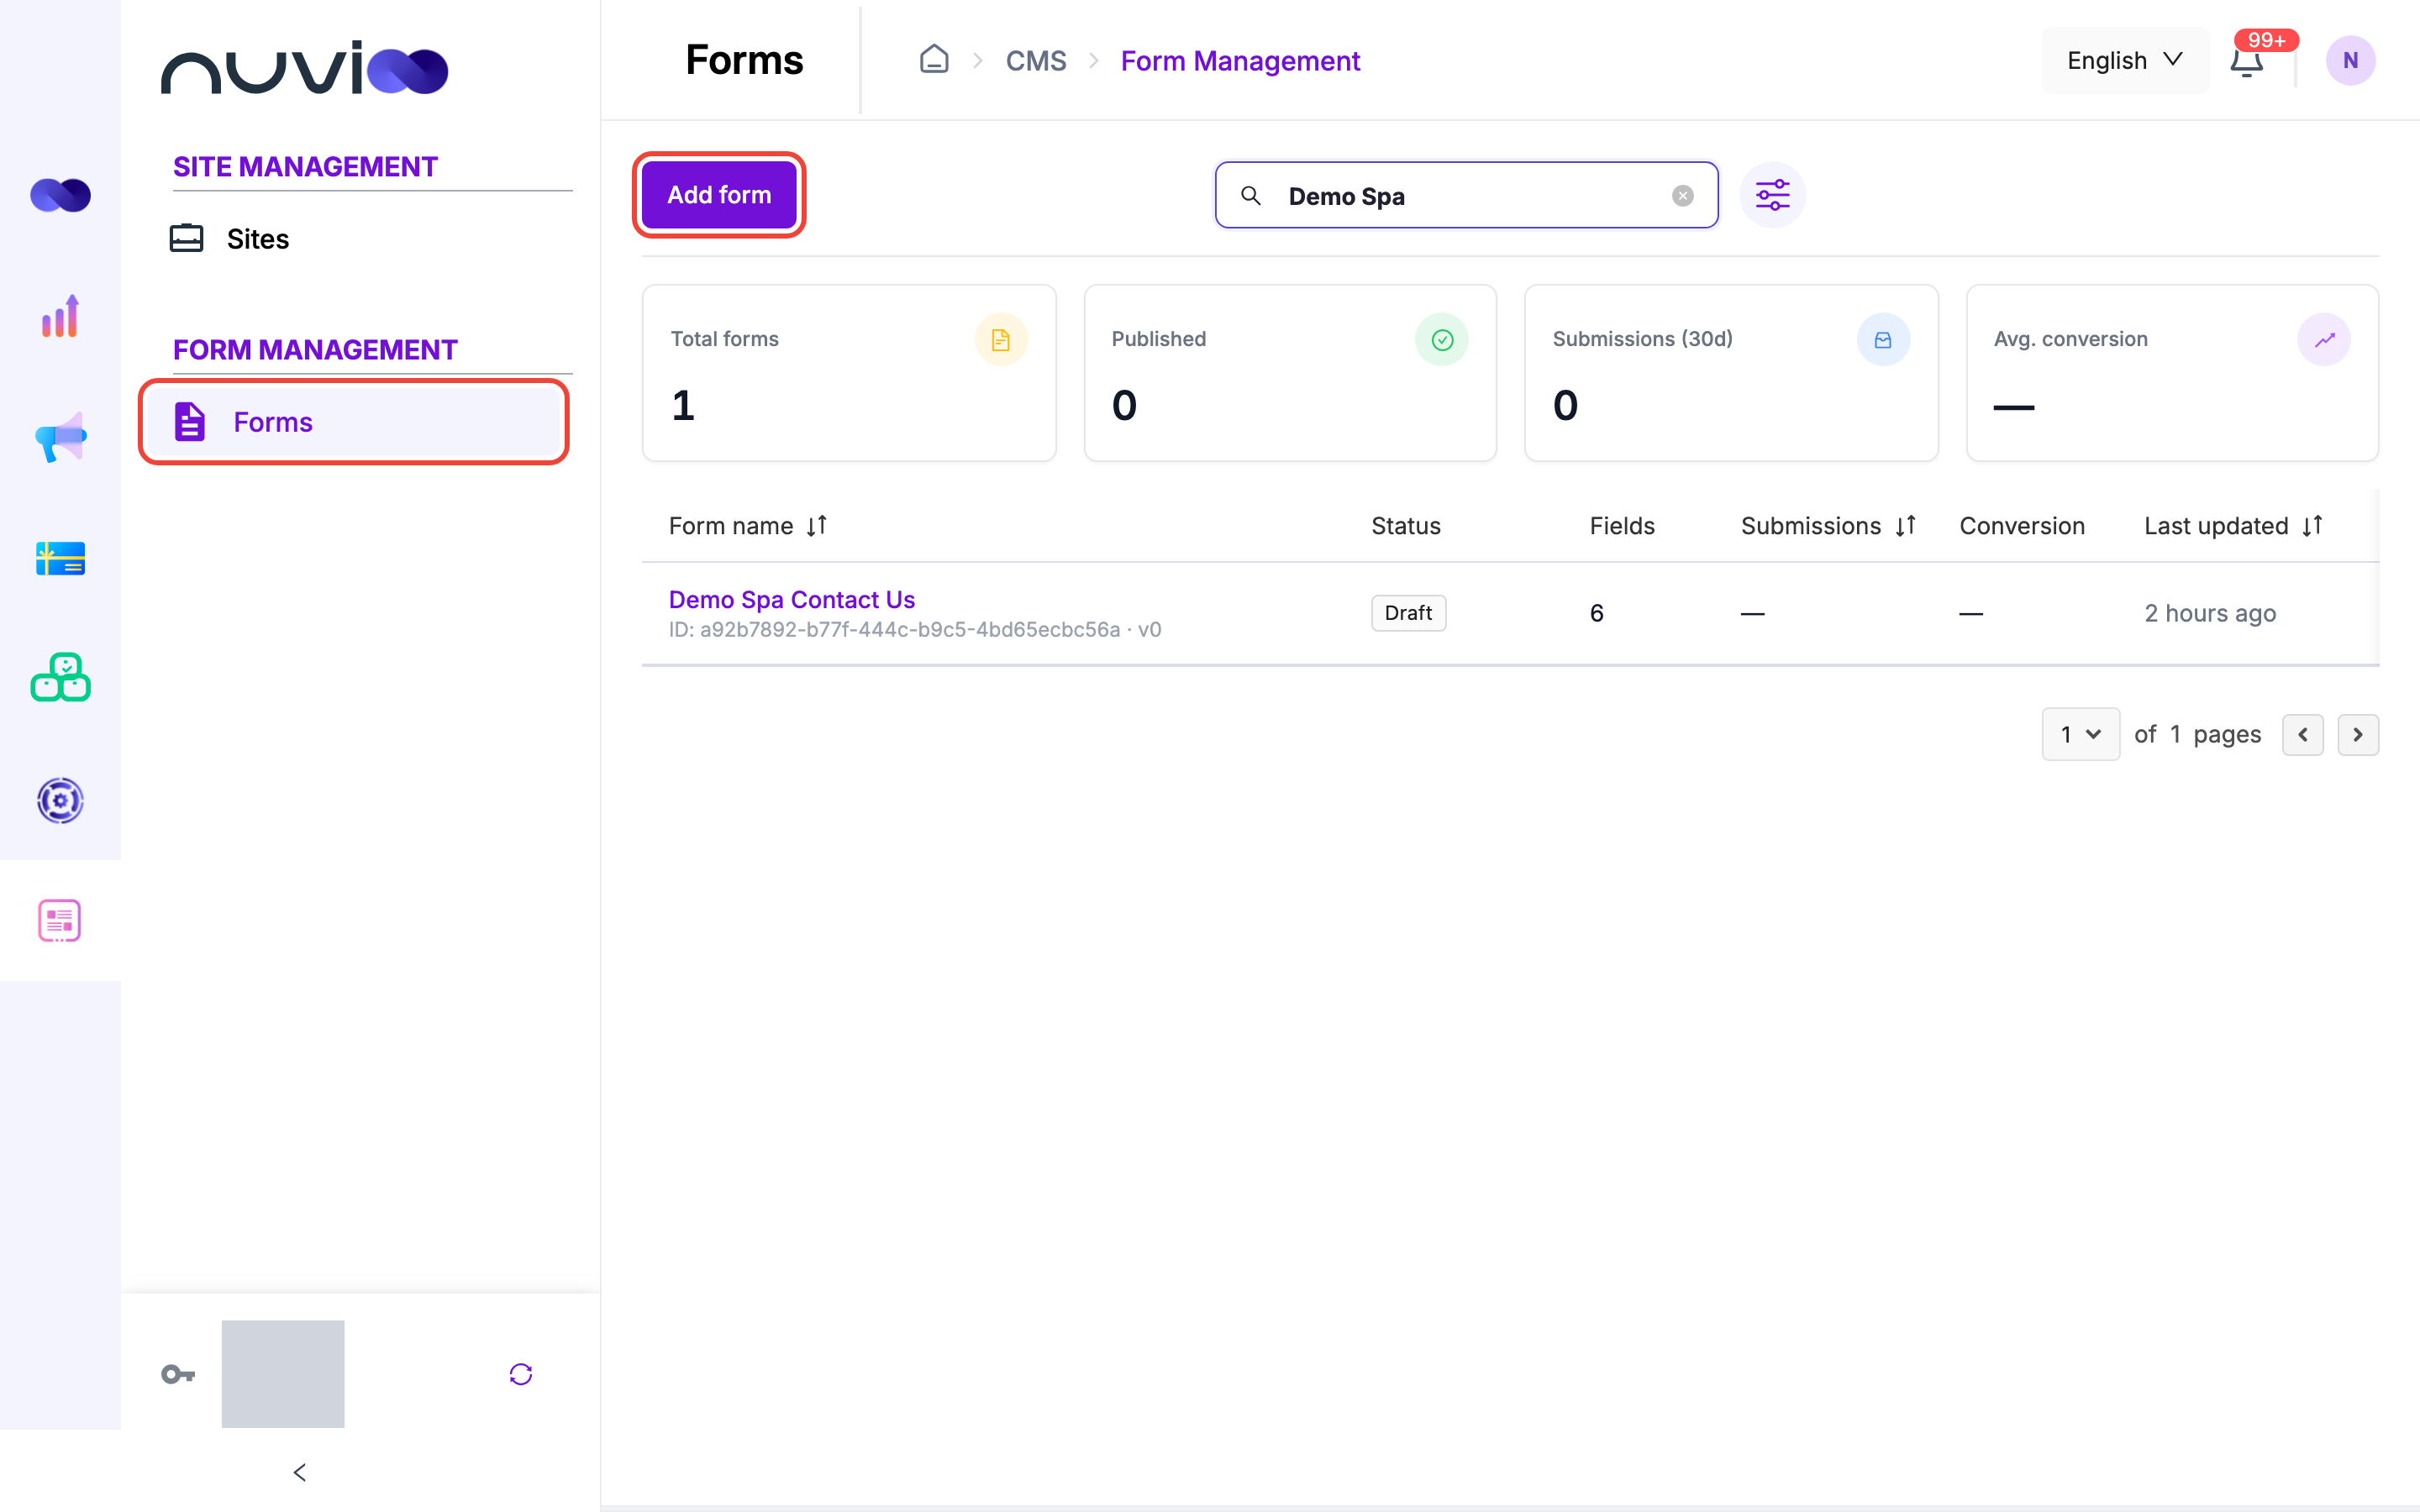
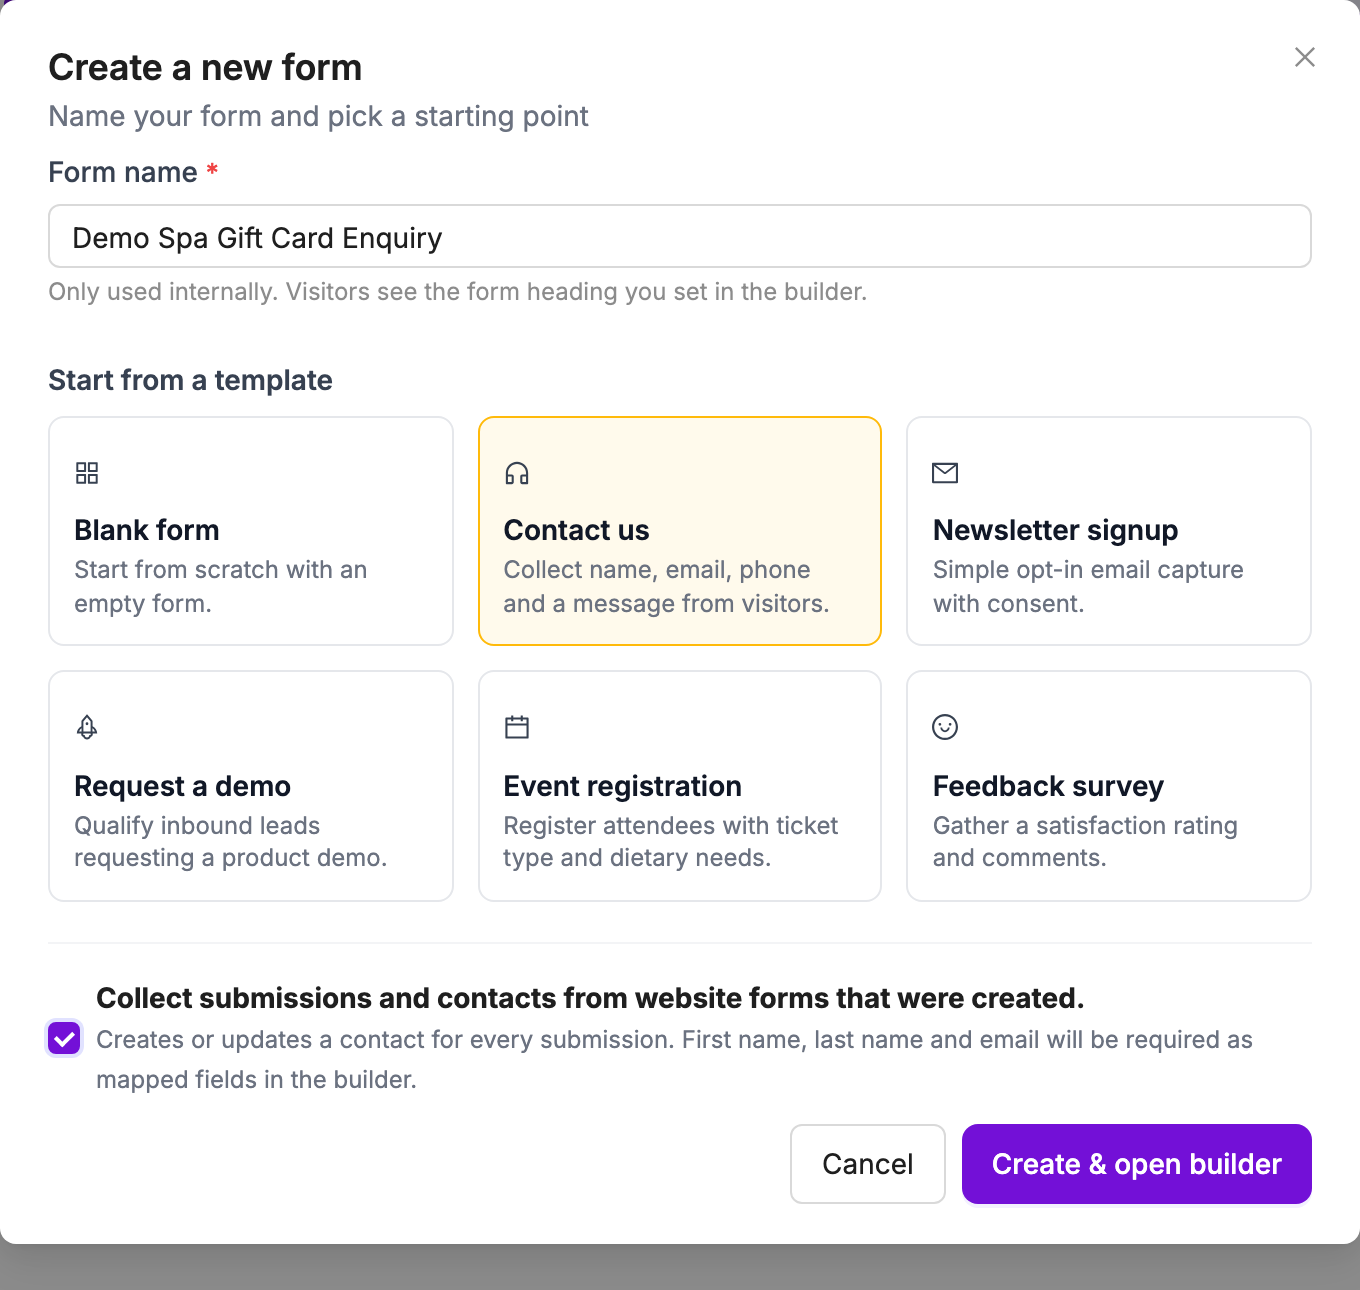
In the sidebar, under Form Management, click Forms, then Add form. Enter a Form name (only your team sees it) and choose a template: Blank form, Contact us, Newsletter signup, Request a demo, Event registration or Feedback survey.
Leave Collect submissions and contacts ticked to create or update a contact for every submission. Click Create & open builder.
Build
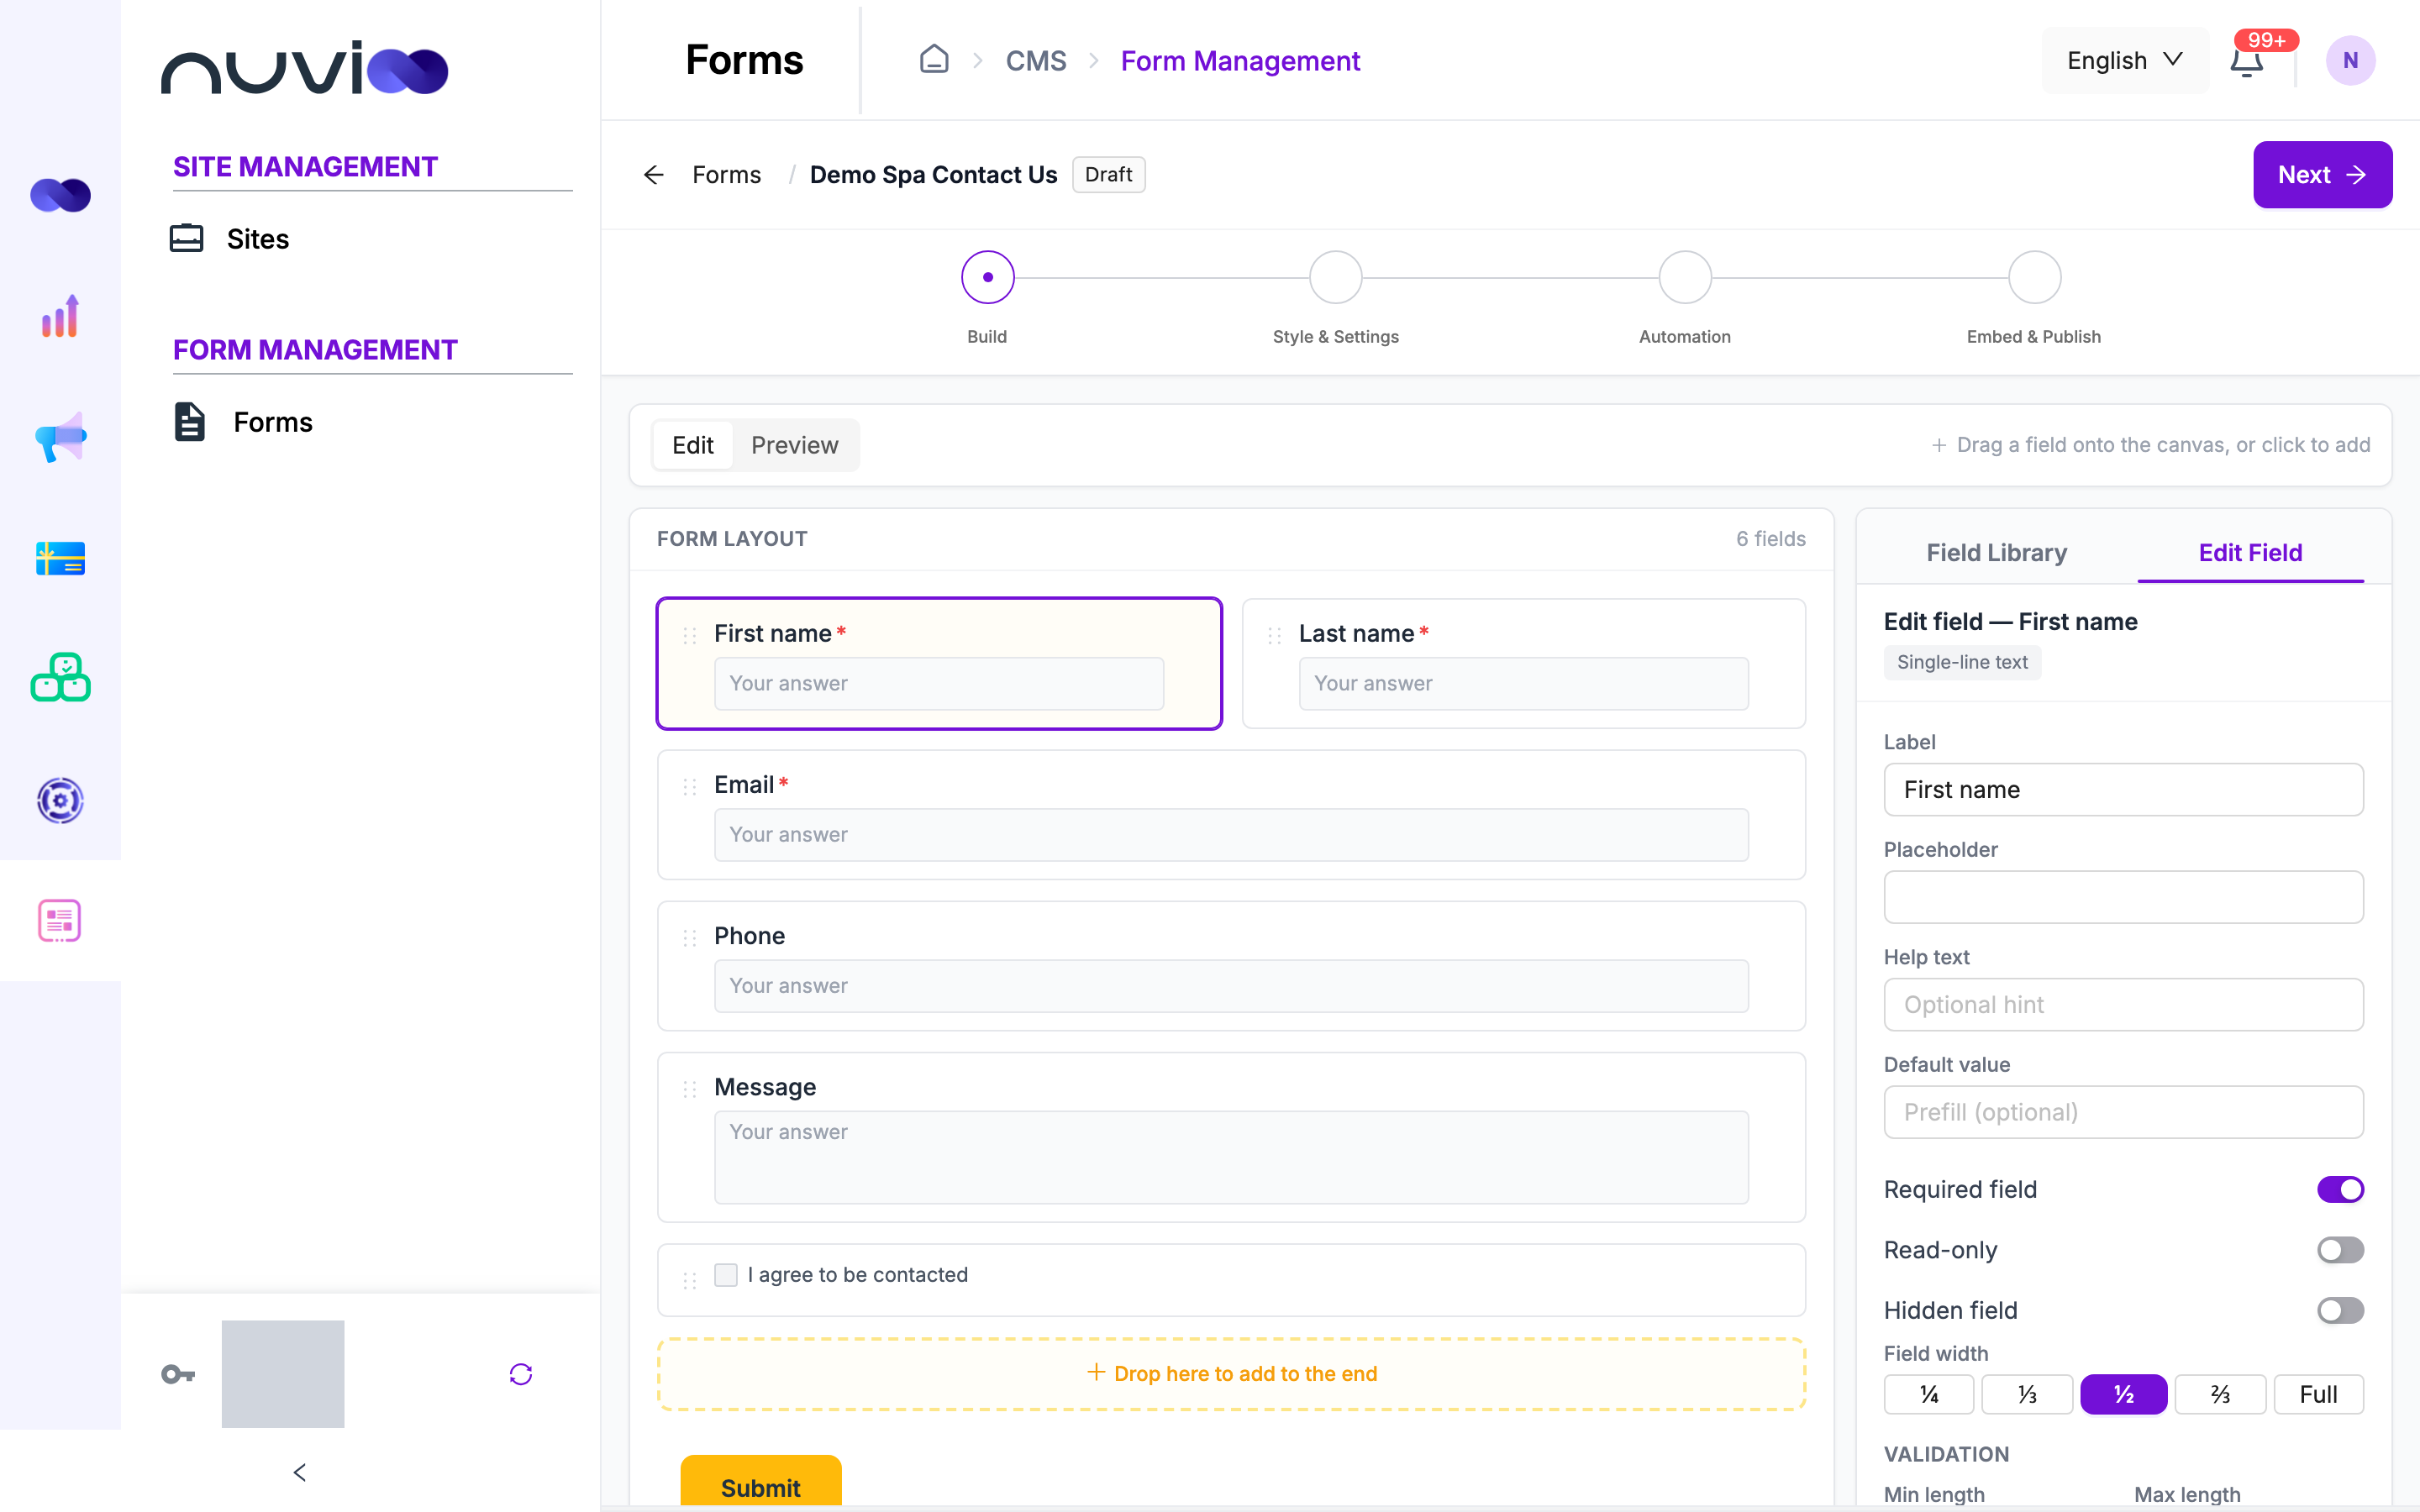
Add fields from the Field Library: click one to add it at the end, or drag it into place. Click a field on the canvas to change its label, placeholder, help text, width and whether it’s required. Every form needs fields mapped to First name, Last name and Email, each set as required, so each submission can be identified. See Form fields for every field type and setting.
Build Style & Settings
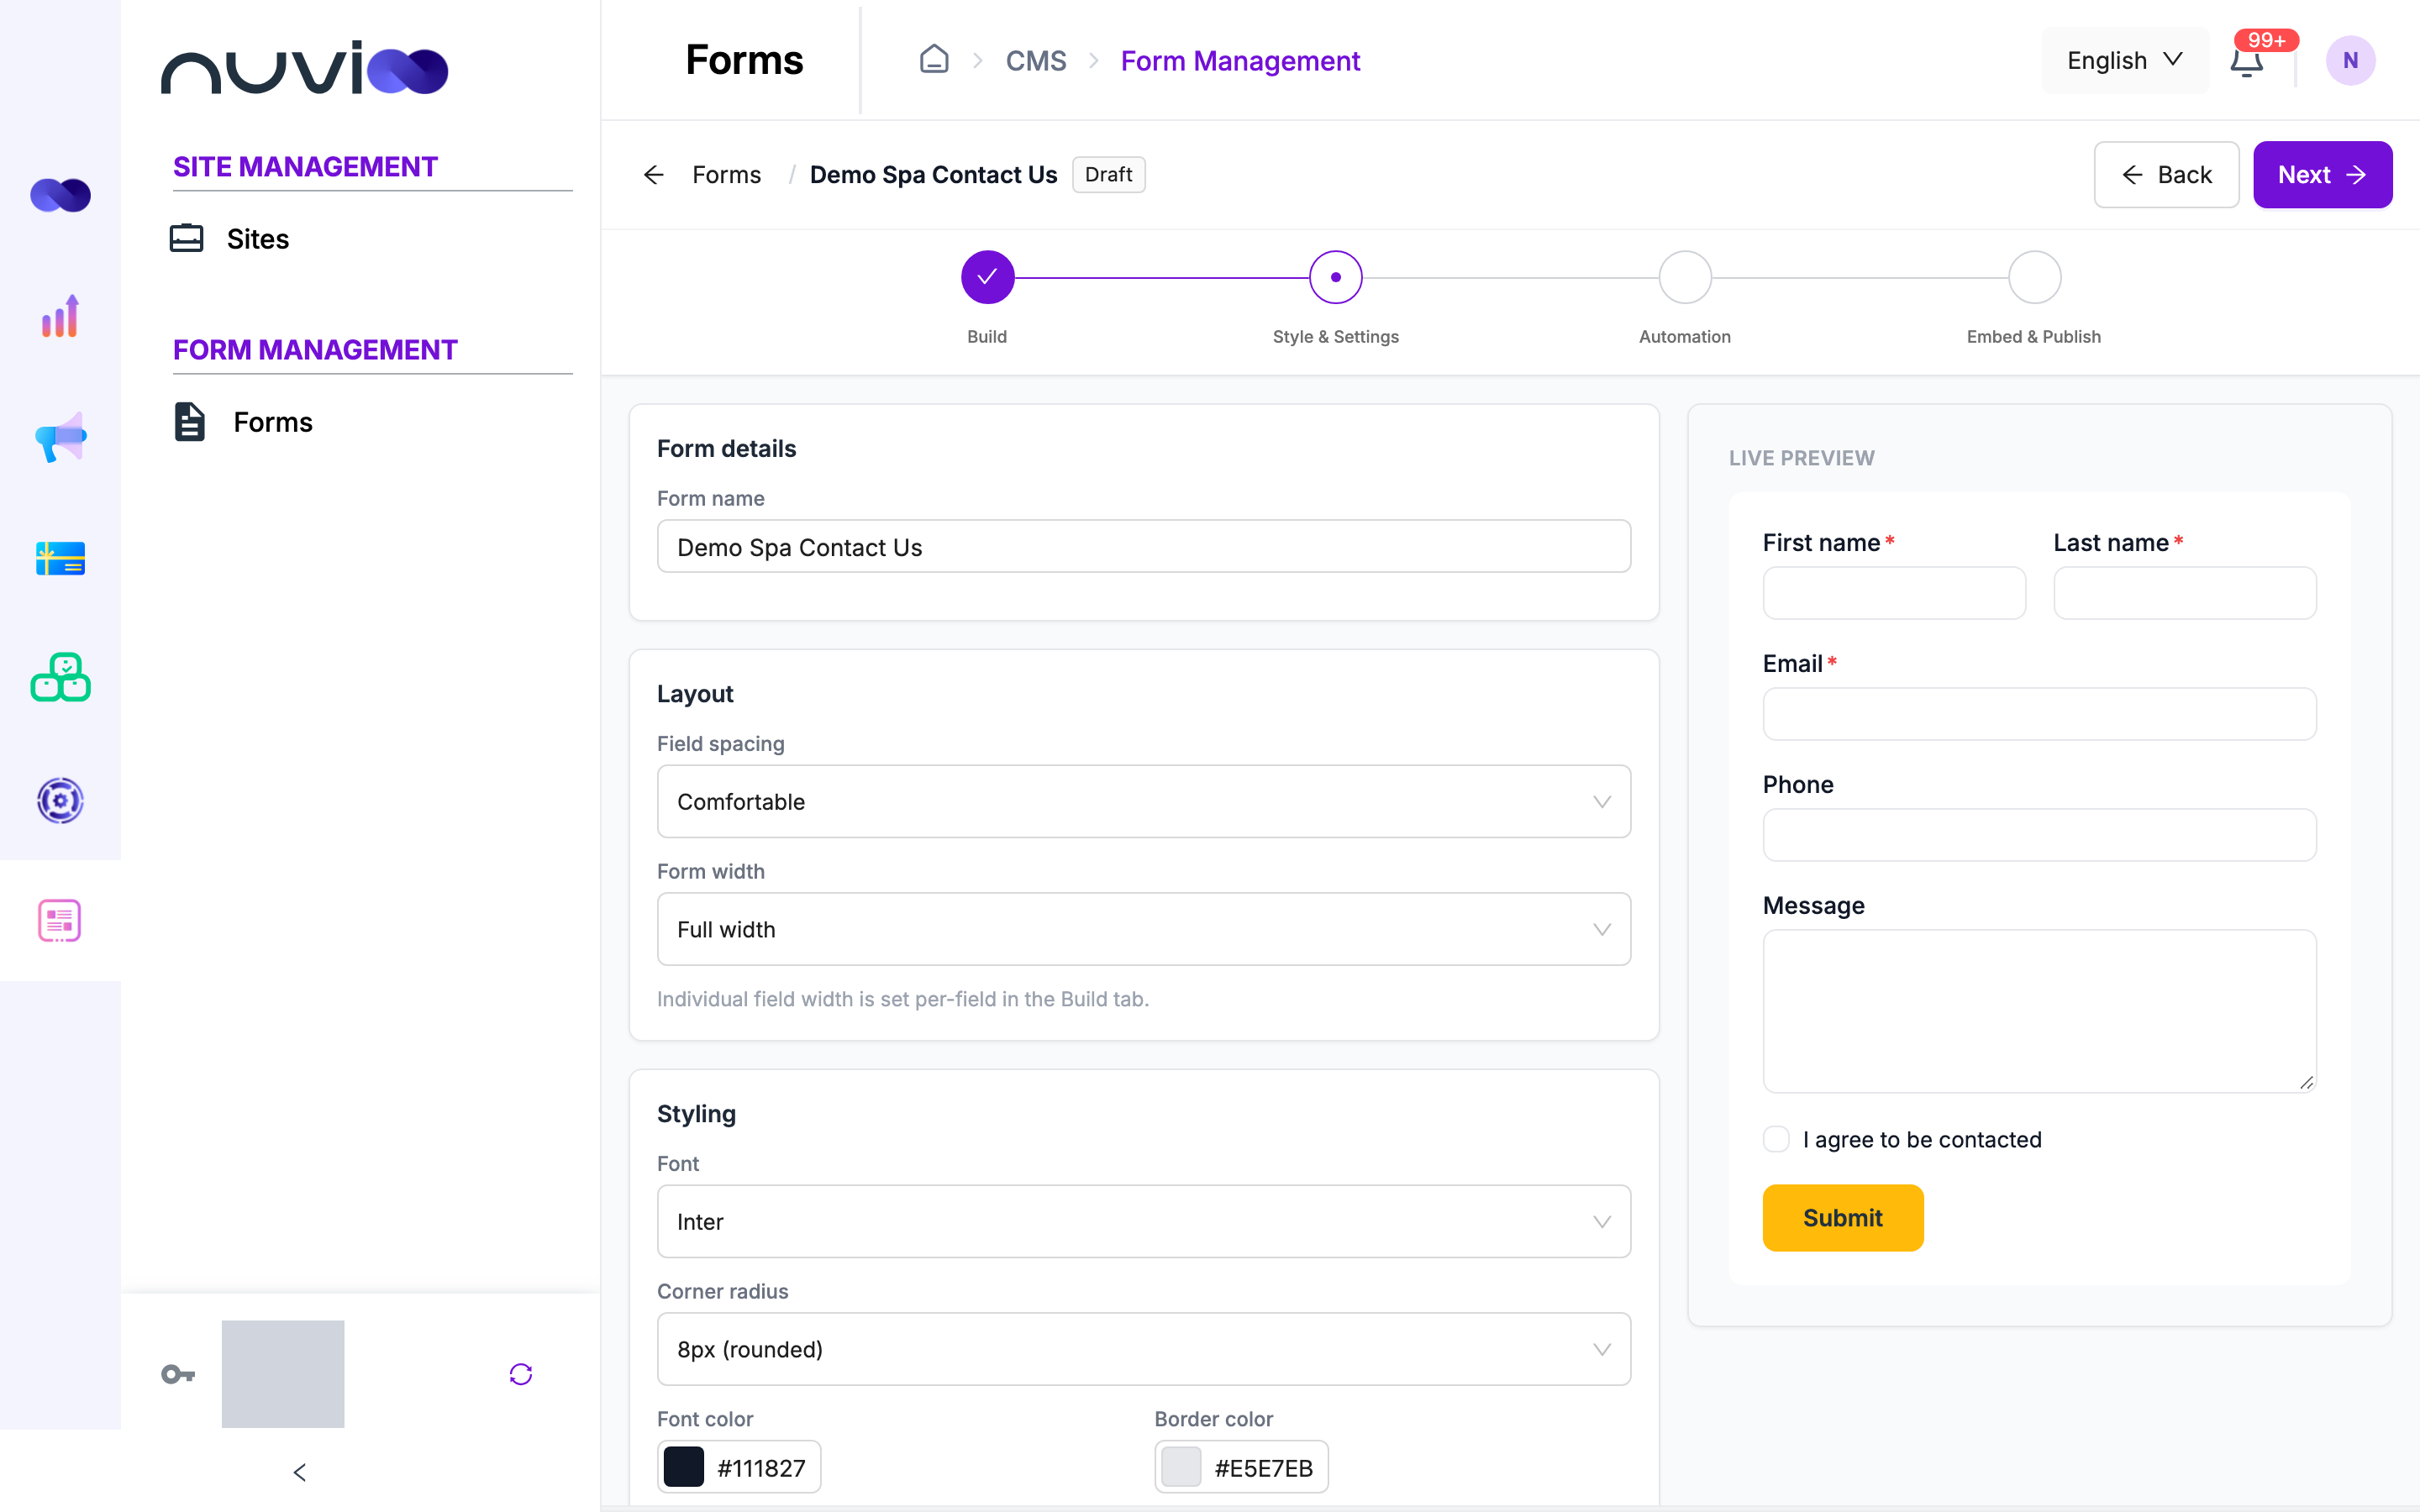
Click Next. Set the layout, font and colors, what happens after submission, spam protection and notifications. The Live preview shows how it will look. See Style & Settings.
Style & Settings Automation
Click Next to add follow-up actions that run on every submission, such as a thank-you email or a task for your team. See Form automation.
Embed & Publish
Click Next, then Publish. Copy the embed code to your website or share the direct link. See Publish and embed.
Your work is saved as a draft as you go. Use Back and Next, or click a step name at the top, to move between steps. The form is live only after you publish it. If a step has something to fix, Complete this step tells you what.